All 3D products in IMVU are built on the principle of a Skeleton. Whether it is an Avatar, Room, or Furniture product, each is constructed, linked, and weighted into a collection of Nodes, Bones, Cameras, and Lights.
These pieces make up how a product will be exported and eventually viewed in the Create Mode Editor and 3D Client. Like the bones in a human skeleton, each piece is connected and makes up a hierarchy of related objects.
For your IMVU product to work properly certain bones need to exist, be named in a specific way, and linked in a special order for the Create Mode Editor to be able to display them.
 Furniture Skeleton
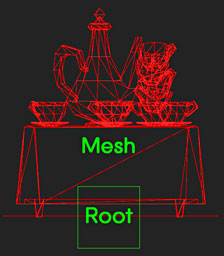
Furniture products are the simplest example of how Skeletons work. A static Furniture model might only have one Root Node and one Mesh. The Mesh is Weighted to the Root Node and that is that.
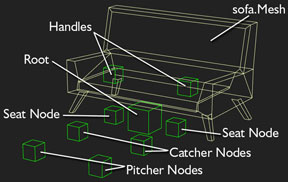
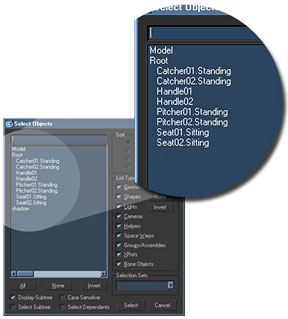 Skeletons need to be Linked together is a very specific way. For the above sofa product the hierarchy looks like the image on the left. All of the Nodes are Linked to the Root Node, indicated by their being indented within the Select Objects window in 3D Max. The Mesh is Weighted to the Root Node, so it does not fall under the indented list below the Root.
Room Skeleton
Rooms have more elaborate Skeletons. For Room products you will need a Skeleton Node (Root), a Camera, Scene Node, Avatar Nodes, and optional Lights. Rooms can become complex very quickly and it is especially important that all of your Nodes are named properly and Linked appropriately.
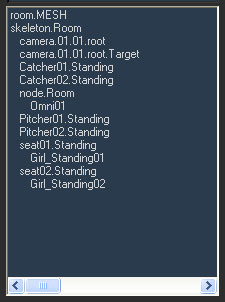
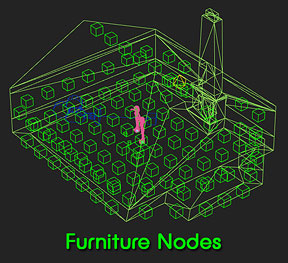
Room products also include Furniture Nodes. These are nodes representing the locations where Furniture products can be placed. These nodes are individually named and should be placed on the floor, walls, and ceiling of your Room.
Furniture Nodes are Linked to the Skeleton Node (Root), just as the Avatar and Scene nodes are. If there are no Furniture Nodes present in your model than a Furniture Product cannot be placed in it.
Furniture Nodes can quickly clutter up a 3D model, so it is suggested that they are added last, just before exporting your model. Furniture Nodes naming and placement are discussed in more detail in the Rooms Node tutorial.
Avatar Skeleton
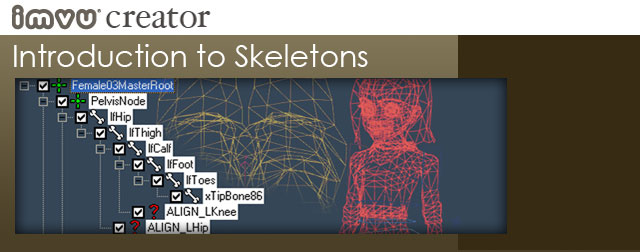
The Avatar Skeleton is the most complex of all, but it follows the same rules. There is a MasterRoot Node (Root) and all other Bones link to it. Avatars are by far the most complex of the IMVU products you will run across, and are not for the faint of heart. Still, this doesn’t mean that you won’t be running across the avatar’s nodes when dealing with the production of other IMVU products.
For animation products like Poses and Actions, you will be working with Avatar Nodes within a pre-rigged Max model supplied by IMVU. Avatar Nodes are also encountered when dealing with Avatar Accessories, as many accessory products link to specific Bones, like the head or wrist.
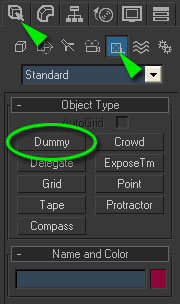 To make a Node in 3D Max, create a Dummy Node in the Create menu, under Helpers. We recommend when possible that you use the Nodes found in the example files offered by IMVU, for ease of use and consistency.