Animated Furniture (nodes)
When wanting to add animation to furniture it’s best to design the item with this in mind so the process is not necessarily complicated by having to make retroactive adjustments so items properly accommodate what’s required. At their most basic this might mean adding another node or bone to the items underlying skeleton to specifically control the parts that need to move. Or more nodes/bones for more complex actions. The result can then be exported and assembled in IMVU to create an animated furniture item.
Furniture skeleton
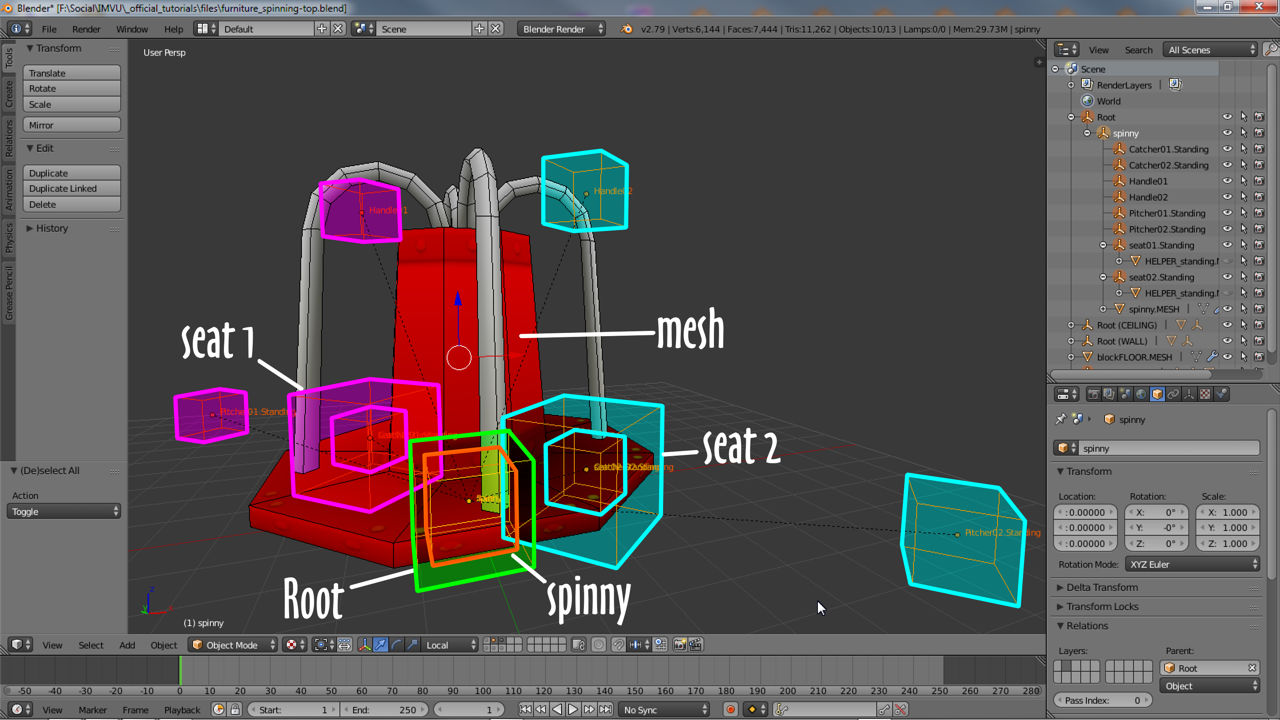
The key to animating furniture is the skeletons set up. It needs to be structured in a way that accommodates both animated and non-animated elements of the visible mesh, and components of associated skeleton. A typical non-animated (static) furniture item for example has a skeleton similar to the following;
Root
» Mesh
With seating, this becomes;
Root
» Mesh
» Handle01
» seat01.Sitting
» Catcher01.Sitting
» Pitcher01.Sitting
In other words everything is parented or linked to Root, the master node of the furniture item. To then accommodate animation this structure changes with the addition of an extra node, ‘spinny‘ in this example, to which the mesh may or may not be parented depending on how its to respond to being animated;
Root
» spinny
» » Mesh
» Handle01
» seat01.Sitting
» Catcher01.Sitting
» Pitcher01.Sitting
In this situation spinny controls the mesh which has been parented to it, when the node moves so too does the mesh. The seating however, being parented to Root, remains static. To change this so it moves with the animation, the avatar spins with the mesh, the order needs to change;
Root
» spinny
» » Mesh
» » Handle01
» » seat01.Sitting
» » Catcher01.Sitting
» » Pitcher01.Sitting
Understand these differences in structure is key to animating furniture; first, how is the mesh to animated, second, what controls it, and third, setting up the skeleton and mesh relationships so everything works properly.
Create a New Action
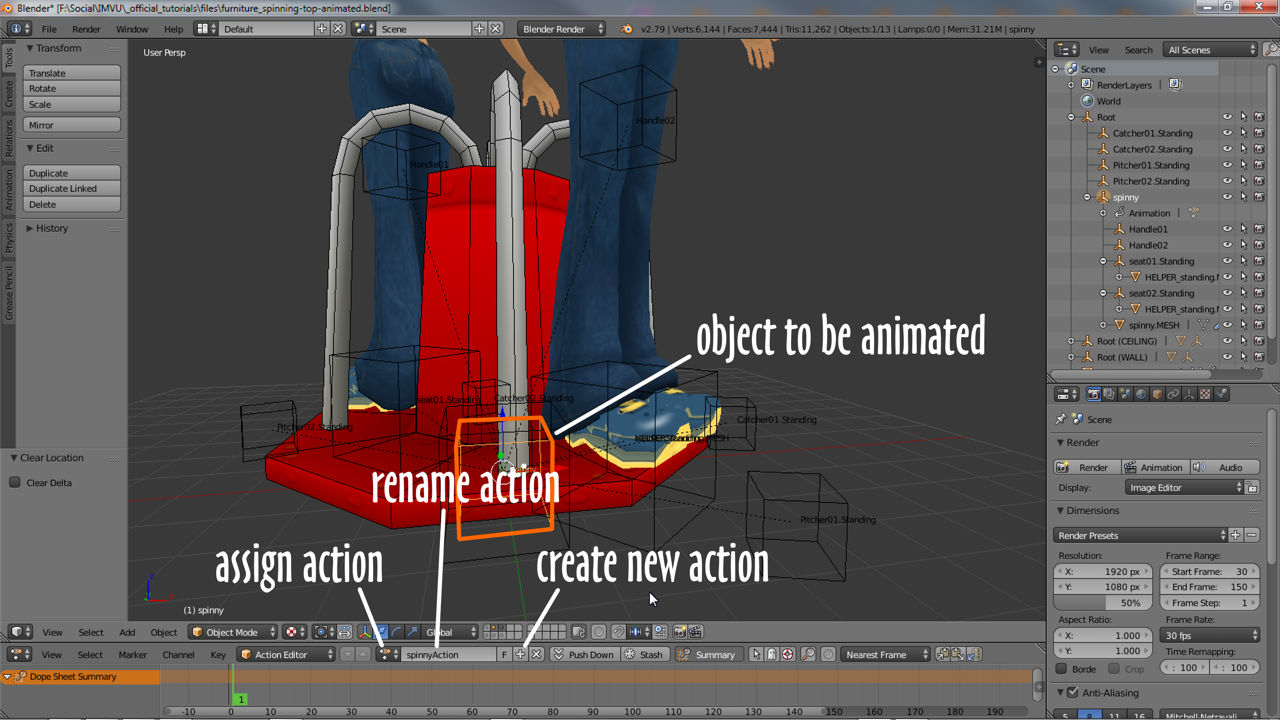
Once the skeleton is in place it can be animated. If an Action is not available or none has been assigned, to create a new one clicking the Create new action button (+ New).
An entry will appear in the ID field. This can be edited to make better sense – double-click and type.
If the Action is not associated with a particular object in the 3D View, select one then click the Browse Action to be linked button selecting an entry from the list. Once this is done animation can begin.
Inserting keyframes
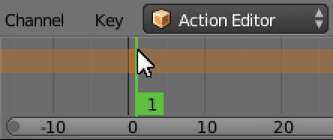
With an Action available and depending on the animations complexity, the first thing to do is mark the initial keyframe into the timeline. Left-click at, or drag the green scrubber to, frame 1;
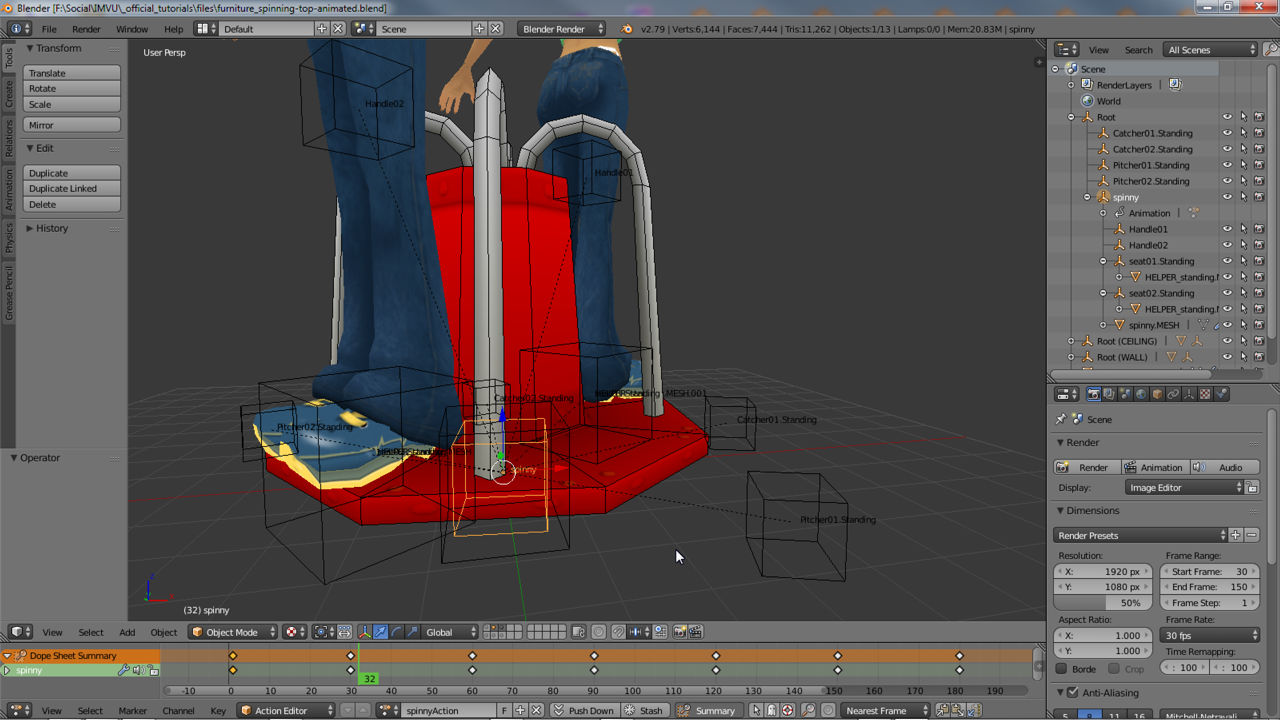
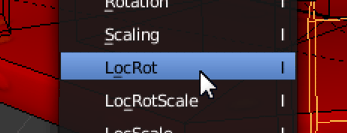
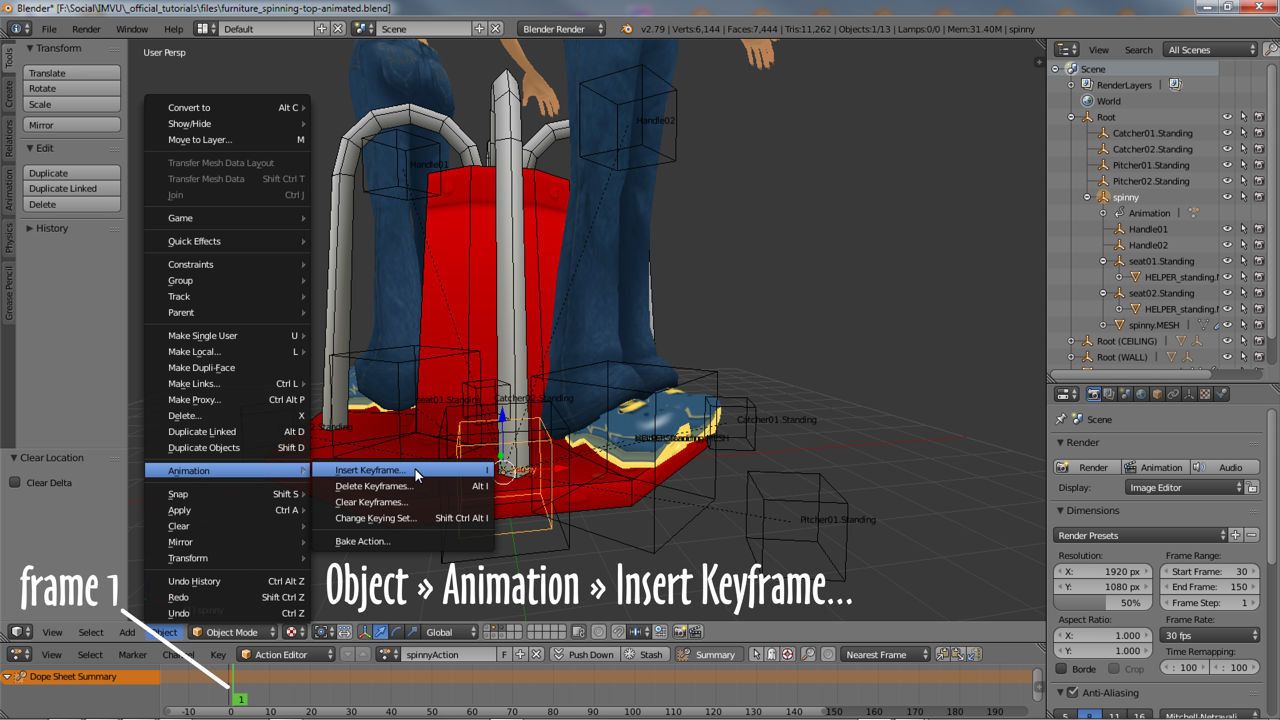
Position the object to be animated at its start point and from the Object menu select Animation » Insert Keyframe…. In the Insert Keyframe Menu that appears click LocRot;
An orange marked will be placed in the Action Editor timeline. Click another frame in the timeline, i.e. frame 30, pose or position the object in the 3D View, for example rotating it 90° clockwise, and insert another frame into the timeline – Object » Animation » Insert Keyframe…. Repeat until the motion required is complete, a roundabout spins about the vertical axis for example.
Export furniture to FBX
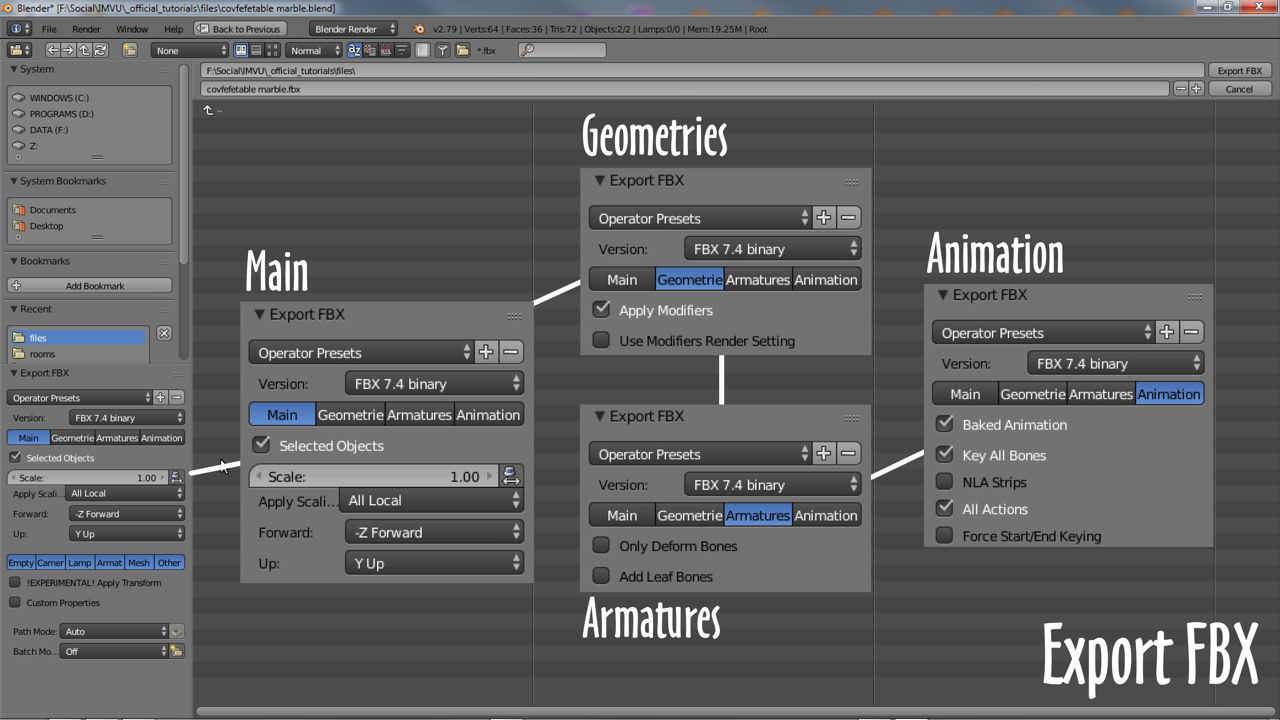
With an animation available the furniture can be exported. In the 3D View select the furniture mesh and skeletal nodes then click File » Export » FBX (.fbx). In the File Browser set the save location, amend the file a name as needed, then in Export FBX settings bottom-left use the following;
• Main select Selected Objects.
• Geometries select Apply Modifiers.
• Armatures deselect Add Leaf Bones.
• Animation deselect NLA Strips and optionally Force Start/End Keying.
Once done click Export FBX top-right to export an FBX file (*.fbx) that’s then ready for import into IMVU.
Furniture Import
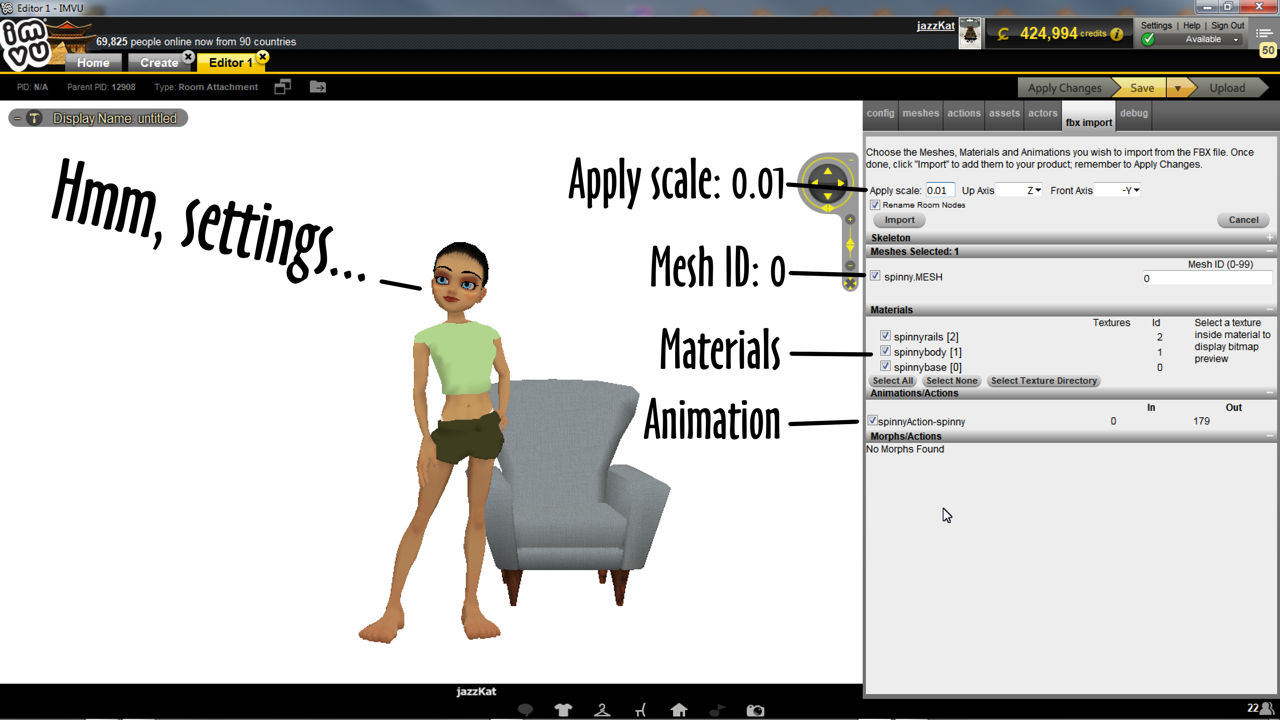
Once an FBX has been exported from Blender it can be imported into an IMVU project Editor and assembled. In Create mode derive the default furniture item (chair) and click the fbx import tab to load in the FBX file. Make sure Apply scale is set to 0.01 and the Mesh ID is 0 then import.
Furniture Assembly
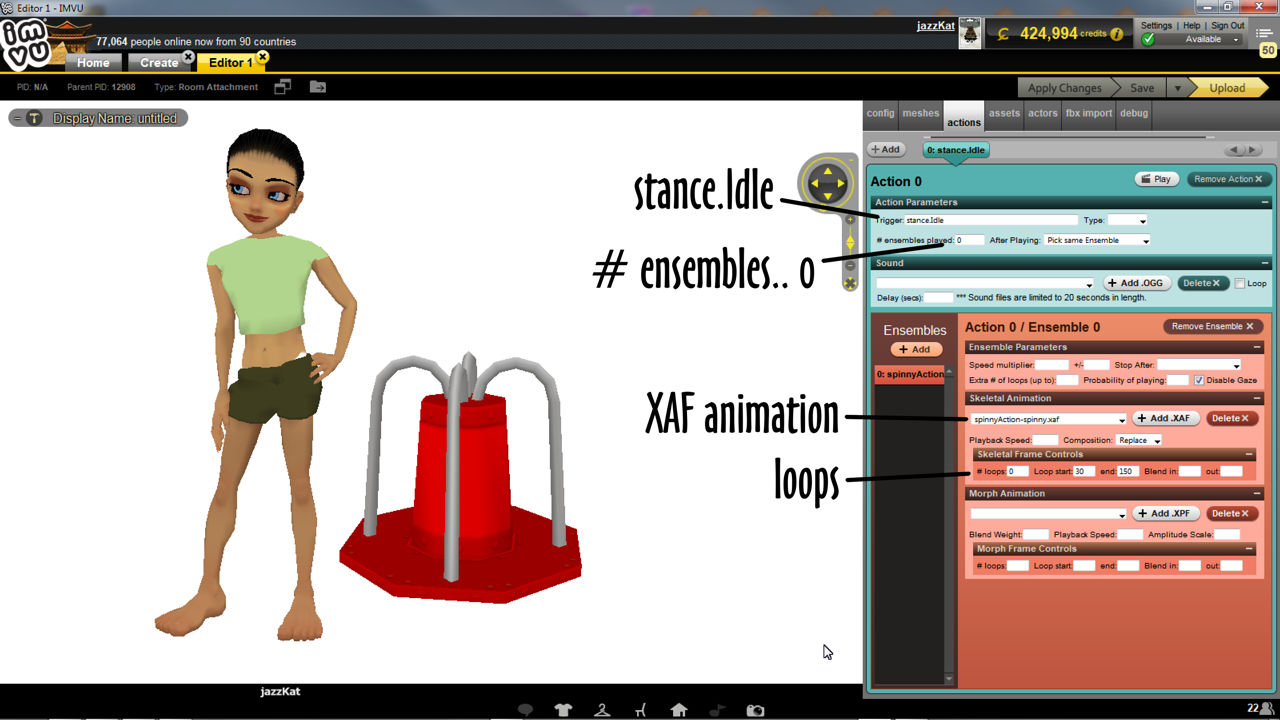
Assembling animated furniture is the same as for any other item except for the addition of an Action. Once the items basics are put together, skeleton, mesh and materials, access the actions tab. If the item is to play automatically when loaded, in Action Parameters set Trigger to be stance.Idle else enter a word or phrase Users can type to activate the animation, e.g. roundabout. If the item is to loop infinitely # ensembles played should be 0 (zero) else use a numerical value to limit the number of times the action plays, e.g. 10.

Next, in the Skeletal Animation section select the XAF file converted from the imported FBX, i.e. spinnyAction-spinny.xaf, and then depending on the sequence, set # loops: to 0 (zero) and Loop start: and end: to values that allow the animation to repeat, for example loop start: 30 and end: 150 for the roundabout shown.

Once the setting and options are established, in this instance clicking Apply Changes will automatically activate the animation so the mesh spins forever.
