Product Lighting

Product Lighting

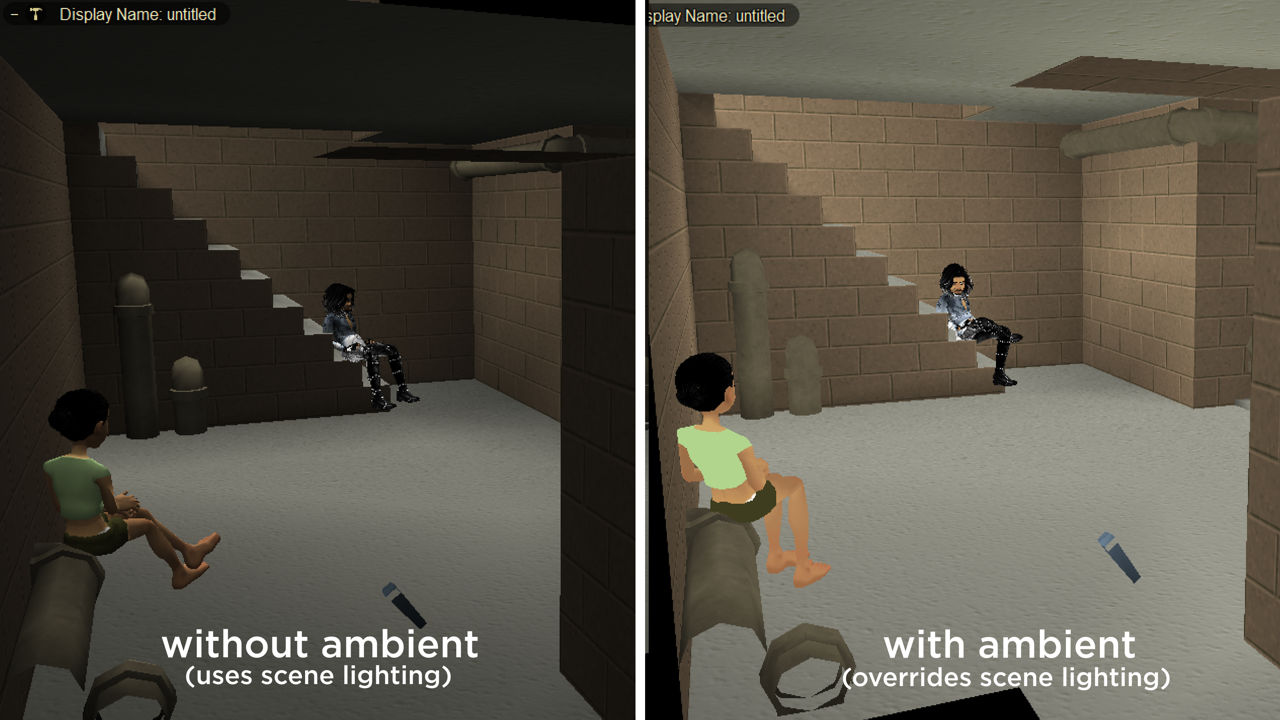
Lights can often make or break a product. Placed well they enhance a room or items appearance due to the way objects shade and darken in response to being illuminated, a clean basement might be made to appear dingy and dirty simply by placing a low-key light source near grimy windows to emphasise the lop-sided nature of the scene itself – a basement isn’t dingy if well lit after all!.

Learn how to add lights here [link: rooms adding Lights]. For more on room skeletons click here.

Different ways to lit rooms using lights (left) and ambient (right)

Lighting affects the way meshes are lit in IMVU based on the location –
on the left a room is lit by a single omni-directional light (Omni) and partial ambient, on the right fully lit by IMVU’s ambient which flattens shadows (mesh is shown enhanced with vertex colours to shade the mesh).

Types of lighting

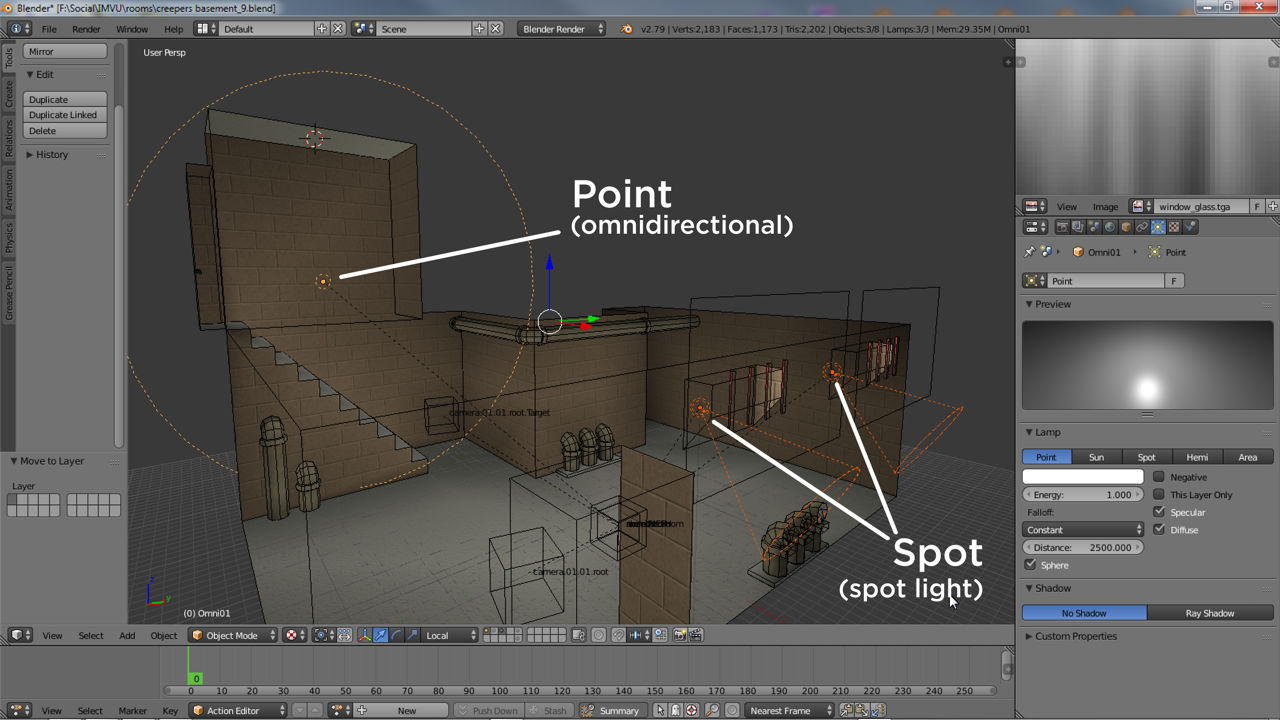
IMVU uses two basic types of lighting, one is provided by a group of objects that cast, project or otherwise emit light, illuminating rooms, furniture etc. based on their location, the other a global uniform lighting that makes everything within a room appear flat lit. In essence the difference between the two types is direction; light objects placed in a room provide directional context – it’s possible to determined approximately where a light source is, ambient light does not, it has no direction because everything is lit with the same value – there is no source.

Rooms can have different types of lighting, omnidirectional and spots

Blender supports two types of light, or Lamp, objects for IMVU; Point, or omni-directional (Omni[n]), the primary source of lighting scenes in IMVU; and Spot (Spot[n]), each subject to different limitations and set up requirements.

Light Colour, Brightness, Intensity

Lights, both object and ambient, can be colour tinted. For light objects this is done in Blender (click here [link Adding Light – Directional]), and for ambient in Create mode once a product has been import, assembled and a skeleton is available for use (click here [link to Adding Lights – Ambient]).

Changing lights depends on the type, either in IMVU (ambient) ot Blender (omni/spots)

Depending on the type of lighting illuminating a room different options can be set in a Create mode Editor or from within Blender, typically as relates to colour, saturation and intensity (lights do not have a brightness or intensity value).

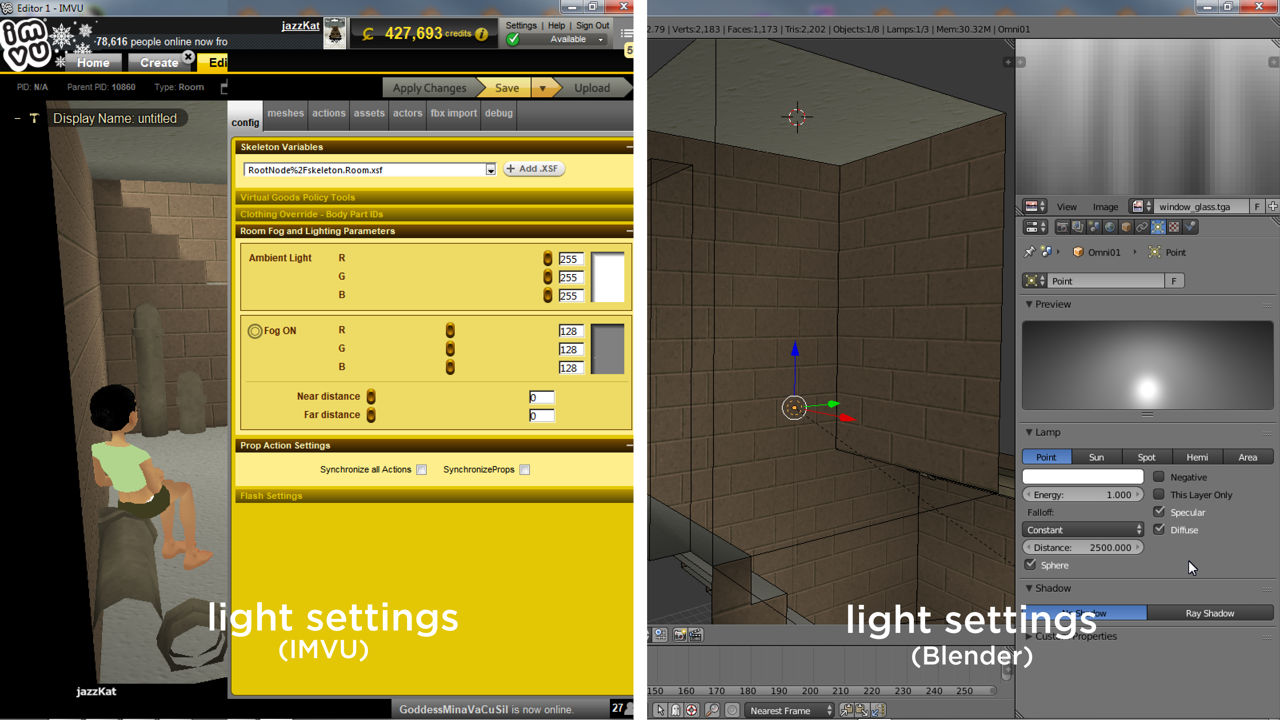
Colour also determines how bright lights appear to be, white being the brightest. In practice the way scenes and items are lit is a consequence of colour saturation, the colour bias or the degree to which the primary red, green and blue colour trend towards zero saturation (no colour) or full saturation (full colour) when tinting (IMVU Create mode), and intensity, a secondary darkness/lightness bias (Blender).

If the R/G/B values are the same, i.e. 128/128/128, the light perceived will be a neutral black/grey/white.

The colour of lighting can be changed in Blender when using Lamp objects

Lights do not have a brightness value but this impression can be given through the use of colour, the closer to white the brighter the light appears to the user.

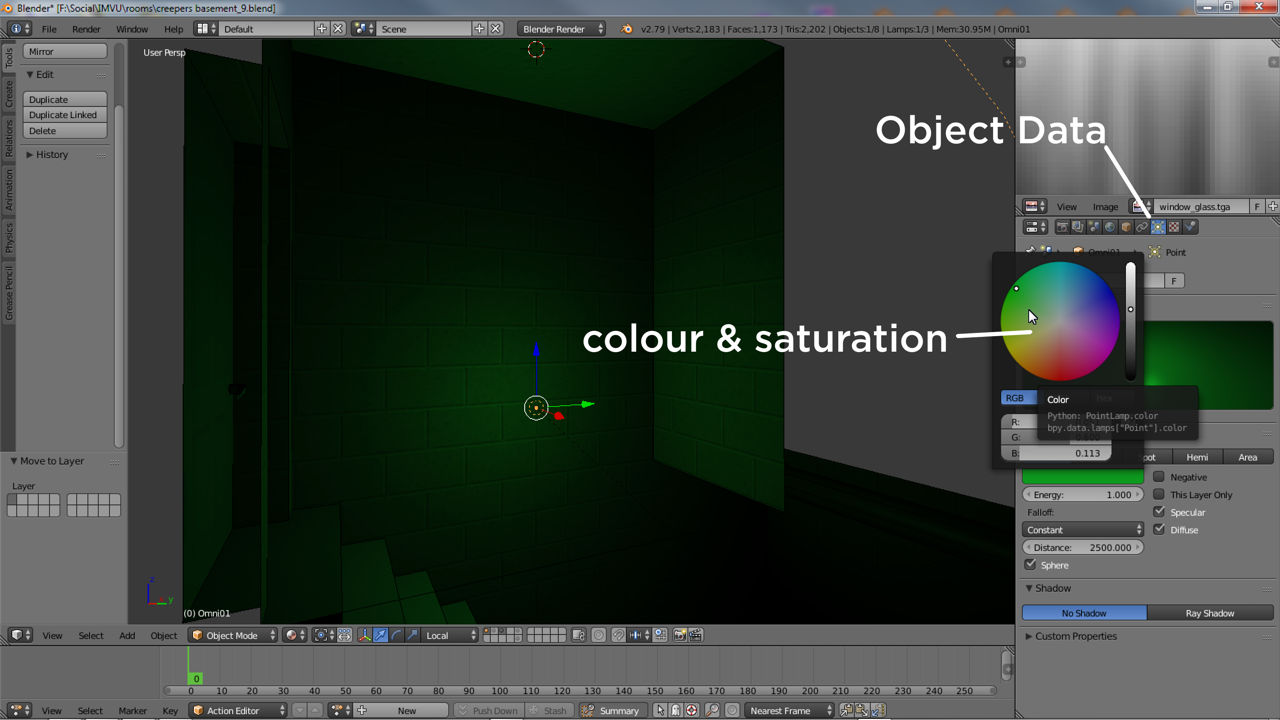
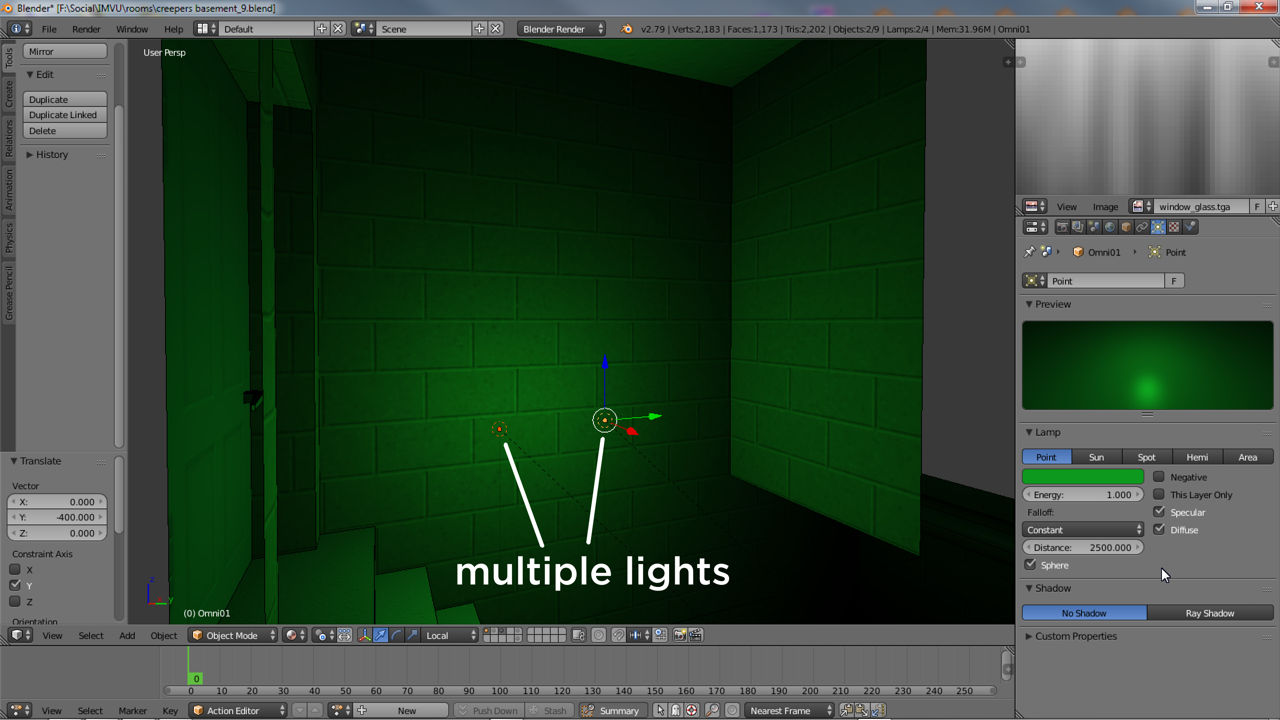
Lights can also give the impression of increased intensity when combined or overlapped, they have a multiplying effect which tends to be more noticeable when lights are tinted closer towards white.

It’s not generally recommended several lights be used in a room as they significantly impact performance. Multiple together lights used in this way can over-brighten an area or object to the effect that everything appears washed out.

Multiple lights in close proximity increase intensity but also resource usage and should be avoided
Although lights don’t have a brightness value the effect can be approximated by doubling-up. This is NOT recommended as it incurs significant performance penalties that can crash IMVU.

Adding Lights

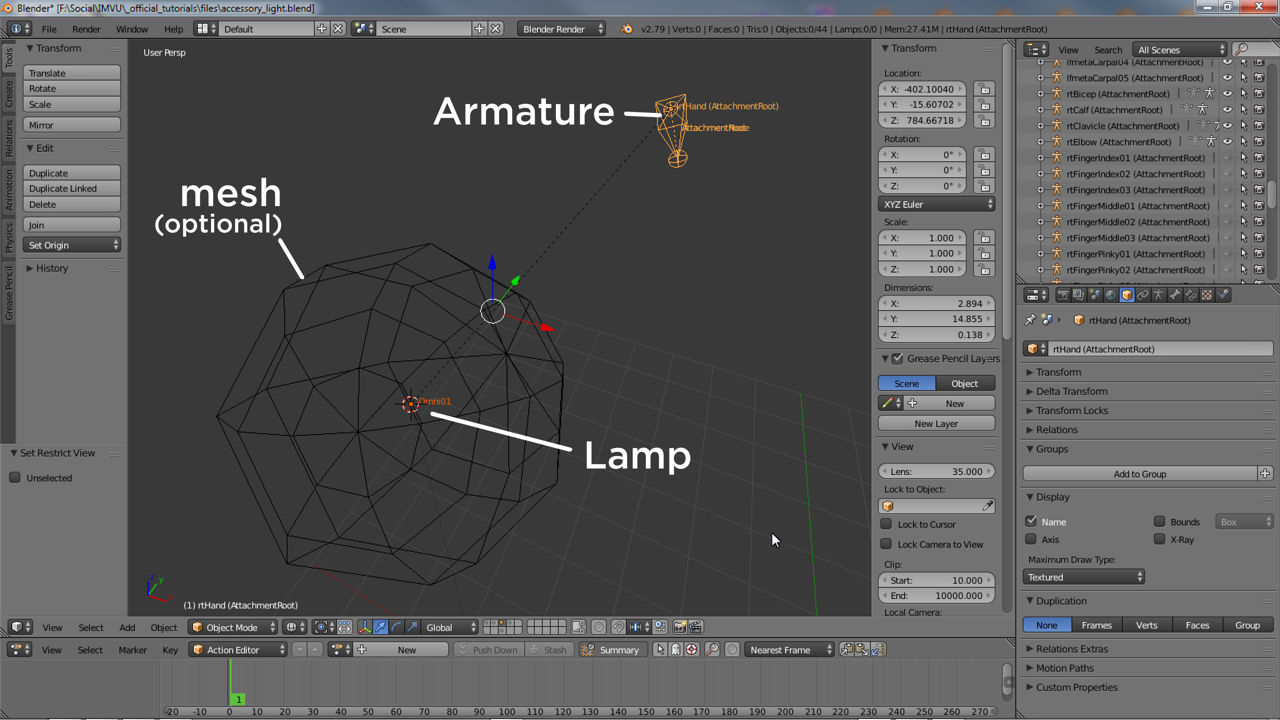
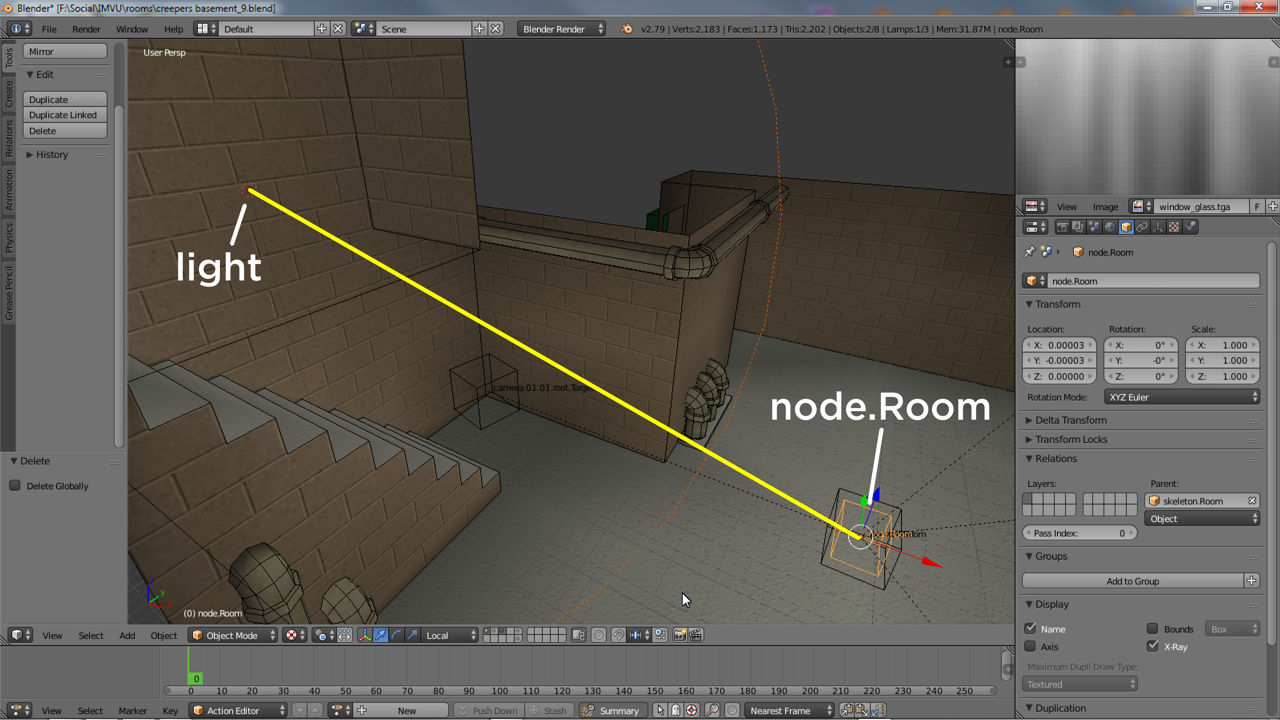
Light objects are part of an items underlying skeleton, for rooms they have a special place in the overall hierarchy being linked to node.Room, which is in-turn linked to skeleton.Room, the master node of a furniture room (click here for more [link Adding Lights – Directional]).

They can be linked to other nodes but may not work as expected.

All types of light need to be parented to node.Room

For lights to work correctly they need to be parented to node.Room NOT skeleton.Room – select each in turn, node.Room last (selection order is important) and Parent; Object » Parent » Object, Object (Keep Transform).

Lights can also be animated which requires a minor modification to the skeleton to accommodate an additional node to control the lights movement (click here for more [link Adding Light – animated]).

This is animation as it relates to movement rather than colour change.

Lights can be animated so long as they are

Although all lights need to be parented to node.Room animated lights should be parented to the node that’s animated, which is in-turn parented to node.Room (lights shouldn’t be animated directly).

Furniture & Accessory Lights

Lights are not specifically restricted to rooms and scenes, they can also be added to furniture and some accessories so long as the same basic rules are followed, that they be parented to the root node of the items skeleton for static lighting, e.g. for a table lamp, or another control node where animation is required.

For more on adding lights to furniture and accessories click here [link Adding Lights – other items]

Lights can also be added to furniture and accessories

Lights can also be added to furniture items [link – Adding Lights (furniture lights)] and accessory [link – Adding Lights (accessories)] but are subject to a few limitations based on the product type.

Video Summary


Updated on July 21, 2023

Was this article helpful?

Related Articles

Discuss this!
Ask questions and get answers in our Creator Discussions.
BROWSE DISCUSSIONS