In this tutorial you’ll learn about vertex painting in IMVU. While this tutorial specifically references Blender, many of these steps will apply in other 3D software applications. [Download Blender FREE here.]
Vertex Painting
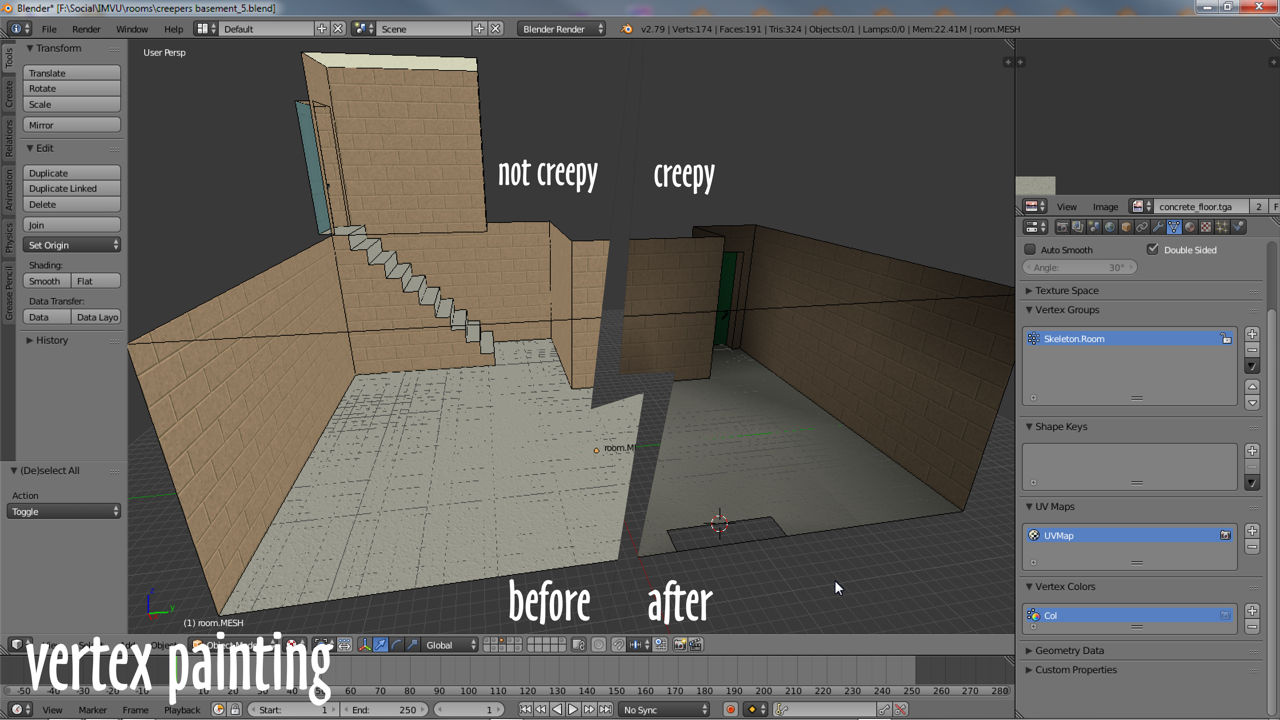
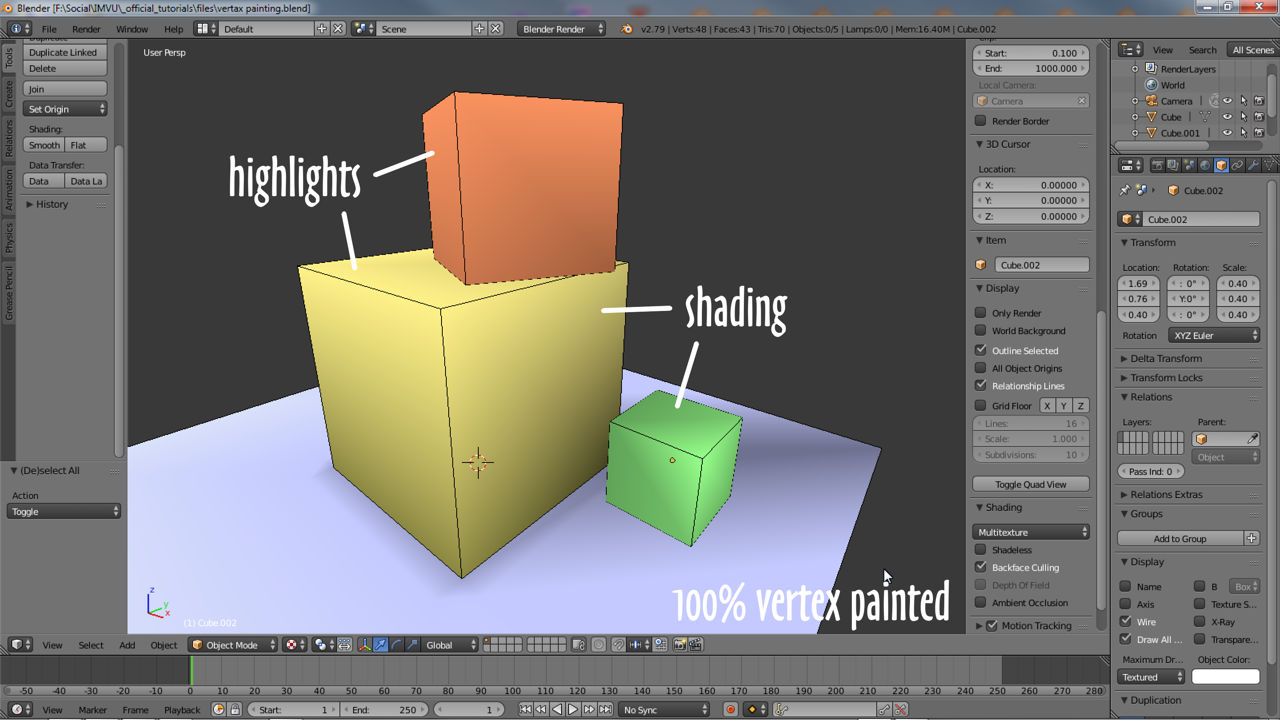
Often overlooked, vertex painting is one of the simplest but useful tools Creators have available that can improve the appearance of their meshes with relative ease. In a nutshell vertex painting is the process by which colour (as red, green and blue [RGB] values) can be ‘painted’ directly onto the mesh, typically to tint, shade or otherwise augment the final appearance of the model, shading a creepers basement for example, or disguising the tops of massive tree-trunks as they disappear into a green fog.
For IMVU vertex colours can be doubly useful as a means to decrease the resources consumed rendering scenes and their content (avatars included!), and used well, can also be an effective way to reduce texture complexity or compensate for IMVU’s 512 x 256 asset limitations.
How does vertex painting work?
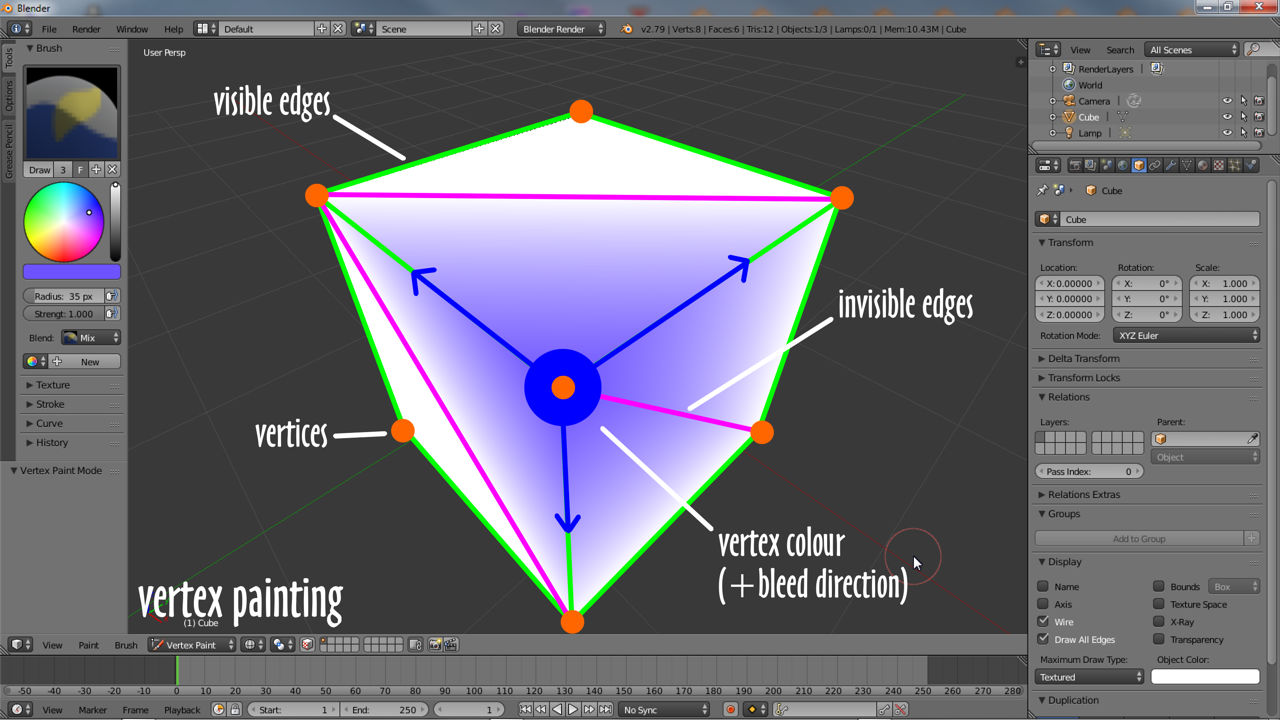
What vertex painting is actually doing is using the vertex structure of the mesh as a very simple canvas, it does not paint surfaces so much as it adds colour to the underlying framework of vertexes that further describes edge and face sub-elements – vertex » edge » face – which allows for colour information to then influence those elements appropriately; paint a corner vertex blue and that colour will propagate outwards to tint related edges or faces, which in turn influence the spread, blend or fade of colour along those elements.
Using vertex colours
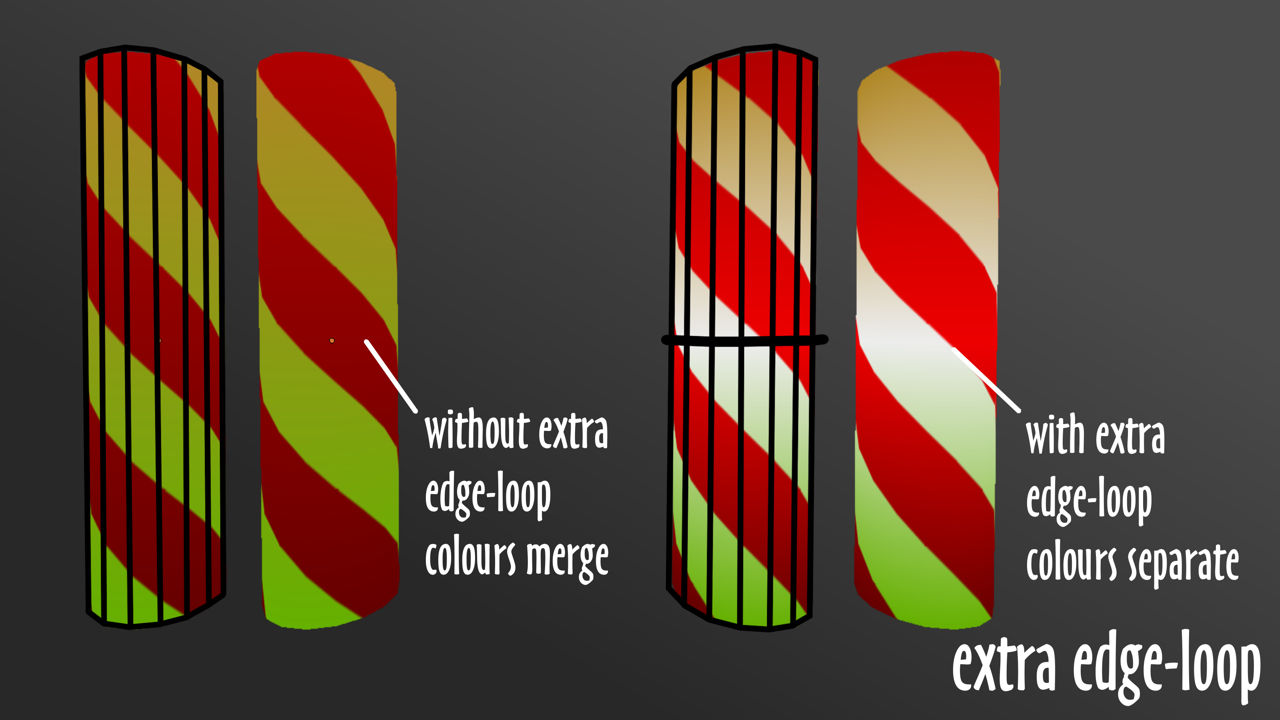
The key to using vertex painting is to include or add enough structure to accommodate vertex colour bleeding, blending or fading to white (typically the default colour value attributed to all vertices) or another secondary colour; for most meshes that simply need to be tinted a certain colour overall, they can be left as they are and relatively simple; for shading, giving the appearance of light and dark, this might not be the case with extra structure needing to be added.
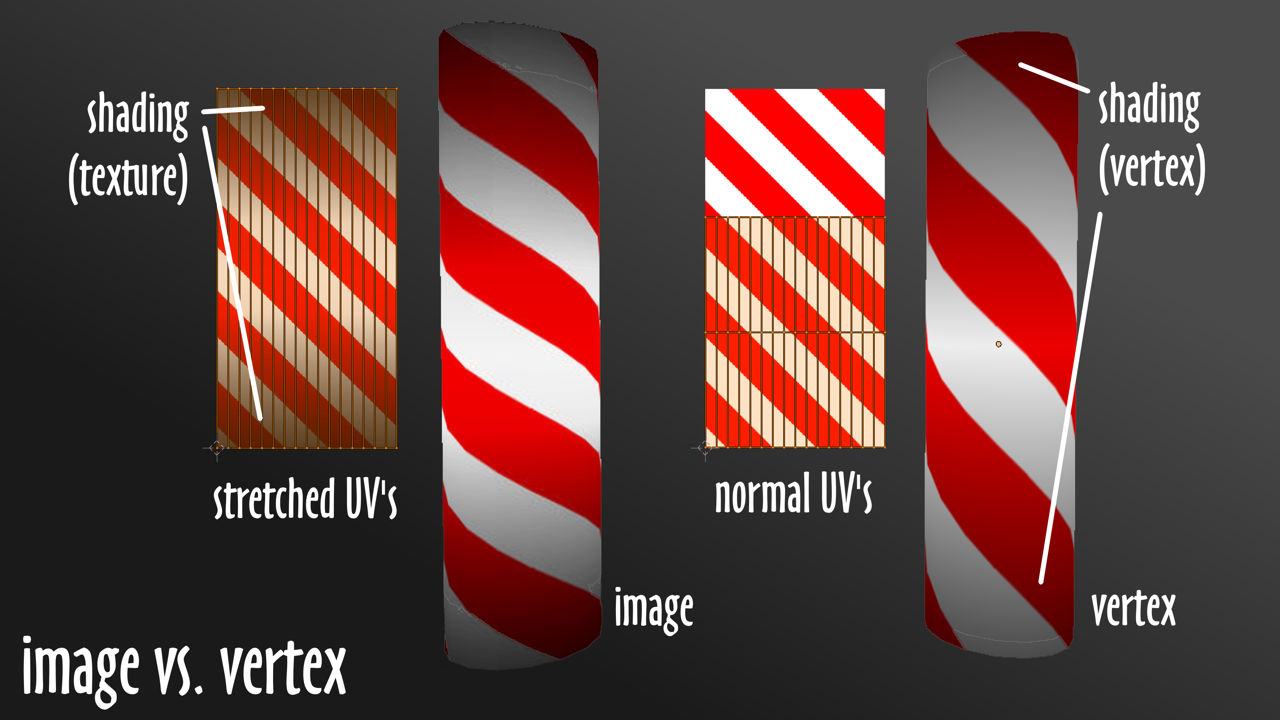
The barber poll above for example, left in its original state and painted, would result in the top and bottom colours blending together at the mid-point between the two. Inserting an additional edge-loop at this point now means both ends blending to white (default colour assigned to all vertices), preventing the entire object being more-or-less uniformly tinted. Being judicial with edge or vertex placement, this technique tends to yield more naturally authentic results more effectively and efficiently.
Vertex, Edge or Face
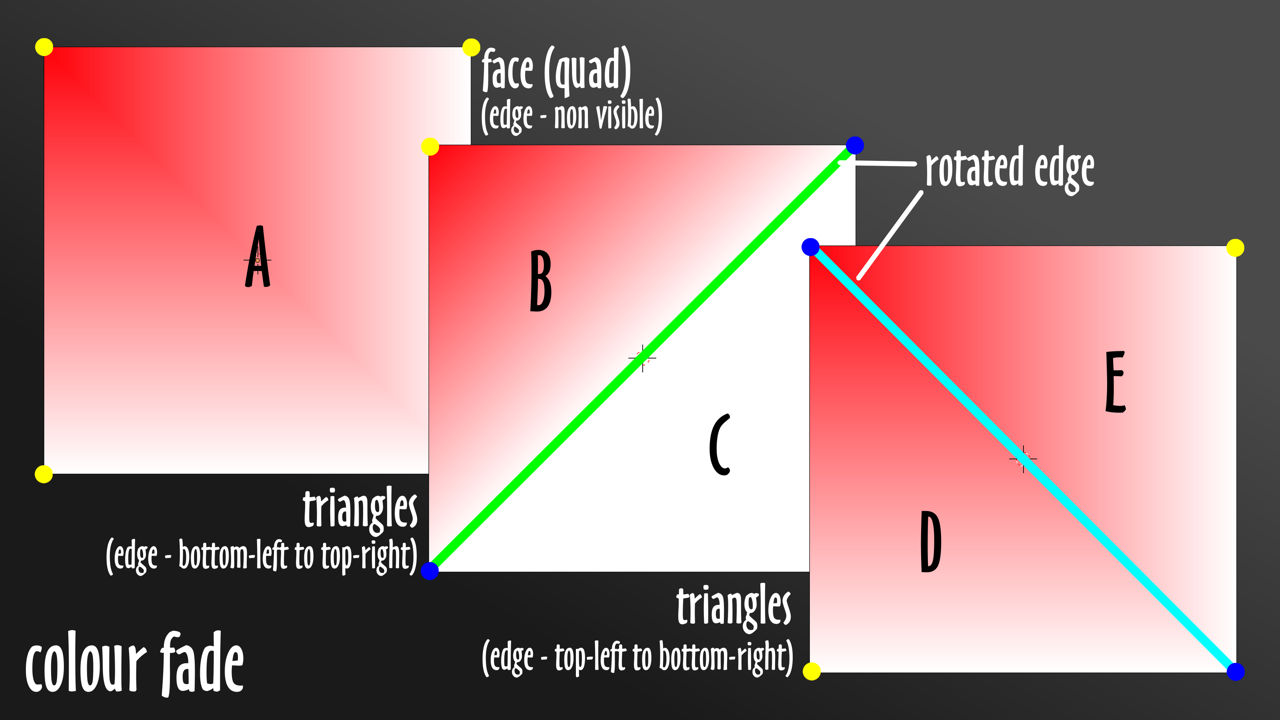
How vertex colour blends across surfaces is also determined by edges (linear structure) and faces (area structure). The latter, being polygons (‘faces‘ in Blender) are ‘quadratic’ – two triangles join along their respective diagonals to form a single surface bound by four edges and four corner vertices (A below, | |). In this state, even though the edge where the two triangles merge together is invisible, its inherent orientation still affects blending behaviour, which travels along the (invisible) edge. Shown below for example, colour painted top-left with a bottom-left to top-right edge orientation (| / |), restricts colour fading to the top-left (B/C below). Aligning this edge with the painted vertex (top-left to bottom-right, | \ |) lets the colour blend along its entire length giving the appearance of a stronger transition covering a larger surface area (D\E below). With careful use, a simple edge rotation can reduce the need to include extra structure.