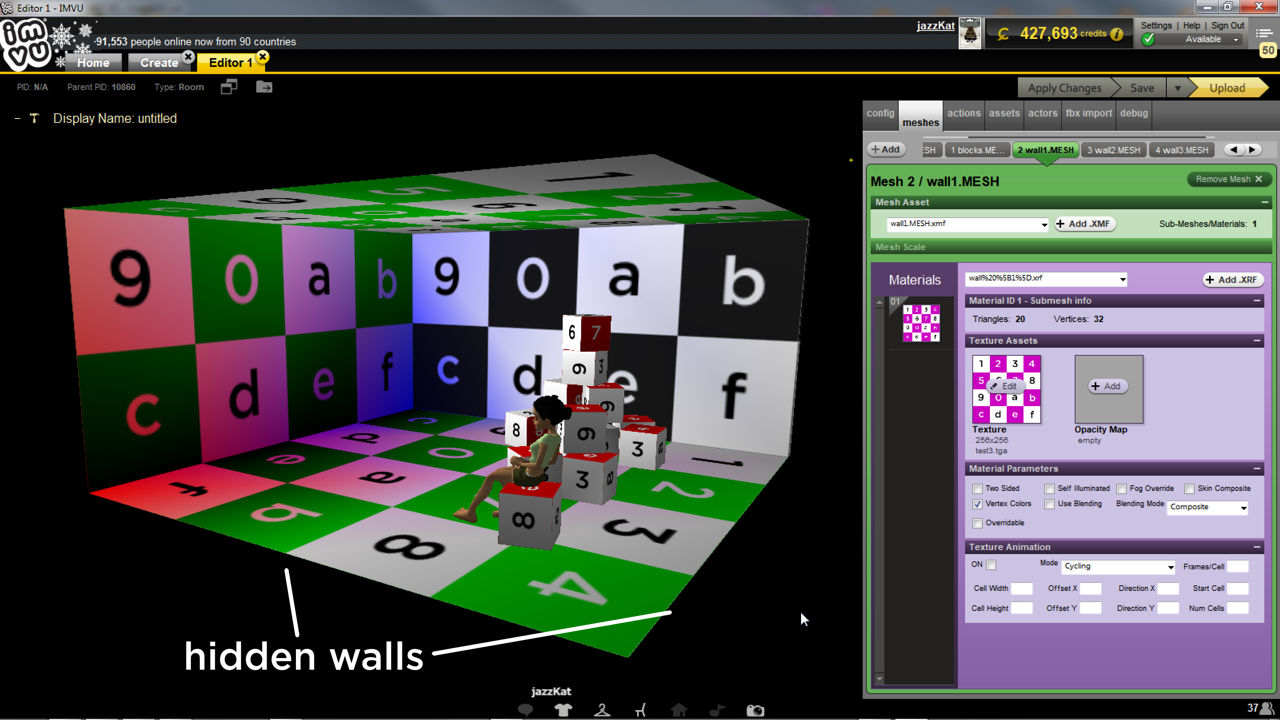
Invisible (see-thru) nodes for Rooms
See-though nodes are a special feature available to room and furniture makers that allows structures to be built with solid walls or features (they have both an inner and outer surface), which then vanish when viewed from certain angles (behind). In practice walls or other elements using see-through nodes are not see-through so much as they are removed from display or more appropriately, hidden from view, temporarily clearing obstructions, walls, pillars or other mesh elements of sections.
What are see-through nodes
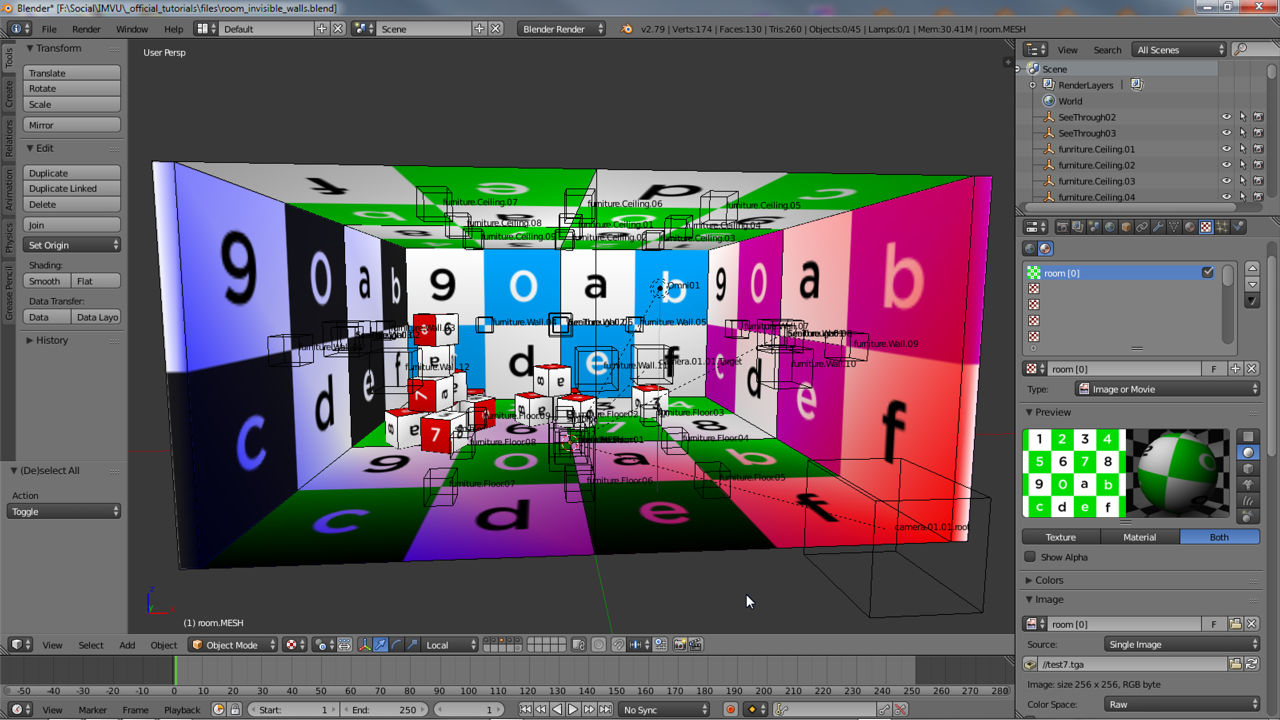
Like other aspects of room and furniture making in Blender, see-through nodes are just like other node types – floor nodes, camera nodes and so on. What makes them different is their general orientation in relation to the room or item, and their name, both being necessary for the feature to work correctly. See-through nodes are similarly linked to the origin node of the product, that’s Root for furniture and skeleton.Room for rooms, and requires each see-through section to be associated with corresponding node using vertex groups.
See-through Node Set-up
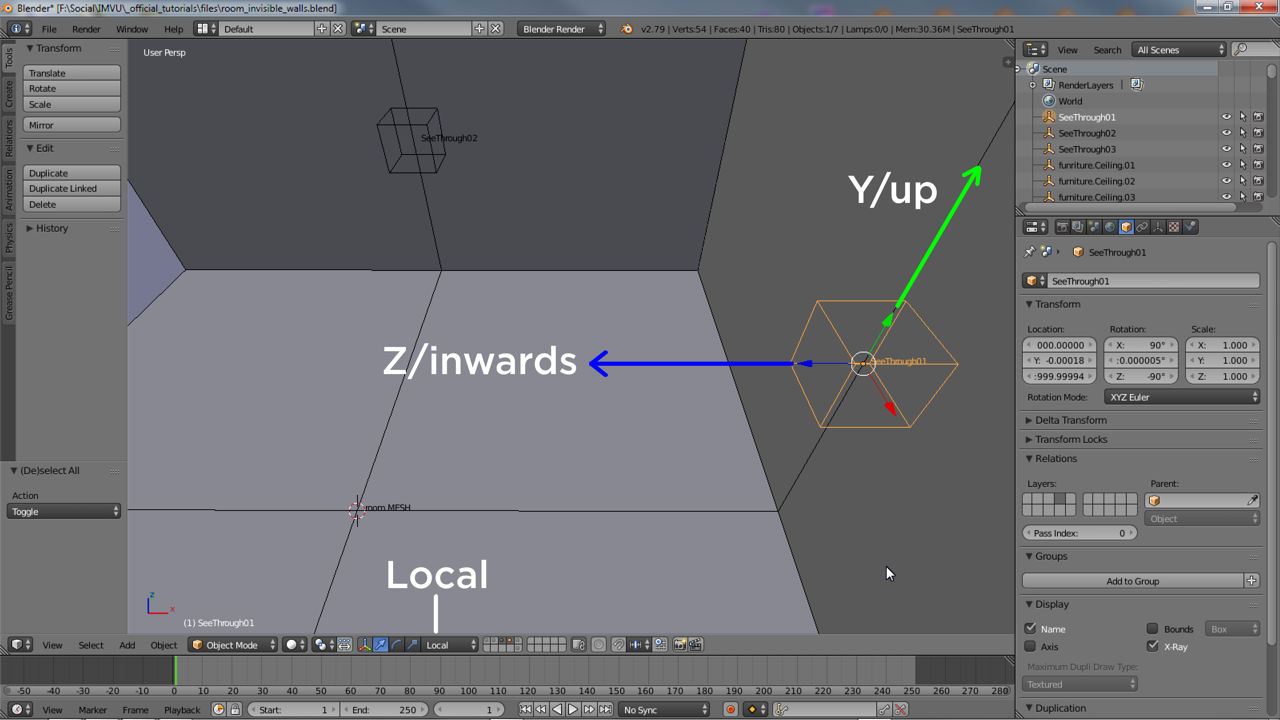
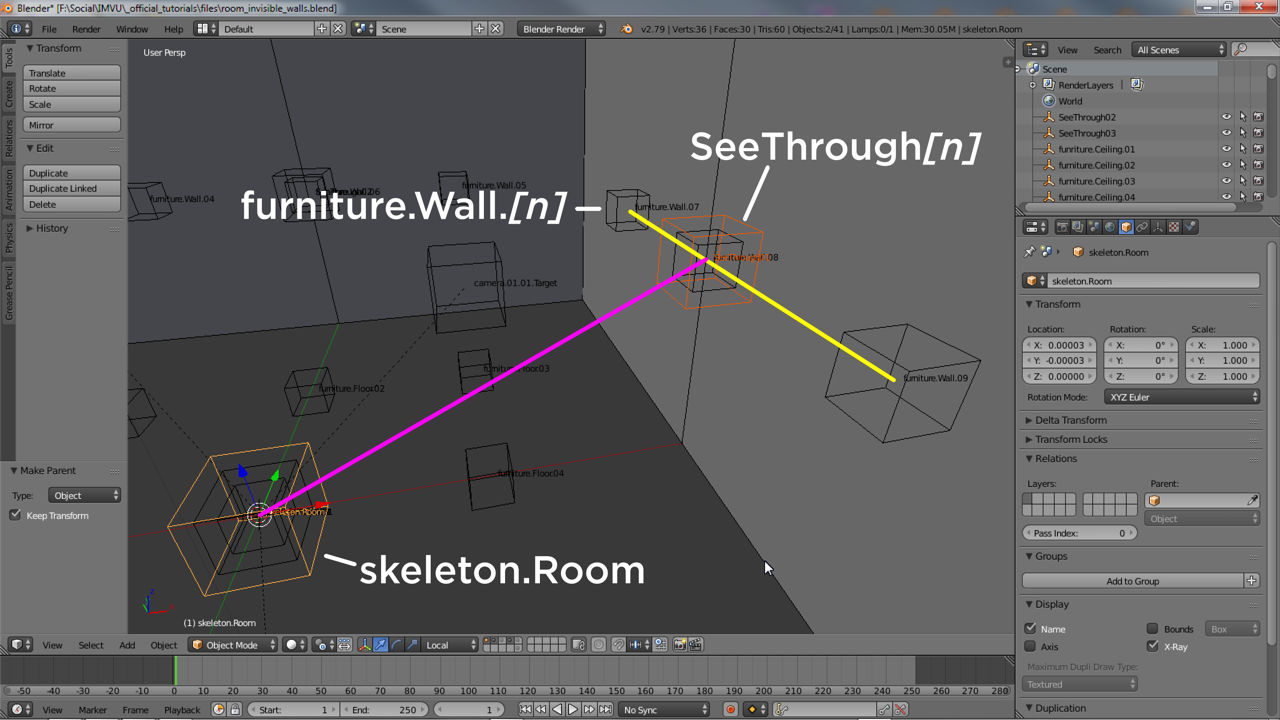
With a room or furniture project open in Blender, to utilise the see-through feature first copy a node and roughly position it using the Transform widgets, against a wall for example. To ensure the node works correctly, set Transform Orientation to Local (if not already) then check widgets Z (blue) axis points in towards the centre of the room and is perpendicular to the grid.
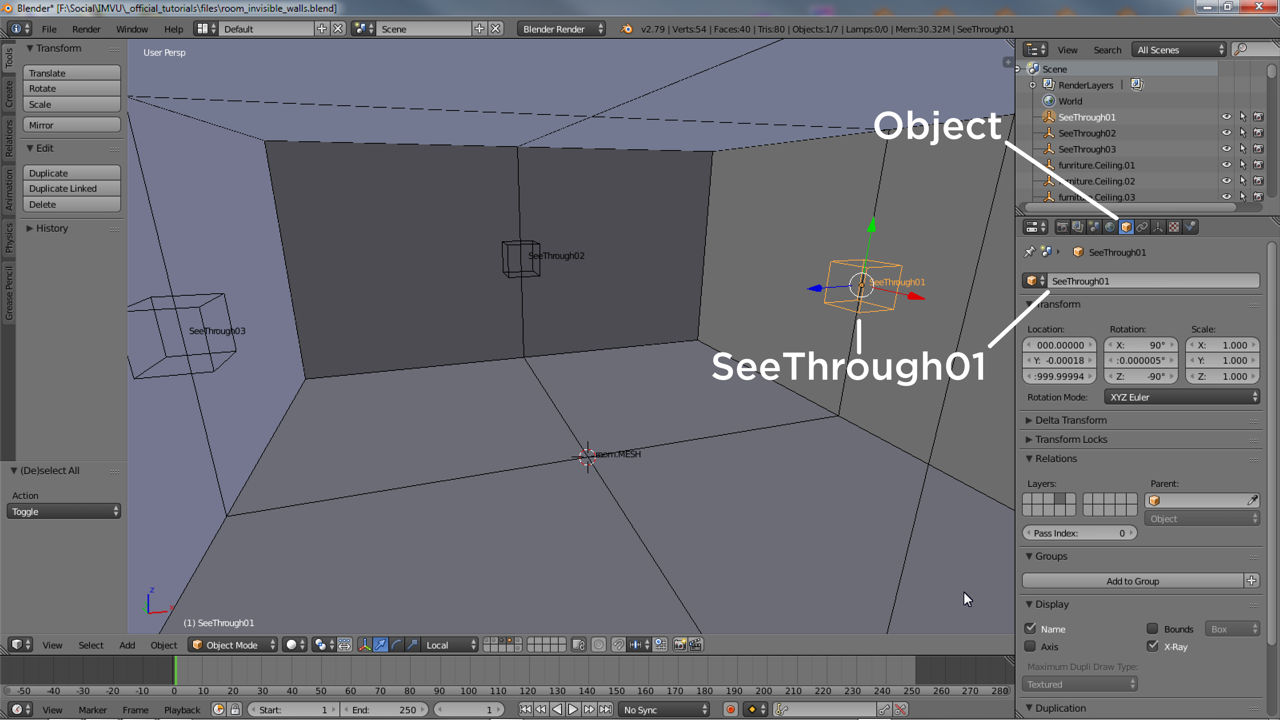
To distinguish this new node, and to make sure IMVU knows what its for, once positioned, in Object Properties change the name shown to SeeThrough[n] in the text input field at the top of the panel, i.e. SeeThrough01. Press Enter to confirm (or click elsewhere on screen).
Once the node is in position and correctly named it then needs to be parented to the primary node of the items skeleton, skeleton.Room for rooms or Root for furniture. Select the see-through node, then Shift+ right-click include the respective master node. From the Object menu click Parent » Object then Object (Keep Transform) in the pop-up that appears. The node(s) will now be linked to the skeleton appropriately.
See-through Mesh Set-up
For the see-through feature to work properly meshes associated with each node must be separate objects in Blender, a house with four walls for example requires each see-though wall to be a fully selectable and independent objects and not part of the same mesh. First then the mesh must be correctly organised. To separate or segment a mesh, select the faces belong to, for example, a wall and detach using Mesh » Vertices » Separate » Selection.

Once a room or furniture item has been split, each section will need a corresponding vertex group that matches the see-through node they are to be associated with. For example, four nodes, SeeThrough01 through 04, would require each to have a wall and corresponding vertex group. To do this in Blender select all in Edit Mode then in Object Data Properties either amend an existing or add an entry to the Vertex Group subsection (click the + button), clicking the Assign to apply the group to the selection. With that done in Object Mode select each mesh then see-through node and parent together – Object » Parent » Object » Object (Keep Transform). The node will now control the mesh in IMVU once exported to FBX.
