Cycling (looping) Animation
IMVU uses looping or cycling animations extensively, from simple tail swishes, to complex avatar and product interactions, all can be made to appear as though they are performing avatar or product motion that repeats infinitely or a fixed number of times depending on the settings used, and activated by an avatar or seat spot, or triggered typing a phrase or word into chat. In other words, looped animations are simply sequences that repeat, e.g. frames 1 » 60 » 1 » 60 and so on, the trick being to make the action loop smoothly across the start/end frames without hiccups, jumps or starts, or looking too much like it is in fact looping.
Sequence set up
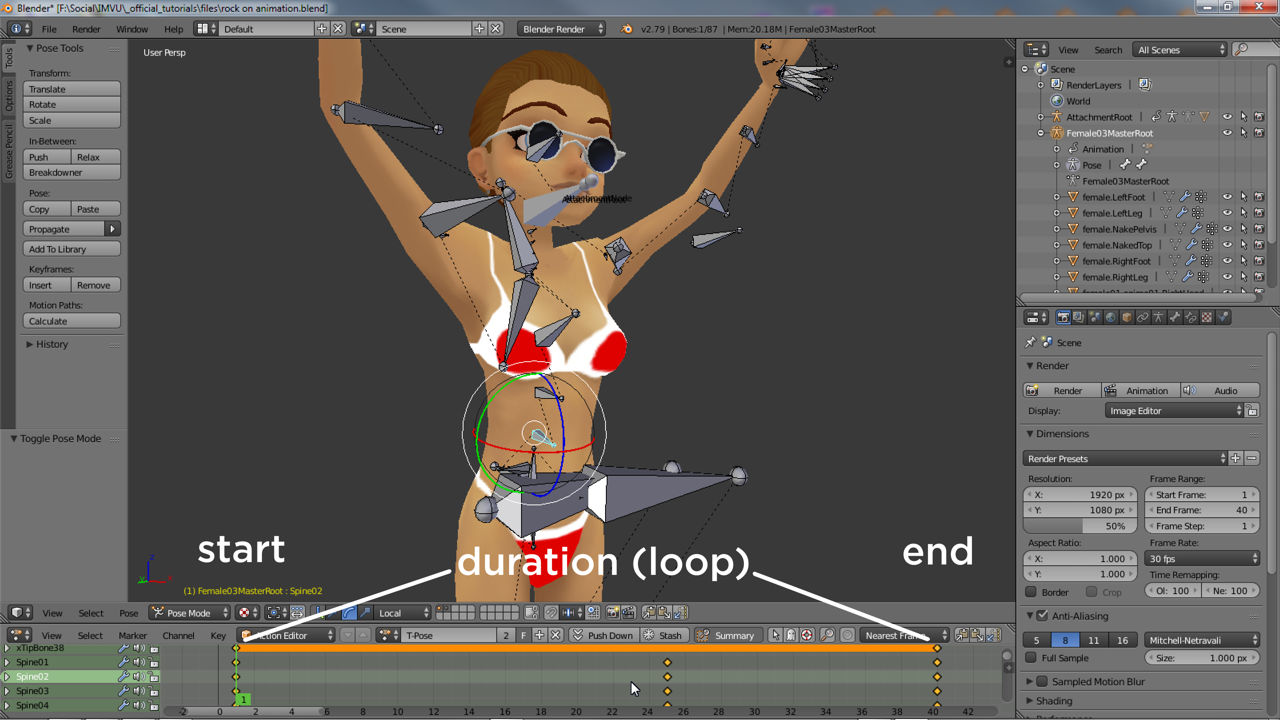
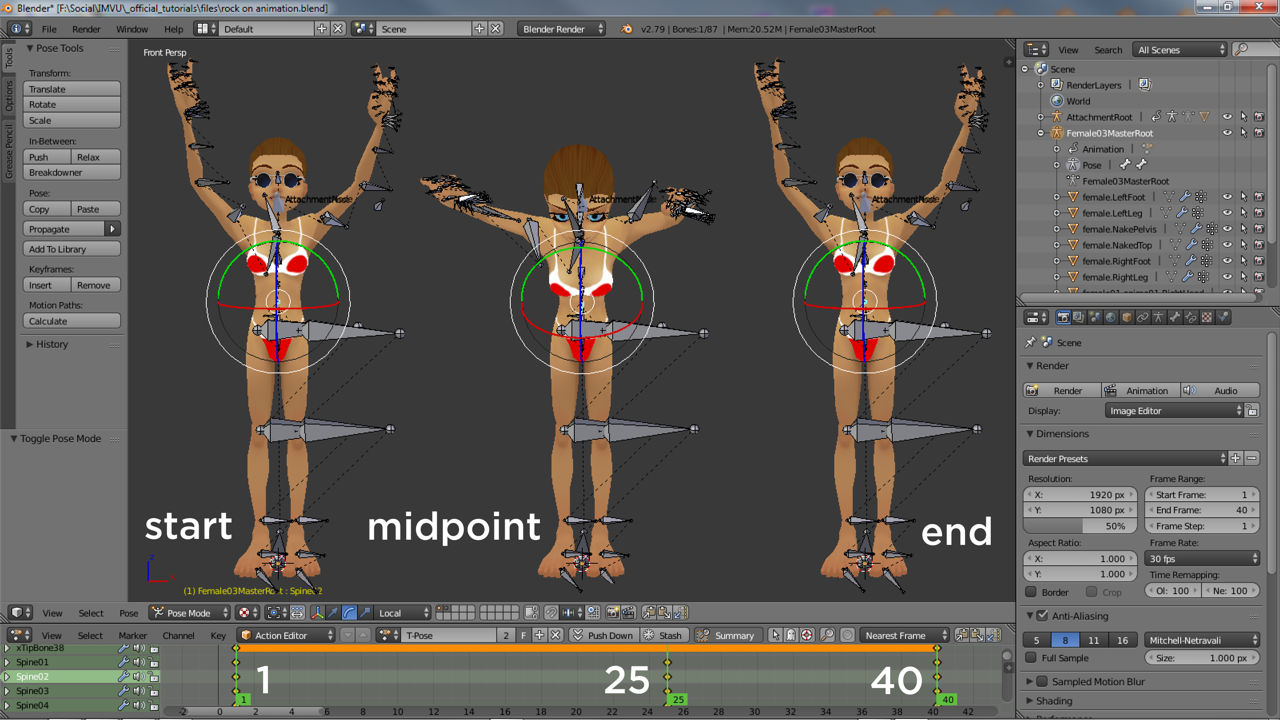
When setting up a looping sequences it’s important to understand the start and end frames, e.g. frame ‘1’ and frame ’60’, won’t necessarily represent the start or end of the action performed (a walk cycle) but instead markers simply indicating a start and end point (the duration) of the linear sequence itself – a walk cycle might be captured or posed mid-stride at frames 1 and 60 for example, rather than there being a distinct start and/or end frame at those points.
Looped Action
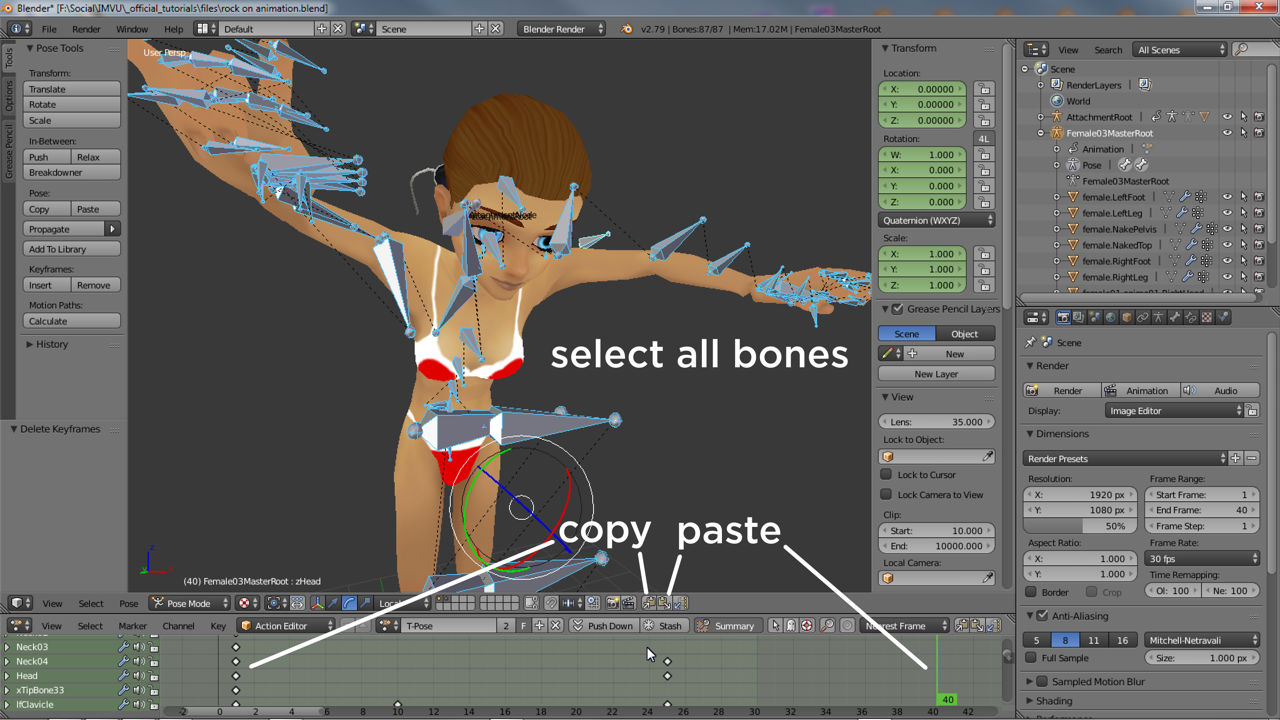
The easiest way to create an animation that loops in Blender is using the Action Editor where poses are represented by small markers in the editors timeline. First move the slider/scrubber to the frame that’s to be duplicated, e.g. first, this selects/sets the frame. Next, in the 3D View make sure the Armature being animated is in Pose Mode and all bones selected (they outline blue). Finally click the Copy button to grab the selected bones data, move the timeline slider to the frame into which the captured data will be dropped, e.g. last, and click the Paste button. The data will overwrite any existing pose information making first and last frames exactly the same.
Export/Import
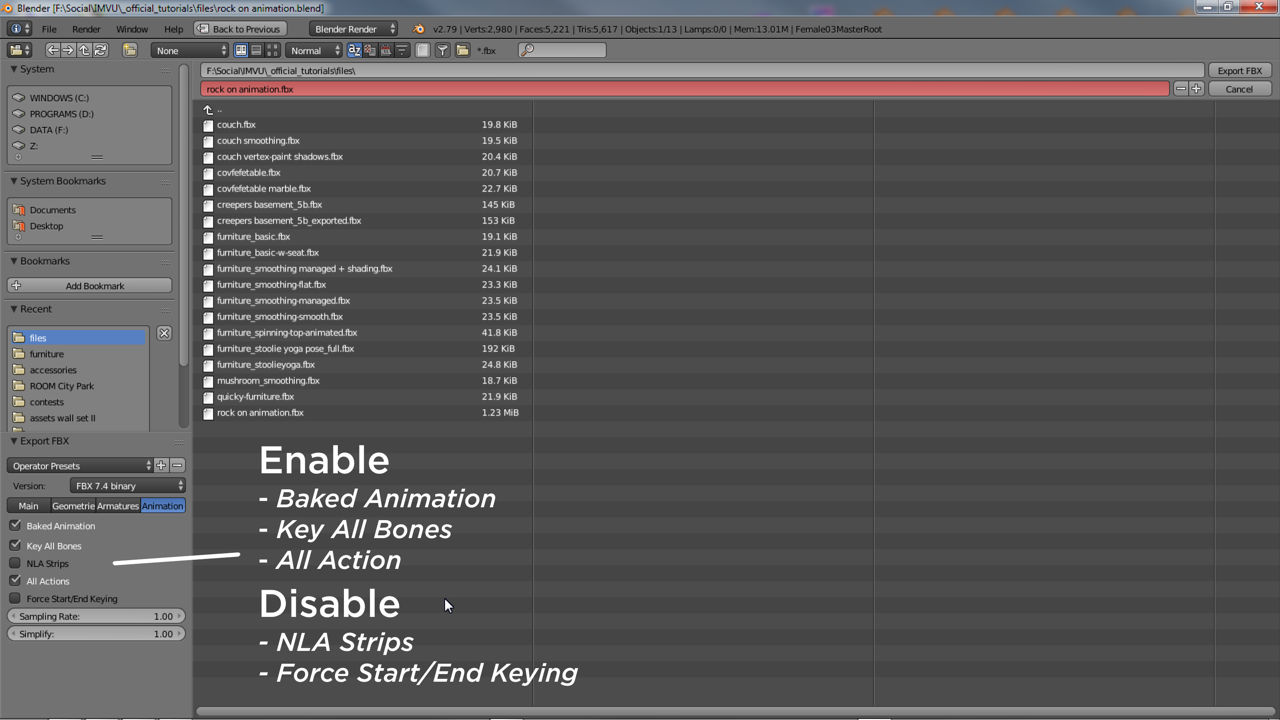
Before exporting it’s important to check the animation has an Action sequence associated with it (click here for more). If an animation has been made using another of Blenders animation editor switching to the Action Editor will reveal an Action linked to the active sequence. With a sequence then available make sure the Armature is in Object Mode (switch from Pose Mode) and selected. From the File menu select Export then FBX (.fbx), that’s File » Export » FBX (.fbx). In the File Browser that appears, bottom-left set Selected Objects (Main), disable Add Leaf Bones (Armatures), NLA Strips and Force Start/End Keying (Animation). Change the file name and save location as needed then click the Export FBX button top-right to generate an FBX.
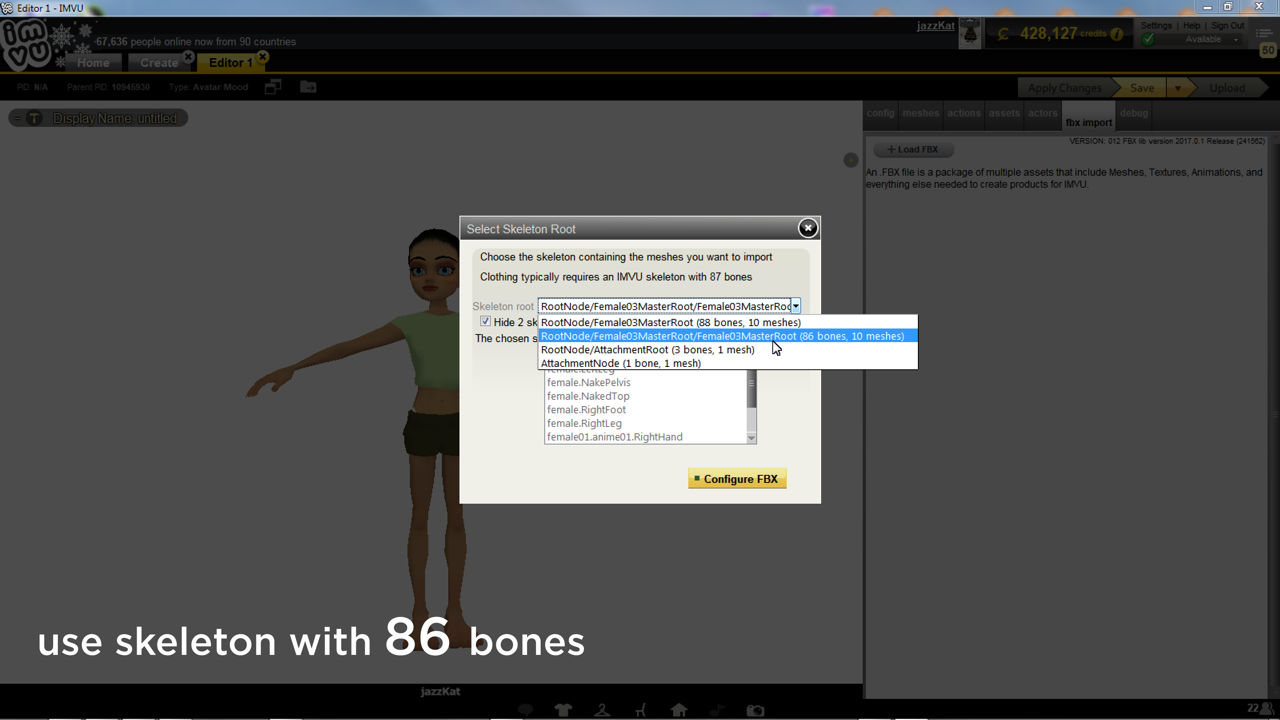
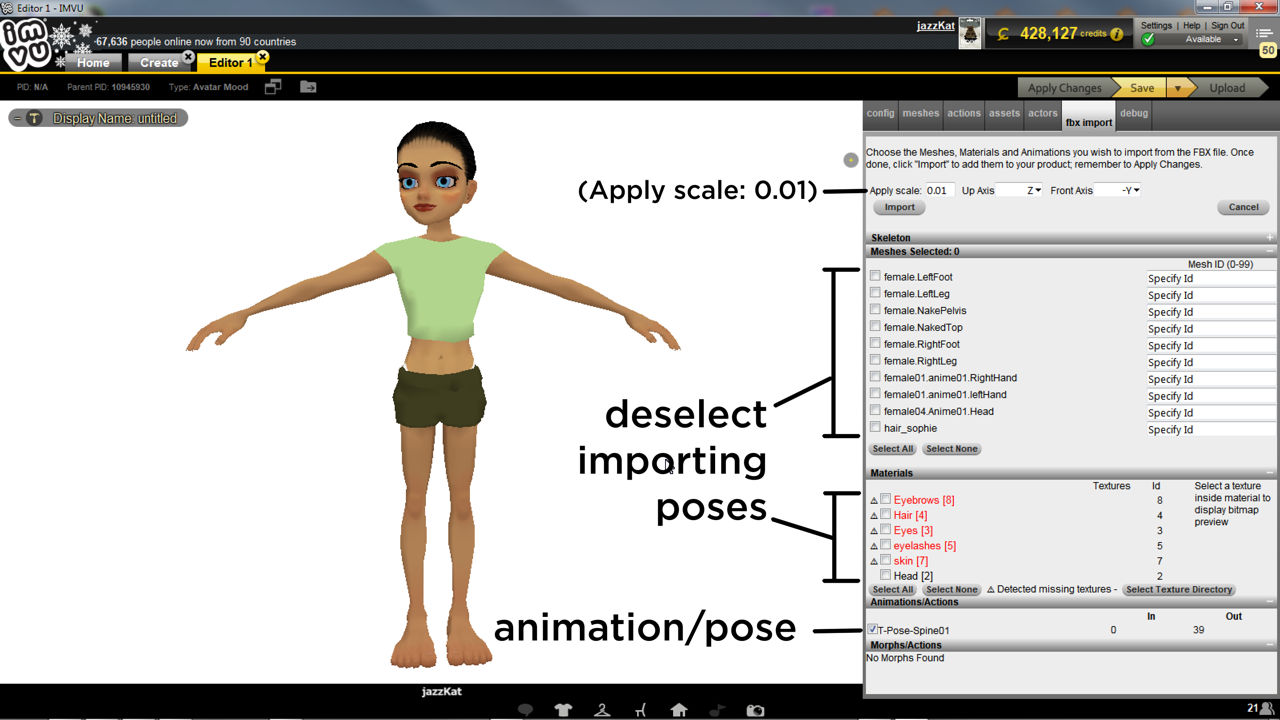
Once an FBX has been exported it can be imported into IMVU. Open a new derivable and click the fbx import tab to load the file clicking the + Load FBX button. Select the file and Open into the importer, make sure to select the assets needed then select Import.
Assembly
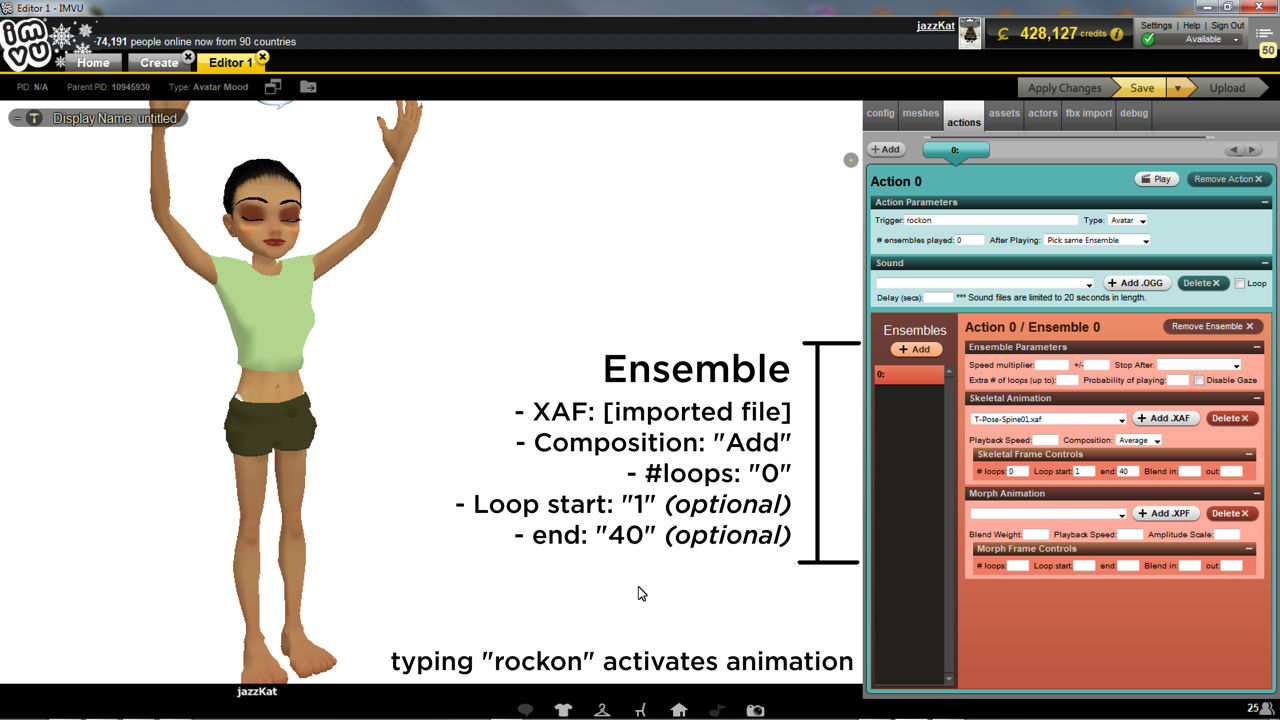
As discussed above, the point about looped animation is to make something appear to repeat a number of times in IMVU. To do this an action needs to be created that’s set up to accommodate the looping characteristic of the sequence. First click the + Add button in the actions tab to create a new entry and in the Action Parameters section (pale-blue section) set the Trigger to use a word or phrase, e.g. loopyloop, or type stance.Idle to automatically play the animation as soon as the product loads. Set the number of times the action is to loop in # ensembles played, e.g. 20 – 0 loops infinitely; what the action does after playing the animation in After Playing, typically Pick same Ensemble; and Type to set the item the action applies to, Avatar or Room.
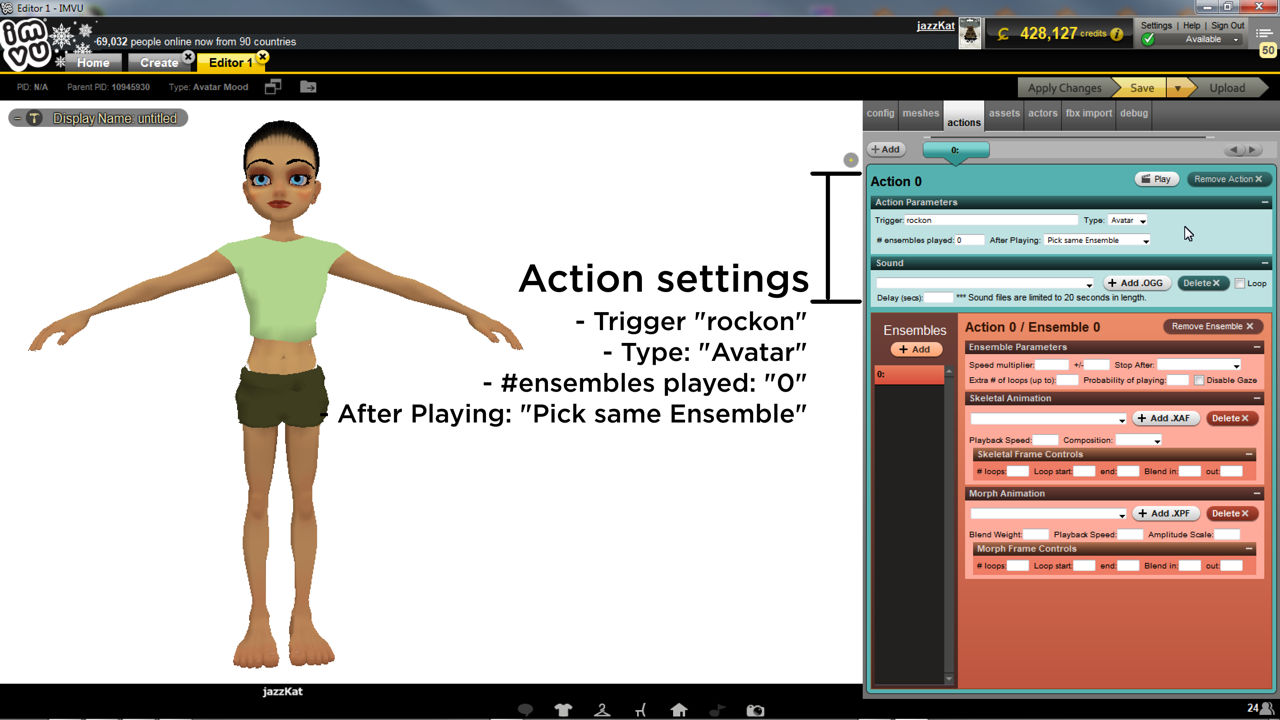
Once the initial properties are set up the next step is to establish the animations behaviour. This is done in the Ensembles section (salmon/rust coloured area). In Skeletal Animation click the drop-down menu and select the imported animation. In Composition below select Replace to ensure the new sequences over-rides whatever might be playing when its triggered. In # loops type a numerical, this represents how many times the animation will repeat, e.g. 5 to play five times or 0 for infinite loops. Then optionally set the Loop start and end points to indicate where the animation should start and finish, e.g. frame 1 (start) and 60 (end) continuing with the example mentioned above. Once done click Apply Changes to see the animation in action – it will auto-play if set to trigger using stance.Idle, else type the trigger phrase or word, Save and then Upload to publish to the catalogue.