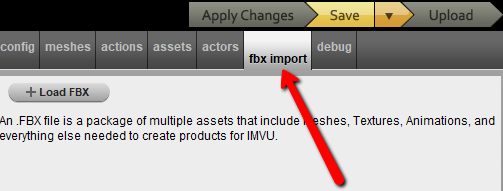
The advantage of using FBX is that it encapsulates all the assets into a single file making the export > import pathway much more straightforward. To this end, so long as all the assets needed for the product were exported from Blender, only a single file likely needs to be loaded (there are exceptions, see animation/pose for example). Once you have an FBX file, in IMVU create a product as normal, an accessory for example, and once that’s loaded, in the project settings area click the tab titled fbx import.
FBX Import
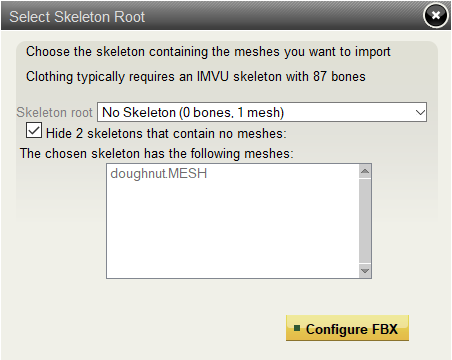
Browse to and select the fbx just exported then click Open. Depending on the product, the Select Skeletal Root dialogue may appear, if it does select the appropriate skeleton belonging to the product then click Configure FBX. If it doesn’t appear the FBX file will be loaded into the importer.
When the FBX file is loaded into the importer it will show each of the elements that were included at export for example a mesh, skeleton and material (texture). Check what’s loaded to ensure the parts needed are available (click the checkbox next to unwanted entries to have them ignored).
Specify ID
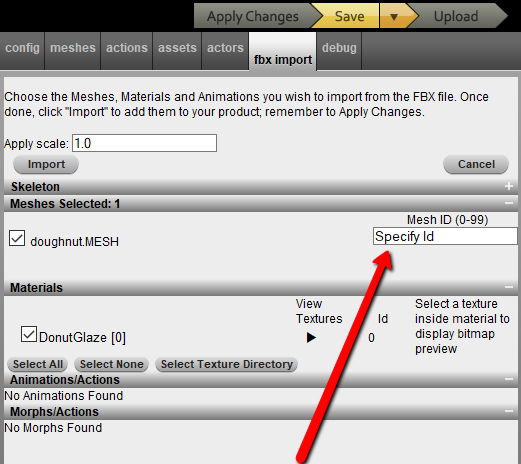

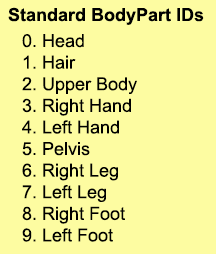
Set any mesh id properties to automatically override the derived products defaults, for example 0 replaces the chair mesh for furniture, glasses mesh for accessories, or Head for avatars Specific BodyPart IDs are listed below:
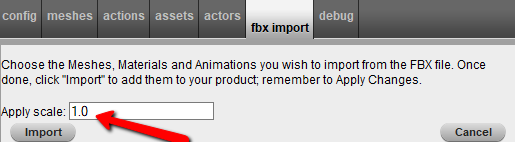
Apply Scale
The final setting to check before completing the process is Apply scale. How this is done will vary depending on how you choose to compensate for the way FBX deals with object scale, but if the starter files are export without changing anything to do the Scene scale in Blender Apply scale will need to be changed from 1.0 to 0.01 – this is important to make sure the assets are correctly sized in IMVU.

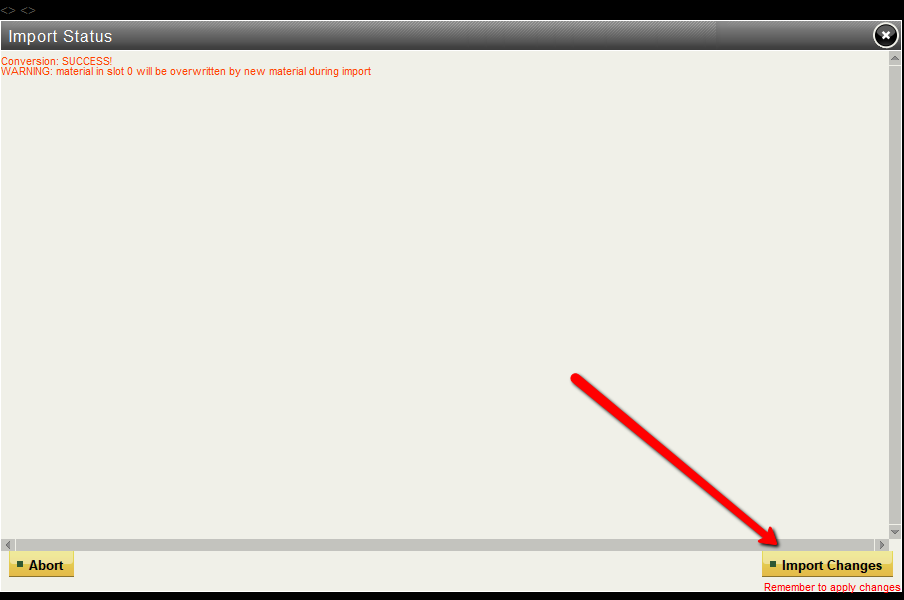
Once scaling is set, go ahead and click + import to convert the files. If the Import Status dialogue appears (and doesn’t show any critical errors) finish up the import process clicking Import Changes.
Import Changes
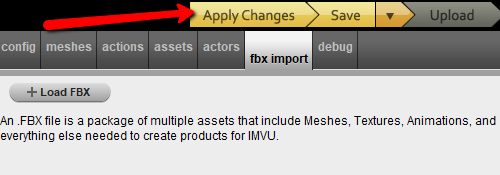
At this point the FBX file has been converted and the components it contained are ready for use. To see them and the automatically assembled product click Apply Changes as normal. The assets can now be edited and modified as necessary!
Scaling Issues
The FBX format treats object scale differently than Blenders raw numbers, being measured in Metres, scale means something; assets exported from Blender without compensating for scale are usually very (extremely!) large in IMVU. Following the general export or import steps outlined above, this scale difference can be solved in one of three ways; On EXPORT from Blender setting the Scale value (under Main) to 0.01*. On IMPORT to IMVU by setting the Apply scale value to 0.01*. Again in Blender by adjusting Units (found in Scene Properties) so Length is set to Metric and Length to 0.01*. [*] Assumes assets are being exported/imported based on the available Starter Files.