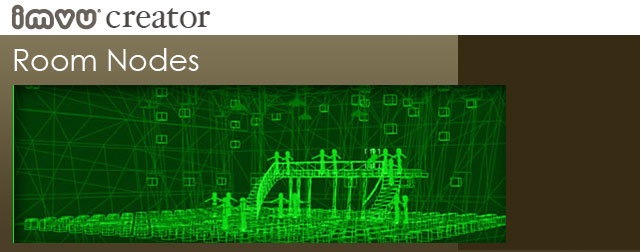
Introduction
Before your Room can be submitted to the IMVU Catalog, it will need to include Nodes that will allow furniture to be placed within it. These are called Furniture Nodes and they need to be placed by you before a sofa can sit on the floor, a picture hang on a wall, or a chandelier suspend from the ceiling.
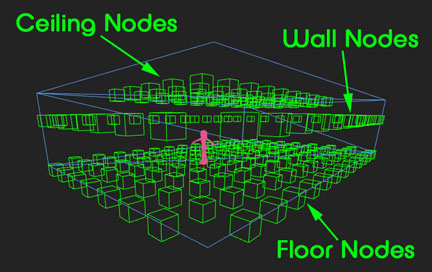
There are three types of Room Nodes, these are Floor Nodes, Ceiling Nodes, and Wall Nodes. Each are named specifically for their Node type, and each has a Axis that points into the 3D space, depending upon their specific location. 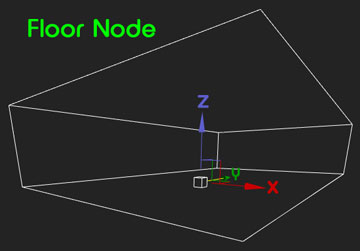
Floor Nodes
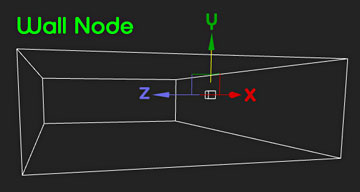
Wall Nodes
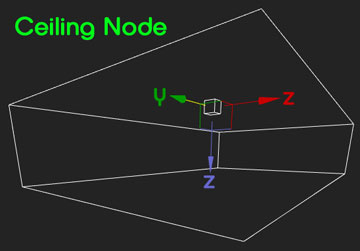
Ceiling Nodes
Proper Naming
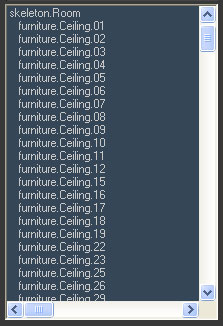
Room/Furniture Nodes are Linked to the Room’s Skeleton Node and need to be named accordingly:
Floor Nodes:
furniture.Floor.01

Wall Nodes:
furniture.Wall.01

Ceiling Nodes:
furniture.Ceiling.01
We arrived at this number assuming there would be at most 100 pieces of furniture in a room and each on of those would have at least 1 node and up to 99 nodes. Although the cost of each individual node is insignificant, multiplying that by thousands means a performance hit while chatting in 3D. So, 650 or less, please.
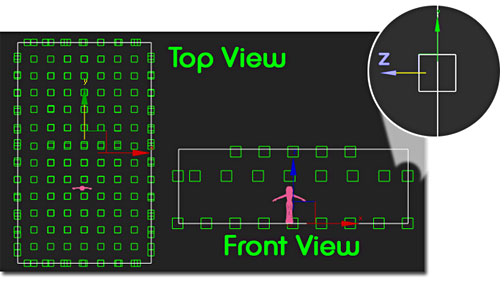 Furniture/Room Nodes need to be placed so that the center of the Node sits at the inward facing surface of the floor, wall, or ceiling. To be safe we recommend that the Node be nudged a little bit further into the space so that objects like pictures, doorways, or floor shadows appear within the room and not beyond the surface.

To import these Nodes into your Room model, choose File/Merge in 3D Max, then select those Nodes that you wish to import. We recommend that you import and place each Node type individually… so floor nodes go in first, get placed, then move on to wall nodes, etc. This makes the task less daunting and gives you the most control.
If you need to create more Nodes, just Duplicate the Nodes you Merge and place them wherever you need them. Each Node needs to be uniquely named, but their numbers do not need to be chronological, so if you are missing a few numbers you are still okay.