
Pets Introduction
A Pet is a glorified Avatar Accessory product. An Avatar Accessory product, simply put, is a product that can be attached to an avatar but that does not override any avatar body parts (like shirts or shoes). An Accessory product can also be anything you can possibly think of: earrings, floaties, wings…..and Pets.
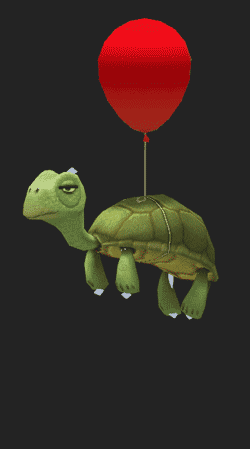
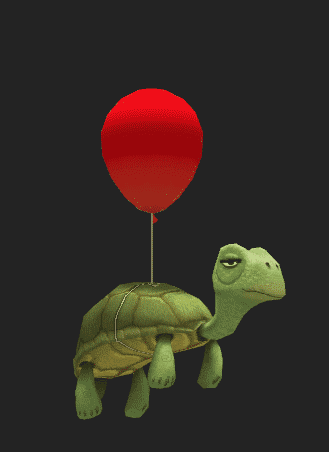
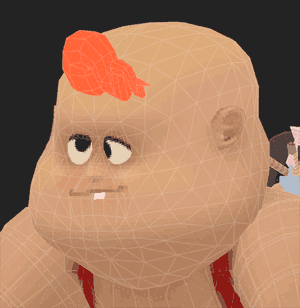
Obviously, you can build a technically simple pet like, say, a parrot that sits on your shoulder but does not move at all. We’ll call these kind of pets “pet rocks”. On the other hand, you can also build a technically complex pet that feels alive and reactive.
Where’s the Avatar?
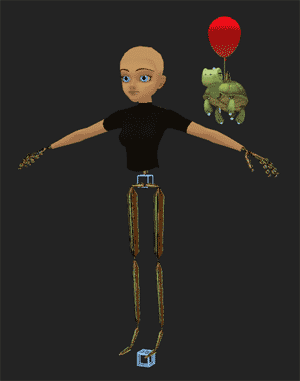
As you prepare to bring your idea to IMVU customers, remember to be cognizant of where your Pet is going to live in relation to the avatar. It can be attached to the avatar, like a parrot on a shoulder, or it can be detached from the avatar.
You should also be cognizant of what other things an avatar might be wearing at the same time as your pet. For example, if building a parrot on a shoulder, you should probably put the parrot out towards the tip of the shoulder vs. close to the head. That way, there will be less potential for penetration with things like hair, hats, big earrings and shirt collars.
A great way to help yourself be cognisant of these things is to spend a fair amount of time planning your Pet out on paper. This early ‘concept phase’ or ‘design phase’ will help you get through many issues not the lest of which is positioning your pet, the size of your pet and overall penetration with the avatar.
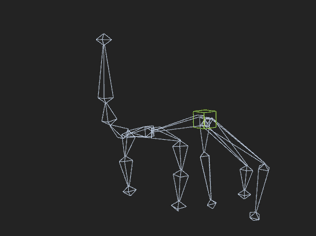
Build Skeleton
It all starts and ends with the skeleton. Let me say from experience that it is incredibly frustrating to learn you need one more bone after you have nearly completed the product – animations and all. The reason it is frustrating is because adding even one more bone to the skeleton requires the following changes:
New skeleton .xsf export
New mesh weighting
New mesh .xmf export
New animation .xaf exports (that's right - all of them)
This is no small amount of work (it can take a full work day if your pet is complex enough) so please take the time in advance to figure out how many bones you will need. How do you figure out how many bones you need? Simple: What is it you want the Pet to be able to do? Answer that question and you will know what bones you need to add.
For example: Does your Pet have wings? Will they flap? Will they flap like a Bird’s wings? If so, you know you need three main bones in the wing and one end effector (so that Physique will work). Does your pet have a head? A neck? Will it nod yes and no? If so, you know you have at least two more bones (+ end effector): Head + neck (you can have more neck bones the longer your Pet’s neck is.) Does your Pet have arms? Hands? Legs? Feet? a Tail? Are those extremities going to move? If so, how?
As you can see, advance planning will help you realize your vision sooner and without having to start over repeatedly.
Align Root Nodes
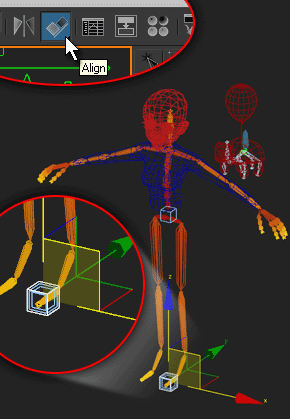
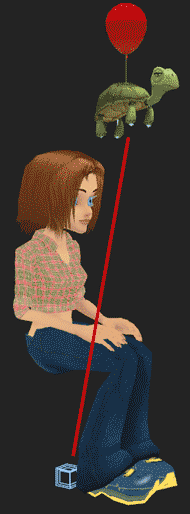
If you want a Pet that moves independantly of the avatar, the first thing should do is align the AttachmentRoot and AttachmentNode bones to the avatar’s Root node: Female03MasterRoot.
As detailed in the Introduction to Accessories Tutorial, every Accessory attaches to a bone in the Avatar. Just which bone it attaches to is set in the Editor. Therefore, the root bones of the Accessory skeleton need to be aligned to the bone you intend to attach your Accessory to. Since you will eventually tell the Pet/Accessory product to attach itself to Female03MasterRoot in the Editor, you need to have your Accessory skeleton root bones aligned to Female03MasterRoot in your 3D file.
To align your root bones, you use the Align tool found in the upper left tool bar. First select both your Accessory bones. Then, with the Align tool selected, click on Female03MasterRoot.
The Align Selection dialog box appears and is chock full o’ settings. You want to align the XYZ position *and* the XYZ Orientation. Also, make sure Pivot Point is selected in both the ‘Current Object’ and ‘Target Object’ fields. Click ‘OK’ and your Accessory root bones should have moved to the exact same position as Female03MasterRoot.
Build Mesh, morphs, materials, textures
Once you have your skeleton built and properly positioned, its time to build your mesh (or meshes), morph targets, materials and textures. To learn more about each of these, please visit the following tutorials:
Budgets
Download and runtime file size is an issue that should be kept in mind whenever designing for IMVU. If your Head’s file size is too big, it is unlikely that your potential customer will purchase and download it and, if they do, there is a very high chance that they will review your product poorly and your sales will go down.
Therefore, it is good practice to try to keep the texture size, vertex/face count of your meshes and animation length down to the bare minimum. There really is no reason to have a 256×256 texture for a button on a shirt: it just won’t be seen in the IMVU messenger. In fact, we have found that the smaller the texture, the BETTER it looks in IMVU. Go figure.
Also, please know that IMVU automatically resizes assets that are too large or etched incorrectly.
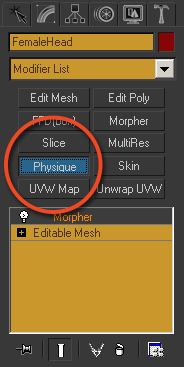
Weight the Mesh
With your Pet completely built, it is time to weight it. ‘Weighting’ means that each vertex in a mesh knows which bone it ought to move with. If a mesh isn’t weighted, it won’t show up in IMVU.
 Test Weighting
It is important to test whether your weighting works the way you want it and, more importantly, that every vertex in your Pet is actually weighted. To do this, you ought to make an animation that moves every bone in your Pet’s skeleton.
I typically move one bone at a time over time so that I can see how the head moves without the rest of the bones moving.
Once I get an animation built that moves all of the bones in the body, I make sure to also add a big movement to the Pelvis bone.
This last animation moves the entire pet far away from its original position with the intent of seeing whether all of ther vertices are actually weighted. If they are not, they will remain in place while the rest of your Pet moves around. If I see any errant verts, I go right into Physique and weight them.
Test Morphs
Once you are sure your weighting is complete, it is important to test your morph targets as well. Remember, you do not need to build morphs for your Pet. It is 100% optional.
When testing your morphs, you are looking for a few things:
If you find any issues, you can always go edit your morphs, reload the morph targets in the Morpher modifier and run your tests again.
Export All
OK. Now you’re ready to export the basics!
As is the case with any 3D product, you must export the skeleton – .xsf file first. Then, you are free to export both the mesh – .xmf files and the animation – .xaf files (though, we’ll get to animations in the next section). You can export the material – .xrf files at any time. To learn more, please go to the:
Make Idle Actions
As a recap, check this out:
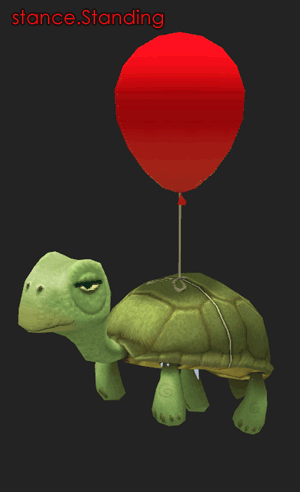
The most common Idle Actions in the IMVU avatar are the Standing and Sitting Actions. This means your Pet can have a different behavior whether the avatar is Sitting or Standing. What’s more, a Pet can have its Idle Action named stance.Idle, then it will play the same no matter what stance is called on the avatar.
Remember, as the Idle Actions Tutorial explains, you can build multiple Idle animations, export them all and then place them into the Editor as separate pieces of separate Idle Actions. For example, I typically have one Action named stance.Idle that covers only the blinking animation. That way, the blink will play regardless of what else the Pet is doing. I also add another Action named stance.Idle that contains at least five Ensembles with animations for a Pet so that it has a feeling of life.
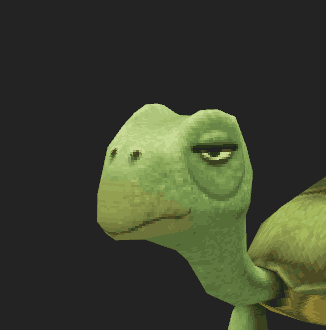
Blink Idle Tip
If you want to build a pet that blinks, I have a good tip for you.
Build the eyes as separate meshes from the body. Then, go back to your skeleton and add bones that live approximately where your eye meshes live. Then, you will be able to build an animation that pulls the eyes inside of the head for a frame or two.
Plus, -iIf you make sure the texture on your Pet head contains closed eyes just underneath the location of the eye meshes, it will look like a real blink in IMVU. Cool
Sitting Idle Position
Although an avatar moves the height of its body when it switches from a Standing node to a Sitting node, its root node does not change its height. This means that if you have a Pet that is attached to Female03MasterRoot, then it will not move lower in the scene just because an animation makes the avatar sit lower in the scene. This is most obvious in stance.Sitting seats.
To address this, you can make another series of Idle animations that have the Pet positioned lower in 3D space. In the Editor, you create an Action titled stance.Sitting that contains Ensembles with these new lower-positioned assets. Then, when an avatar sits down, its Pet acts the way you want it to.
Make Triggered Animations
I always consider this the most fun part of building a Pet because the triggered actions make the Pet feel sentient. Making a triggered Action is pretty easy as you just need to name the Action anything you want. When someone types in that word, or words, then the Pet will play the animation associated with that Action.
If you want to know what triggers are used by the IMVU avatar, you can always take a look at the .xml file that comes with IMVU. It is called ‘menus.config.xml’ and should be right in your IMVU directory. The section titled ‘Personal Gestures’ are ones that can be used by your Pet. If you can’t open the .xml file, you can just try a few commands in IMVU to see if they work on your avatar.
The fun part, though, is making your Pet react the same way your avatar does to triggered commands. That’s why I typically include Actions for yes, no, what, lol and flip (I just like to flip a lot.)
What’s also cool is that your triggered animations can contain Ensembles as well. This means that you could have multiple reactions to the same command that were randomly chosen. This makes your Pet feel REALLY alive.
Export All Animations
When you’ve built all of your animations, remember to export them.
 Create Mode: the Editor
Alllllll righty. Now that you have all of your assets built and exported, it is time to put them all together in the Editor.
Create Mode : Base Product
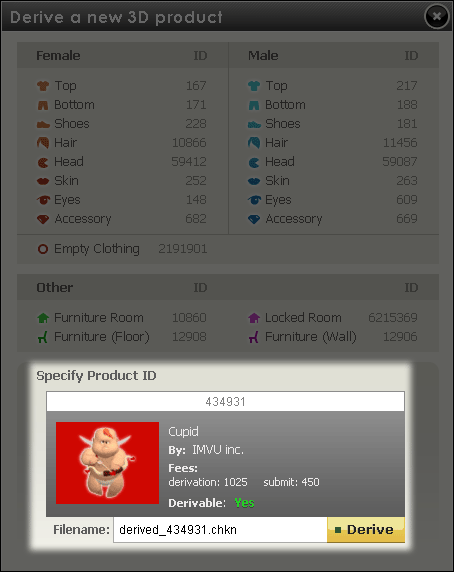
While we recommend that you derive from either product 682 or product 669, product 434931 is a good example of how a Pet ought to be set up. You can derive from 434931 just to see how it is set up.
As with any 3D product that you build from scratch, you should build your Accessory product with NO Actions or animations first. In the Config tab, browse to your skeleton .xsf file, type in the name of the bone that you want the Accessory Pet to be attached to and then type in the avatar IDs with which you want your Pet to work with. If you want the Pet to work with both the female and male avatars, you would type in “80, 191” in the IDs field. IMVU always does this.
The reason you should create your product without animations first is because it is MUCH easier to find errors with your skeleton, mesh, materials and textures without having to wade through potential animation errors too. Save your product once you have the skeleton, mesh, material and texture assets working.
Editor: Set Up
As mentioned above, product 434931 is a great example of how your Actions ought to be set up for a Pet product. Each panel is set up very much how you will no doubt want your panels set up. Let’s take it one by one.
The ‘Config’ tab:
You will notice that the Compatible Body Pattern Product IDs filed is already set to ’80, 191′, the Attachment Node is already set to Female03MasterRoot, and it contains its own .xsf file. You only need to add your own .xsf in this tab.
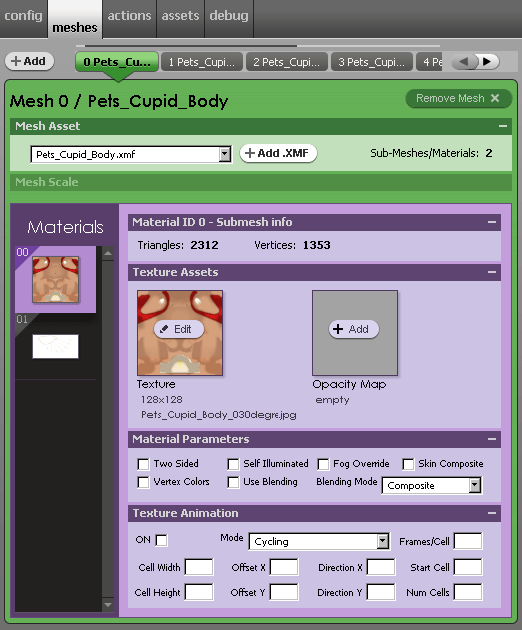
The ‘Meshes’ tab:
Notice that this product has multiple body parts. Your Pet can have as many body parts as you like – as long as you remain within budget, of course. Also note that each mesh has materials and textures.
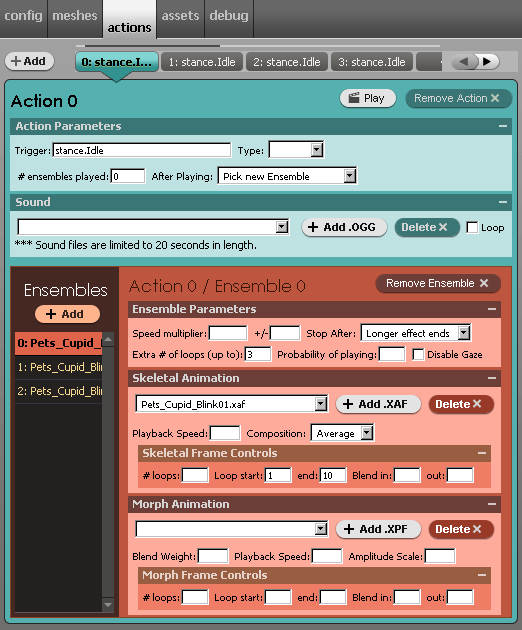
The ‘Actions’ tab:
And last but not least, the Actions tab. You will see that this Pet contains several Actions named stance.Idle with one handling the blinks, one handling the wings, one handling the core floating animations and the last handling the Bow Idle.
Add Idle Actions First
Remember, at this stage, you should already have your skeleton, mesh and material assets in place.
When setting up your Actions, I recommend you add your Idle Actions first. Essentially, this is so you can get through the hard part first and save the quicker, easier, more fun part (triggers) for last. haha.
Every Action needs a name. The name of your main Idle Action depends on how you want it to behave. For example, if you want the Action to play forever, regardless of which seat an avatar joins, then you would name your Action ‘stance.Idle’ in the Trigger field.
On the other hand, if you want your Pet to have different behaviors/positions when the avatar is standing vs. sitting, then you would name your main Idle Action ‘stance.Standing’ in the Trigger field.
Action Parameters
We have already discussed what you ought to name your Idle Actions in the Trigger field but what are the other fields for? The other fields in the Action Paramters section are discussed in detail in the Actions Tab Tutorial. However, there are some specifics as to how to set them up for a Pet Accessory.
First of all, the Type field does not matter to Pet Accessories so you don’t have to add any information to it.
Next is the ‘# of ensembles’ field. If you are building an Action that is meant to loop forever, like an Idle Action, then you ought to type in the number 0. If you are building an Action that is meant to play a limited number of times, you can type in any number *OTHER* than ‘0’. I typically just type in 1.
Then comes the ‘After playing’ field. This field tells the Action what it should do once it stops playing an Ensemble. If you have multiple Ensembles that you want to have play at random (even sometimes choosing the same Ensemble twice), then you choose ‘Pick new Ensemble’. If you want to play the same Ensemble every time (like if you have only one Ensemble in the Action), then you choose ‘Pick same Ensemble’. The third option, ‘Cycle Through Ensembles’ is only for testing purposes and may not give you reliable results in IMVU.
Editor: stance.Sitting
If you want your Pet to have different behaviors/positions when the avatar is standing vs. sitting, not only do you need to make your main Idle Action called stance.Standing but you must also make a secondary Idle Action called stance.Sitting.


Editor: Test Idles
Once you have added your Idle Actions, animation assets and Saved your Pet, it is a good time to test whether all of the Actions in your Idles work. To do this, you can set the After playing field to Cycle through Ensembles and then press the Play button. This will play all of the Ensembles included in the Action in consecutive order. If an animation asset doesn’t work properly, or if your Ensemble loops and/or blends are not working, then you can easily fix the individual assets, re-Save and test again.
Editor: Triggers
Once you have added and tested your Idle animations, you can add new Actions for your Trigger words. There are only two technical differences between these Actions and the ones you just set up.
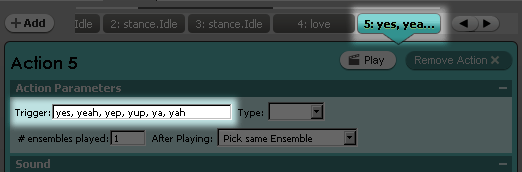
Another cool feature of triggered Actions is that you can add comma separated lists to the Trigger field. This powerful feature allows your Accessory Pet to feel more alive. For example, in the image below, Action 5 is triggered by all of the following text commands:
yes
yeah
yep
yup
ya
yah
Editor: Test Test Test
I can’t stress enough how important it is to test your Pet product repeatedly as you build it. In fact, I often save a new version of the Pet every time I add a new bath of assets. New Idle Action with multiple Ensembles? Save as. New series of Triggered Actions? Save As. This is important because it is possible to add corrupt or broken assets to a CFL that make it impossible to open later. It is…an emotional challenge…to lose all of the work you put into getting the skeleton, meshes, materials, and Idles perfect just to have some random Trigger asset ruin the whole product.
Editor: Save Save Save
Save repeatedly. Be known as a furious saver. Save like your power could go out at any moment.
![]()
Editor: Jazz Jazz Jazz
This is probably the most important thing to know about any Pet you build….. OK. Fine. It really isn’t. However, you’ve got to admit that the title fits in nicely with the whole ‘Test, Test, test’ ‘Save, Save, Save’ thing…
Submission Tutorial