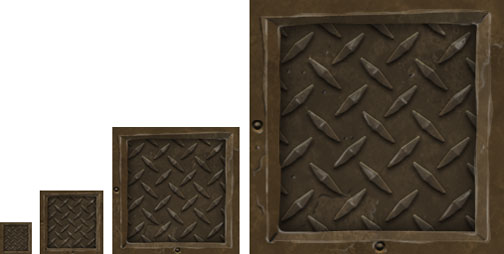
When you create textures for your IMVU products it is important to remember this rule…
Make sure your textures have dimensions that are Powers of Two! This means the width and the height of your textures have to be a combination of 32, 64, 128, 256, 512.
So, you can have a texture that is 128 x 128 pixels, or 128 x 256, or 256 x 512, and so on. The reason for this is that IMVU optimizes textures before they ever make it to the 3D window of your customers. This means that if you submit a non-standard texture size, the submissions process will squash and stretch your texture to make it conform to these dimensions, and undoubted reduce the quality of your design.
 Although it is conceivably possible to submit non-standard texture sizes, the process used to make them conform will potentially ruin the very effect you are trying to achieve.
When in doubt, pre-size all your textures to these dimensions and feel confident that your work will look as good in the IMVU Client as it did in the 3D application you created it in.
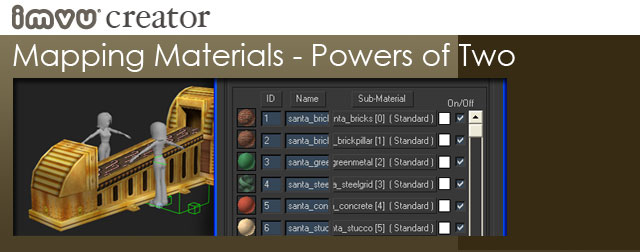
Mapping Your Mesh
Texture mapping in any 3D program is an art all its own. However, there are a few IMVU specific things that you ought to know before you can export.
One Multi-Sub Material
If you are using MAX, you may only have one material on your model. This material can contain as many Sub-Materials as you like and can therefore be a “Multi-Sub” material.
If you are using another 3D program, it is likely that you will have to have separate top level materials. This may result in your needing to have more meshes than described in this document.
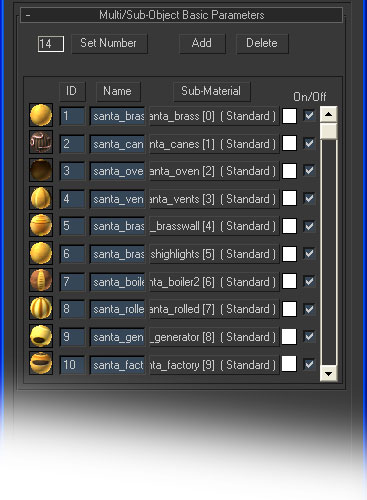
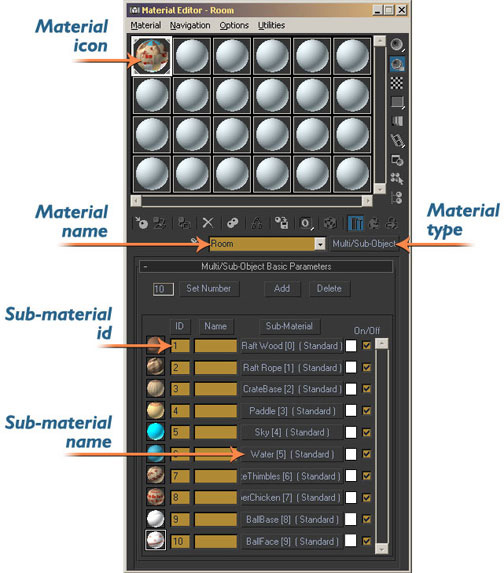
Multi-Sub Material naming convention
When creating your materials for IMVU products, you must follow a simple numerical naming convention in order for your textures to show up in the Create Mode Editor. Each material name must contain a bracketed number at the end of the name.
For example, FrogTexture [2]
The number contained in the brackets is always one number less than the material index in MAX. Therefore, every time you have a material in index 1 in MAX, that material’s name must contain [0] at the end of its name.
If the index is 6, the convention is [5]. If the material is 10, the convention is [9] and so on. It is actually pretty easy once you know what to do. It is also easy to forget if you’ve never done it before. Very easy.
Another thing to consider when naming your sub-materials is that they need to be consecutively numbered.
You cannot have four sub-materials number [0], [2], [7], [22]. If you have four sub-materials, those materials must be numbered [0], [1], [2], [3]. Otherwise, you will end up with a product that will eventually not load.
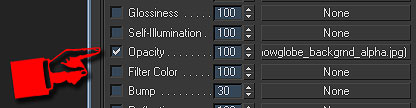
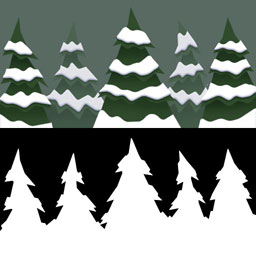
Alpha Maps
Another technique you have at your disposal is the use of Alpha Maps, or Opacity Maps. These are additional black & white bitmaps that you apply to a texture to create a “cutout” effect. Opacity maps can also be used to create translucent materials. An Alpha or Opacity Map works like a frame, solid White becomes opaque, Black is transparent, and shades of Gray are various levels of translucency.
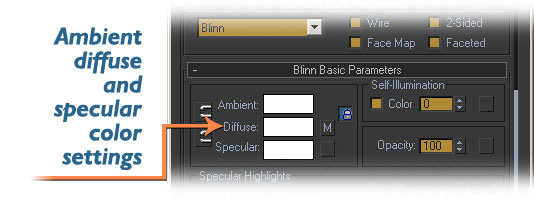
Ambient Color
It is possible to dilute the color of your sub-material using its embedded ambient color setting. To be clear, this is the ambient color setting that is actually part of the sub-material and NOT the Scene ambient.
IMVU exports the ambient color that you can’t see in your 3D program so, when you load your sub-material file in the Create Mode Editor, you may be startled to see that your once bright and happy colors are now grey and sullen.
The fix is simple: every time you create a new sub-material, make sure all of the sub-material’s light settings are set to pure white. Pure white = no ambient interference.