 The IMVU Catalog is filled with 3D generated products, and the success of any good 3D product is the quality of the textures applied to it. A Texture is the two dimensional artwork that is applied to a three dimensional “Mesh”.
Adding a texture to a 3D mesh is much like wrapping a package, or covering a piece of furniture with patterned paper. Applying a texture to a 3D surface is called “Mapping” and can be the most time consuming aspect of creating a 3D product, and can be the difference between a professional or amateurish model.
 IMVU is founded on the idea that many products in our catalog can be Derived from. This means that if a product is set as derivable, other creators can alter that item and sell it as their own. One of the most popular methods for deriving a product is to swap the textures applied to that product.
Creating & Mapping Textures
Textures are primarily created using a 2D application like Photoshop, although there are many software options out there to choose from. You will also run into a variety of ways in which textures are applied to a 3D Mesh. Here are a few examples of how a texture, or group of textures, might be use on a 3D Product. 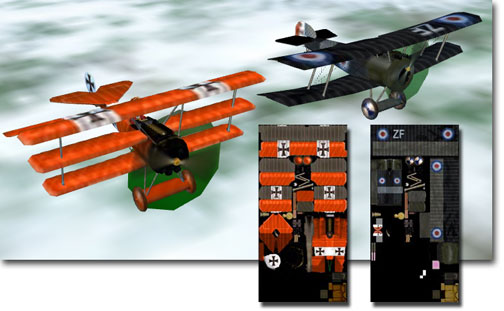
UnWrapped Texture
When creating a texture map for a 3D Mesh, some developers will UnWrap their mesh so that all of its many surfaces are laid out like a paper cutout. Each part is then painted individually, making it easier for a developer deriving from the model to swap the original texture and have a fairly good idea where the changes will be appearing on the pre-existing surface. ![]()
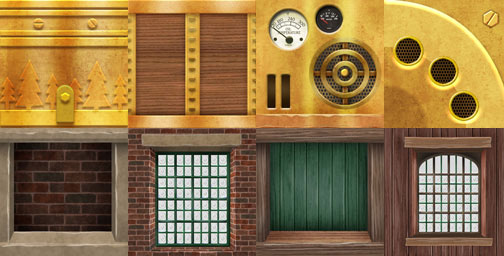
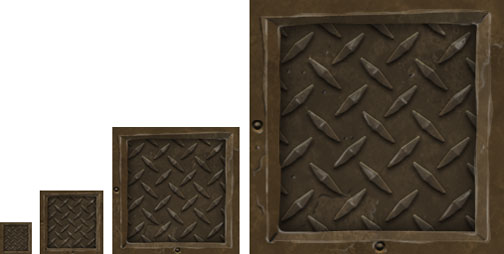
Individual Textures
Other products may include a collection of individual textures that are applied separately. This is handy if a pattern, like wood grain, is repeated over multiple surfaces, or if a texture is going to be Tiled over an area larger than the single texture size (note the puple wood texture). This examples shows eight individual textures that were used to create this one product.
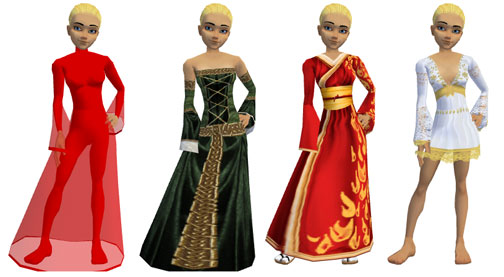
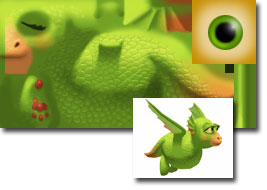
All in One Textures
Some Meshes, like those used in Avatars or Pets, are often comprised of one texture that includes all aspects of the finished model. This means that every surface is represented, and might also include shading that suggests turning form and highlights. This is very like the UnWrapped texture, but takes into account the organic nature of the finished model.
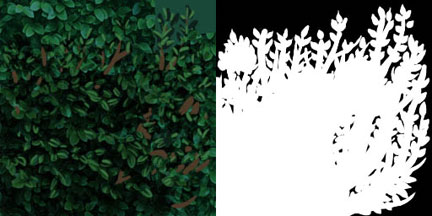
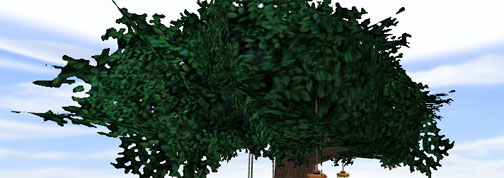
Opacity Maps
Another texture type you may run into are Opacity Maps, or often called Alpha Maps. Theses are additional textures that are added to a texture to indicate what areas are opaque and what are transparent. An Opacity Map is a black and white image with white representing the solid areas and black the see-through areas. Shades of gray are used to create levels of transparency, like might be seen through a shower curtain or the surface of water.
Particle Textures
Only recently introduced to IMVU is the use of Particles in our 3D products and environments. Particles are points within your 3D model that can be animated to simulate natural or magical properties. Each particle can have a texture applied to it, so you can simulate water droplets, fire, falling snow, smoke, or anything else you can imagine. Like Opacity Maps, particle textures can be transparent, but they use a different file format that allows for transparencies to be built right into the texture itself. These textures are saved as a .PNG file and should be no larger than 32×32 pixels square. In this video example you can see particle textures at work. In the fountain you will see splashing on the surface of the water, and on the lava throne, sparks jump up out of the lava in the surrounding pools. There is so much more that can be done with particles, but it can take a lot of work to get them to look just right. It is also important to note that a ton of particles in your scene will slow down the frame rate of the 3D environment. When in doubt, be sparing with the quantity of particles you apply to your 3D products.
Make sure your textures have dimensions that are Powers of Two! This means the width and the height of your textures have to be a combination of 32, 64, 128, 256, 512.
So, you can have a texture that is 128 x 128 pixels, or 128 x 256, or 256 x 512, and so on. The reason for this is that IMVU optimizes textures before they ever make it to the 3D window of your customers. This means that if you submit a non-standard texture size, the submissions process will squash and stretch your texture to make it conform to these dimensions, and undoubted reduce the quality of your design.
Although it is conceivably possible to submit non-standard texture sizes, the process used to make them conform will potentially ruin the very effect you are trying to achieve. When in doubt, pre-size all your textures to these dimensions and feel confident that your work will look as good in the IMVU Client as it did in the 3D application you created it in.