
We are often asked how we come up with our product designs for the IMVU Catalog. More specifically, what is our process to get an idea from our heads, through the production process, and eventually in front of our members. We thought we would illustrate our process by using a recent project as an example. These steps are by no means the only ones, in fact you may have a completely different method for reaching your end goals, but for us, these have worked successfully. If you are looking for specific information on any one of these areas of production, we encourage you to search through the Content Creator Tutorials section of the site.
For our example we were given the task of coming up with a holiday themed bundle for the Catalog. Since the previous year we went for the obvious Christmas tree with snow lodge setting, we thought we should come up with something that would be fun for us to produce, and perhaps be unique in the ocean of seasonal offerings. We decided to mix the idea of Santa’s Workshop with a Steampunk twist to it. We have found that we do our best work if we are inspired by its theme, which is often confirmed by higher sales.
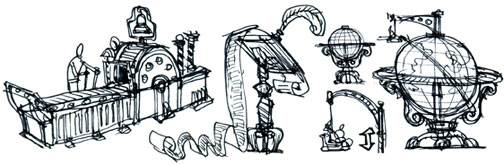
Concepts Sketches
Although not a prerequisite, I often start a new product design by sketching it out in my sketchbook. These can be very quick thumbnail drawings, but even in this rough form they hold information that will help guide me through the 3D building process, and act as a reminder of what my initial intent was for the specific product.
When I am sketching I keep mental notes on what elements might animate, what colors and materials I might use, and how each of these separate elements might work together in an eventual Bundle. If another artist was to be building these I would be much more explicit with my descriptions and drawings.
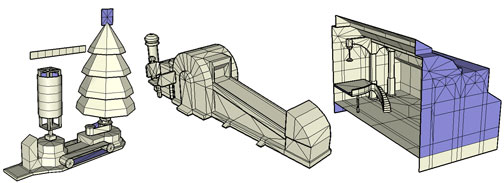
Rough 3D
Next we start the process of building the 3D Meshes that will comprise our finished product. Although many developers happily jump into 3D Max to start their modeling, I personally like to play around a bit first, roughing in my ideas, making quick changes as I decide what will work best for this particular product. Once I have something I am happy with, I will really get to work.
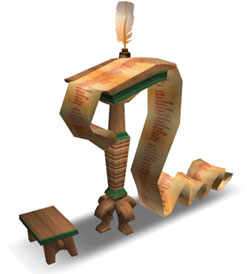
Texture Mapping
Now it is time to create the textures we will be applying to the surface of our 3D Meshes. If I were to break down my process, I would say that I spend 10% of my time on the Mesh, 10% Teching my model, and 80% creating and adjusting my textures for that model. I am always surprised how long it takes to make textures work just right, but it can make all the difference when it comes to the final look of a product. Although it is tempting to use photographic reference, I have found that unless I am very clever, I can never really get away from the telltale appearance of contradictory shadows, grainy surfaces, or too much contrast, that are typical of photographic reference.
I also make sure that my textures work together in both color and value. If my textures contrast too much when placed side by side, then they will not work well together in my model. To achieve this I try to keep the contrast in my textures to a minimum so that no one part stands out more than another. If there is contrast, I make sure the shapes are simple and bold.
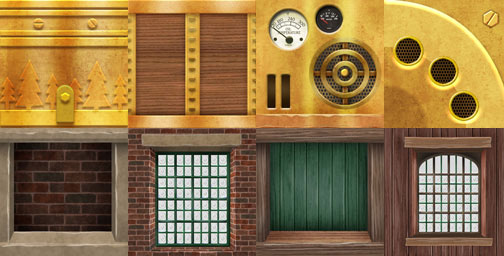
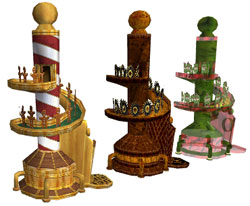
Sense of Place
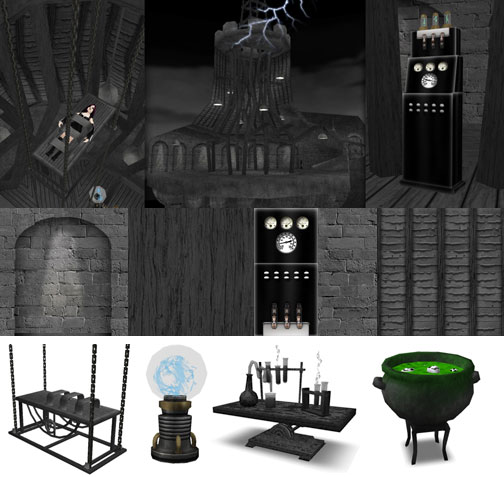
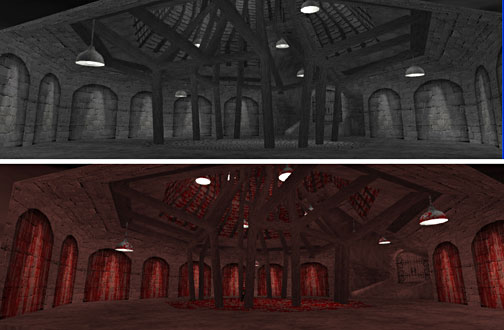
With our textures built and applied, we next make sure that everything is working together to create a cohesive theme. If we are creating an environment for multiple products to live within, we make sure to focus a lot on the sense of place, or the foundation story behind the Room our various products that will be living within it. In the case of both the Santa’s Workshop and the recent Halloween Frankenstein’s Laboratory, each had their own specific color palette and ambient lighting.
For the Workshop we went for a warm ambient light with very little additional fog, while the Laboratory had a gray ambient color suggesting a classic monster movie, and much denser fog settings. We also made sure that the colors we used on all of the products fit well with the eventual lighting and textures used in the final themed Room.
Designing with Multi-Use in Mind
In the case of the Frankenstein’s Laboratory we were asked to create an Access Pass version of the same room. This was relatively easy to do with a quick texture swap and lighting change. Our classic monster movie environment quickly turned into a slasher zombie interior with some liberally splattered blood. It also proved to us that if you feel you have gone too far… perhaps you can push it just a little bit more?
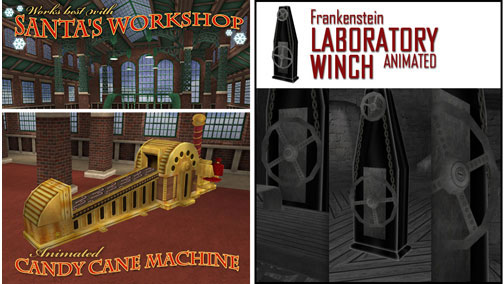
Adding Animation
Now that we have established a look for all of our products we can consider what else we can use to make our environment come alive. Nothing makes a product more fun to look at or interact with than if you add some sort of animation to it. Whether I add a moving texture on the surface of a model, or move some part of the Mesh itself, adding animation just makes your products that much more exciting.
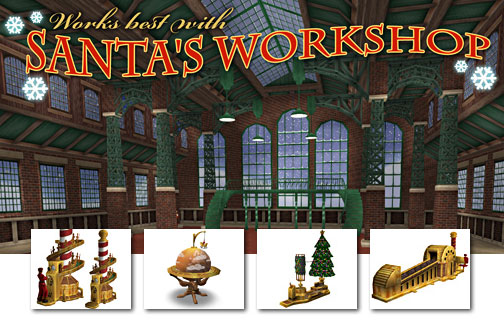
For the Steampunk version of Santa’s Workshop we added lots of moving elements, both textures and mesh, knowing that when put together they would add kinetic complexity to the environment. We also added falling snow outside of the window to add further movement and variety to the space.
Advertising Your Products
Once the Meshes are built and imported into the Catalog, now you have to start promoting it. When we are creating a Bundle we like to visually tie all of the products together. Because we have created an environment for our products to live in, this becomes the perfect backdrop for promoting those products.
Creating a placeholder Catalog Snapshot to get the product into the Catalog, we then load everything up and start taking screenshots that really show off how nice our products look within that environment. These screenshots will later be the base for new Catalog Snapshots and Ad images to replace the older placeholder versions.
In the end, we aren’t just selling 3D objects, we are selling a Story, and suggesting that to fully experience that story it helps to purchase all of its corresponding props.
Thinking In Bundles
When designing a new product for IMVU, we are always thinking about how it might work with other products to create a specific theme, or product line. In the case of our Steampunk inspired Santa’s Workshop, although two designers were working on the products separately, we both agreed on a color palette, consistent aesthetic, and even shared textures to make sure everything worked well together. These types of projects can be the most fun, as designers often bounce ideas off of each other and inspire the other to think beyond the obvious when they come up with their product ideas.
We could stop there, but why not take it just a little bit further. Our final touch is to create a video that helps really showcase how all of these various pieces work together to make an entire virtual experience. With some screen capture software, a little editing and some music, we can add a video promotion to our product pages to further help sell just how fun and kinetic our new Santa’s Workshop really is. When it comes to self promotion there is really no limit to the fun you can have, and you might as well show off your work in the best possible light.
Derivable or Not Derivable?
One unique aspect to all things made for IMVU is that each Creator can choose to set their creation as Derivable. In our case, unless a product is an IMVU Collectors Item, we always set our products as Derivable.
Our reason for doing so is to promote just how much fun it is to create products for IMVU, and help new Developers by letting them see how we put our products together. We hope to inspire through example, but we are just as inspired by the work that other Developers do. We believe that allowing other Developers to derive from your products further connects you to an ever growing community of talented artist, designers, and programmers.
We hope this gives you some insights into how we go about creating products for IMVU, and gives you some ideas of your own. Everyone is unique in the way they create and promote their work, and we look forward to seeing what you come up with! See you in the Catalog!