![]()
For the purposes of this tutorial, we will be building the head in 3DS MAX.
OK. Straight up. No lies. Building a *complete* avatar head is REALLY hard. It is not for the feint of heart. The road is frought with peril and disappointment. However, the bright light at the end of that road is that it *can* be done and is very rewarding. I mean, come on: you can make your own head in IMVU. That is so cool! You can choose to make these heads as big or as small as you like and the heads can be anything your imagination can conjure up.
The Curse of the Corrupt File
While its true that building a head is hard because 1) you need to know how to model fairly well, 2) you need to know how to use Physique fairly well, and 3) you need to have a deep understanding of how to make morph targets, the hardest part of making a head is file corruption [insert eerie music here. Note: music may contain someone playing a saw].
Your file may not become corrupt the first time, or even the second time you build a head. However, please know that a corrupt head file is waiting in the shadows and will strike you when you can least afford it. Best to keep whistling ‘Singin’ in the rain’ while you work. This confuses the dreaded corrupt file.
A MAX file can become corrupted for a number of reasons. One of the sure fire ways to get a corrupt file is to make multiple copies of a single mesh and perform the same actions on those files – which you will no doubt do in order to save yourself gobs of production time. I am guilty of this same act and, sometimes [most of the time] it actually works. However, sometimes, I collapse the stack on a bunch of meshes and….my file size rises inexplicably each time I save…eventually making MAX unusable and making the file un-openable…and, in some very rare cases, killing the fan on your graphics card! YIKES!
So, now that you know what you are getting into, read on, intrepid soul…
Example Head Files
To build a new head, specifically, it is *really* helpful to begin with an avatar that is positioned in the ‘weighting pose’….and that also has all of the morph targets actually living in the file. This, of course, means that the files are MUCH larger than the master weighting poses found on the Avatar Body Parts Introduction. This makes them a little harder to work with as it takes a beefier computer to deal with the complexity of the file.
The female .zip file also contains product61995.cfl, example female head textures, and the master skeleton file. The male .zip file also contains product59086.cfl, example male head textures and the master skeleton file. All of these files will come in handy later when using an Editor in Create Mode.
Example Head Contents
The Example 3D Head files contain everything necessary to export a functional, animating Head mesh. This includes a master head mesh, morph targets, the avatar skeleton and default body meshes.
Build Mesh
Build Mesh – Geometric Complexity
A head can be as simple as one polygon, if you so choose. It can also contain as many or as few morph targets as you like. The IMVU heads supplied can be pushed and pulled to become a wide variety of head shapes while still maintaining the same mapping across problem areas (like eyes and lips). By using the supplied head, you also get the benefit of knowing that other products like skin, eyes, and eyebrows will work on your head too.
Build Mesh – Parents and Children
The mesh that actually gets texture mapped, weighted to the skeleton and exported is the ‘parent’. All of the morph targets are called ‘children’ in that they get linked to the parent in order to be included in the mesh export.
Build Mesh – Adding or removing vertices – your friend?
Morphs are interesting creatures in that they are pretty much a morph target or not. A morph target is an EXACT DUPLICATE of your original mesh but with some vertices pushed and pulled into a new location (like, a smile or blink). This means that adding or removing vertices (even just one vertex) will change your copied mesh from a morph target to just another mesh. Vice versa, adding or removing geometry from the parent will render all of your morphs useless.
Said another way, if you build a mesh and then build out all of the morphs and THEN realize that you need one more vertex to get the shape you want on the morph….you should realize that you will have to rebuild all of your morphs from scratch.
Do not be afraid of this, however, as it is bound to happen. Haha – one of the reasons making heads can be so hard is because it requires patience.
Build Mesh – Match the neck EXACTLY
If you are building a head that is meant to blend seamlessly into the tens of thousands of upper body products in the catalog, you must match the neck vertex positions exactly to those of the upper body mesh supplied in the Example Head file.
To do this, just click the move icon and turn on the Snap tool. Then, when you click on a vertex and move it around, it will try to snap to another, nearby vertex. In this manner, you can move each neck vertex in your head mesh *near* the appropriate neck vertex in the body mesh and it will ‘snap’ to the exact same 3D space as another vertex.
Build Mesh – Big heads are not just for egomaniacs
The default avatar heads in IMVU are of an enlarged, anime style. All of the accessories and hairstyles in the catalog have been built to fit these default heads. This adds a level of complexity to those of you who plan on making a head that is meant to work with those existing products.
Basically, in MAX, your head will look enormous in order for it to fit the original hair, accessories and neck.
This is OK, though, as you will be able to reduce (or enlarge) the size of the head later in an Editor in Create Mode. You can also change its depth so that a squat face in MAX can end up looking normal in the Editor.
In MAX, an oversize head with no penetration on hair or accessories = good.
Build Mesh – Mesh Scale
It is really important that you understand that you can change the size and depth of your head file later on when using the Previewer. If you want the head to work with existing hair and head-accessory products, your head will need to fit within the glasses and hair supplied in the example head files. Sometimes, this means the head mesh file can look squished (from front to back.)
Build Mesh – Half a Head
Symmetry is a good thing. Humans react well to it especially when it is applied to a head. Models are often hired because of their facial symmetry. What’s more, when building a 3D head, working symetrically can save you SO MUCH TIME.
So, start with half a head and get that half looking pretty darn close to how you want it. Add the eyes. The eyelids. The eyebrows. The lips. The teeth. The tongue. The cheeks. The ears. Get all of your material IDs set up. Get the texture mapping right. All of it.
Build Mesh – Separate Eyes and Eyebrows
It is important to note that it is MUCH easier to animate the eyes and eyebrows if they are geometrically separate from the rest of the head.
This does not mean that they should be separate pieces of geometry (ie – different objects in the scene.) Rather, no vertex of an eye should be connected to any part of the rest of the head. This allows you to more easily move the eyes around within the eye socket when building your morphs later.
Build Mesh – Anticipate Morphing
One of the biggest mistakes that first time head builders make is not giving themselves enough geometry in areas of the face that are going to move/animate later on.
For example, when building the eyelids, you can safely assume that they will be made to blink. This means that they need enough geometry to get around the full, rounded shape of the eye.
The areas of the head that require the most geometry are the eyes, mouth, nose and cheeks. By far, the highest concentration of vertices is around the mouth because it is meant to take on a myriad of emotional shapes.
Build Mesh – Cheapskate
An avatar head is the most expensive part of the avatar from a file size, download and rendering point of view. This is because it typically has the most complex geometry as well as morph targets. Each morph target makes your final, exported mesh .xmf file a little larger. For example, some IMVU heads have 72 morph targets while others have 30+. An avatar built with the larger number of morphs is roughly 300k while an avatar built with the smaller number of morphs is roughly 200k.
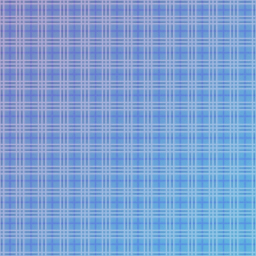
Build Mesh – Aide: Plaid is the New Black
As mentioned on the Avatar Body Parts Introduction, IMVU users expect their skin texture products to work perfectly across all clothing meshes. When their skin texture products do not work perfectly, they get upset, leave bad reviews and spread the word that your products are unreliable. So, please err on the side of delighting your customers and use the texture mapping IMVU has already lovingly built for you.
To the left is the 256×256 plaid texture we use to make sure that our mapping is near perfect. When this texture is applied to the avatar head in MAX, the horizontal and vertical lines are drawn as near straight as possible. This should allow you to more easily see how the skin on your new mesh is mapped and, more importantly, whether or not it matches what is on the master meshes.
Build Mesh – Material IDs and Texture Mapping
The avatar head material IDs are:
Material 2 = Head (skin)
Material 3 = Eyes
Material 4 = Hair
Material 5 = Eyelashes
Material 6 = Eyebrows
When a polygon in your head is given a material ID of, say, 2, then that polygon will display the skin texture in IMVU. This is really handy for those of you who are building heads that are meant to work with existing skin, eye and eyebrow products.
To handle this, we rely on the name of the material to dictate what ID it is. That is is why we use the following naming convention for materials:
materialName [0]
Build Mesh – Copy Initial Half
Once you have your half-head built and mapped the way you want it, its time to make the other side. Doing so is pretty easy. In fact, once you’ve done it a few times, you’ll find its easier than watching grass grow. OK…so maybe not THAT easy…
Build Mesh – Mirror
With your copy selected, click the Mirror button along the top panel in MAX.
This will launch the Mirror: Screen Coordinates dialog box. Since you have built, say, the right side of a face and want to now create the left side, you want to mirror the copy along the X axis only. Also, make sure that ‘No Clone’ is selected.
Then, click OK and watch the copy *MAGICALLY* fliperoo. (I don’t know if its a technical term but it FEELS good to say. Go ahead. Say it out loud….you can do it….go on…..theeeere. Now wasn’t that fun?)
Build Mesh – Select Material ID [2] of Mirrored Mesh
You are preparing to flip the mapping on the flesh of the face. In the material ID section, select all polygons that have been labeled as material ID [2].
Build Mesh – Unwrap UVW & Flip Mapping
With the face mapping verts selected, set the Mirror Mapping tool to Horizontal and click it. This will flip the mapping for the selected mapping verts.
Now, set the move tool to horiz only and then drag all coordinates far off map to the left. You will put them all together later. The important thing is to get all of the mapping flipped on the mirrored head so that users can customize both sides of the face.
Follow the same process for the ears and tongue. You can leave the neck, teeth and inner mouth alone.
Build Mesh – Oh, Snap!
With your copy still selected, click the move tool and then turn on the Snaps Toggle again.
Now, select an edge vertex on your copy and move it to the matching edge vertex of the original. It should snap perfectly into place.
Build Mesh – Attach
Now select your parent head. Then, in the Edit Geometry drop down, enter ‘Attach’ mode. Then, click on the copy to make the two meshes into one.
Build Mesh – Select
With the two halves now one, it is time to make sure that all of the verts along the center seam are actually in a perfectly straight, vertical line. This is so you can weld them in the next step.
Select the head and enter Edit Vertex mode. Make sure you are looking at the head from the Front view and then drag along the very center of the head. This will make sure that you get all of the vertices on the inside of the mesh as well as on the outside.
Build Mesh – Weld
With all of the center verts selected, click the Weld: Selected button. This will make all of the duplicate vertices disappear and give you one smooth mesh to work with.
If you didn’t do this step, then, no matter what you did, your head would look like it had a seam down the center of its face. This is because the smoothing groups between the two heads could not be made to be the same.
Build Mesh – Wrap it up
Now that you have one solid mesh for a head, it is time to wrap it all up. The first step is to go through the material ID [2]/3 selection process again and get the mapping straightened out. This is pretty simple, actually, as you just need to select the mapping you placed well out of the way and move it into place. When the center boundary verts are in place, you can target weld them using the Mapping Vert Target Weld tool. This will make sure that the mapping across the forehead, nose, lips and chin is seamless.
With the Mapping done, you can move on to weighting.
Test #1 – Weight & Export
Once you have a finished head mesh complete with proper material IDs and texture mapping, it is time to test whether that head, without any morph targets, works in IMVU. To do this, the head needs to be weighted using Phsyique.
Once the head is weighted, you can export it as an xmf as usual. To learn more about exporting .xmf files, please go to the Exporting the Mesh – .xmf Tutorial. As a reminder, this tutorial assumes you are building a new head for use on the IMVU avatar. This means that you can use the skeleton .xsf file supplied with the master weighting ZIP files when exporting your mesh .xmf file.
Test #1 – Create Mode
Open Create Mode and choose to derive from an IMVU head product like product 59412 for females or product 59087 for males. To learn more about Create Mode, please go to the Create Mode Introduction.
With a Create Mode Editor open, click on the Meshes tab and then browse to your newly exported xmf asset. Click the Apply Changes button and verify that:
- Your head mesh actually appears on the avatar (this lets you know that there is no issue with the mesh itself)
- Your head mesh moves with the head bone (this tells you your weighting is correct)
- The correct textures appear on your head (this tells you your mapping/material IDs are correct)
If any of the three above are not met, you need to go back and resolve the issue. If things look good, then you know your base head works great and it is time to add morphs.
Morph Basics
Below are a few avatar head-specific morph tips.
As far as IMVU is concerned, a good set of morphs = a set of morphs that:
a) Don’t penetrate or tear pieces of the face when played back and
b) Clearly express the emotion of the character when their head takes up less than an inch on screen (no easy task).
Morph Naming Convention
Morph targets in IMVU use a naming convention that dictates what kind of morph they are. This naming convention must be used or your morphs will not play back in IMVU. An example of a properly named morph target is leftBlink.Clamped where the .Clamped suffix is the morph type. The prefix of the name can be anything you like. Here is a breakdown of what the four morph types are and what they mean:
.Clamped – allows multiple morph animations to affect the channel but clamps the sum of their effects to 100%
.Averaged – allows mutlipe morph animations to affect the channel, averages the result.
.Exclusive – allows only one morph animations (the most recent one applied) to affect the channel, no cap on value (i.e. allows values greater than 100%)
.Additive – allows multiple animations to affect the channel, values are added together.
For the purposes of this tutorial, we will name our Morph Target ‘Morph.Exclusive‘.
Avatar Head Morph Names
Below is the full list of morph names IMVU uses in its base avatar heads. There are 79 of them. These are the morph names available to you if you want to make a morph animation using the IMVU base avatar heads. See them in all their glory:
blink.Left.Lower.Clamped
blink.Left.Upper.Clamped
blink.Right.Lower.Clamped
blink.Right.Upper.Clamped
blink.Wide.Left.Average
blink.Wide.Right.Average

eyebrow.Left.Angry.Average
eyebrow.Left.Down.Average
eyebrows.Left.Center.Up.Average
eyebrows.Left.In.Average
eyebrows.Left.Mad.Average
eyebrows.Left.OuterDown.Average
eyebrows.Left.OuterUp.Average
eyebrows.Left.Sad.Average
eyebrows.Left.Up.Average

eyebrow.Right.Angry.Average
eyebrow.Right.Down.Average
eyebrows.Right.Center.Up.Average
eyebrows.Right.In.Average
eyebrows.Right.Mad.Average
eyebrows.Right.OuterDown.Average
eyebrows.Right.OuterUp.Average
eyebrows.Right.Sad.Average
eyebrows.Right.Up.Average

Eyes.Bugged.Left.Average
Eyes.Bugged.Right.Average
Eyes.POP.Left.Average
Eyes.POP.Right.Average
Eyes.Scale.Left.Average
Eyes.Scale.Right.Average

left.Eye.Down.Clamped
left.Eye.Left.Clamped
left.Eye.Right.Clamped
left.Eye.Up.Clamped

mouth.BigSmile.Exclusive
mouth.BigSmileLEFT.Exclusive
mouth.BigSmileRIGHT.Exclusive
mouth.Bite.Left.Exclusive
mouth.Bite.Right.Exclusive
mouth.CheekLEFT.Exclusive
mouth.CheekRIGHT.Exclusive
mouth.Cheeks.Exclusive
mouth.Down.Exclusive
mouth.F.Exclusive
mouth.Frown.Exclusive
mouth.FrownLEFT.Exclusive
mouth.FrownRIGHT.Exclusive

mouth.Grin.Exclusive
mouth.GrinLeft.Exclusive
mouth.GrinRight.Exclusive
mouth.JawDown.Exclusive
mouth.LeftSmirk.Exclusive
mouth.RightSmirk.Exclusive
mouth.MadLip.Exclusive
mouth.MadLipLEFT.Exclusive
mouth.MadLipRIGHT.Exclusive
mouth.Narrow.Exclusive
mouth.NarrowLeft.Exclusive
mouth.NarrowRight.Exclusive

mouth.OH.Exclusive
mouth.Open.Exclusive
mouth.Pucker.Exclusive
mouth.Scream.Exclusive
mouth.Smile.Exclusive
mouth.SmileLeft.Exclusive
mouth.SmileRight.Exclusive
mouth.TongueDown.Exclusive
mouth.TongueLEFT.Exclusive
mouth.TongueOut.Exclusive
mouth.TongueRIGHT.Exclusive
mouth.TongueTHIN.Exclusive
mouth.TongueUp.Exclusive

mouth.Up.Exclusive
mouth.Wide.Exclusive
mouth.WideLeft.Exclusive
mouth.WideRight.Exclusive

nose.Flare.Exclusive
nose.FlareLeft.Exclusive
nose.FlareRight.Exclusive
nose.Long.Exclusive

right.Eye.Down.Clamped
right.Eye.Left.Clamped
right.Eye.Right.Clamped
right.Eye.Up.Clamped
Blink Morphs
The blinks are very important. Along with the eye morphs, they imply the most sentience as well as help convey a large range of emotion. Here are some things to keep in mind when building blink morphs.
Use morphs on your morphs – Build an extra copy of the head and make one eye blink completely (both lids). For this example, we’ll use the left eye blinks. After you’ve made a head with one eye’s lids fully closed, select your left blink lower mesh, go into vertex mode and select only the vertices of the lower lid.
Then, apply a morpher modifier to the left blink lower mesh. After the morpher is applied, you will see a list of target spots that say ’empty’. Right click on the top one and select ‘choose from scene’. Then, click on the extra copy (mentioned in the first sentence). When you do this, the name of your extra copy will appear in the morpher list. Drag the slider of this entry all the way to 100% and you will see the lower lid of your mesh morph to the position of the morph target. COOL.
When you have the shape exactly how you want it, collapse the stack on your left blink lower mesh in order to reduce file size and make it possible to use this mesh as a target for your master head later. Follow the same process for the upper lid (of course, selecting only the upper lid vertices on your left eye upper mesh)
Sock-et To Me
For each of the four blink morphs, move the eyeballs back into their sockets a little so that the eyeballs don’t penetrate the eyelids as they animate. Not too far, though, or your head will look like its going through withdrawal each time it blinks.
Eye Morphs
The eye morphs are tricky for two reasons. They CAN contain bits from other morphs to make the av feel more alive (if you care about such things). They also need to be tweaked to not look cross eyed in IMVU.
I’ll handle the latter first: The IMVU avatars move their eyes because our code tells them what morphs to play, at what percentage, for how long and when. Our system has been built to accommodate our first two avatar heads: the male and female anime heads.
As is true with humans, the left and right eye movements are not necessarily the same amount of movement from the default position. Said another way, when the left eye looks left, it turns to the left a little more than when the right eye turns left. The amount of adjustment is miniscule but can make the eyes look less cross eyed at run time.
Now for making the avies look more alive: we have two tricks we use on our eye morphs to help the avies look more alive. The first is that we raise the eyebrow a bit on both the right eye right and left eye left morphs. This helps hammer home the illusion that the eyes lead the head before the head turns – a nice effect. We also lower the upper lids on both eye down morphs. Otherwise, the avatars look like they are frightened for their lives every time they look down.
Mouth Morphs
The mouth morphs are the hardest to build and hardest to get right. They are the hardest to build because they affect the most geometry. They are the hardest to get right because it is likely that you will get penetration when several mouth morphs are played in IMVU…if your morphs are not built correctly.
Give Yourself Some Room
Considering the close proximity (and the likelihood of penetration) of the tongue, teeth, and cheeks, it is a good idea to pull the teeth and tongue away from each of the open mouth morphs. By ‘away’, I mean pull them into the mouth.
Fill the Mouth
Although this contradicts the above recommendation, when building the smile morph, you ought to fill the mouth with teeth. Remember, you are not necessarily building the world’s perfect smile. Rather, you are building a smile that will look recognizably like a smile when the head is only an inch tall on screen.
One Side First
using the mirror/align/snap process described above for building blink morphs, you can build out only one side of your face to save time. Then, make a copy of the one-sided smile or frown or whatever – mirror it, align it to your master smile, frown, whatever – and then use the snap tool to move the verts of the unedited side of the face into place. You will have to tweak the center line of verts, of course, but you will end up with a symmetrical smile, frown, whatever.
Morph Groups
You can see in the example head files that we use a standard morph set up. You can have your file set up any way you like. However, we recommend this way of working: separate the eyes, eyebrows, nose, blink, and mouth morphs into separate groups. At the same time, keep your face.average morph close to the parent head mesh so it is easier to see how different from the parent your changes are.
face.Average
Before you go diving into making a whole new head from scratch, I should tell you that there is a MUCH simpler way to build a new head.
There is a morph target included in the IMVU head files called “face.Average“.
By simply moving some verts around on this morph target, you can build a new, fully animated head that works with all existing skin, eyebrow and eye products in the IMVU catalog (VERY cool and more likely to make a customer happy).
Sometimes, you don’t want to take the time to build an entire morph set just to get a new head into IMVU. If you just want to test how a head shape or just want to make a quick head, you can do so by just changing the face.Average morph target.
Just make your changes to face.Average, select the head and then export a new XMF. Load this XMF into your derived product and hit apply changes to see a very different avatar!
Test Combinatorics
The real trick to building a believable head with morph targets is to make sure that all of the morph targets work well together. Do the teeth poke through the cheek when the av smiles? What about when the av smiles and winks? and puckers? and looks angry? Arguably, this is the longest phase of building a head as you really want to avoid ugly penetration at all costs in your final head product. Hint: heads with lots of geometric penetration sell poorly and are reviewed…unfavorably.
If there is any penetration, you need to adjust the morph targets themselves and then reload and test the morphs until you get it just right.
Linking
If all of your morphs work together, it is time to link them to the parent. Click the ‘Select and link’ tool, drag over all of the morphs and then click on the parent head mesh. In wireframe mode, you will see the parent head mesh blink white to let you know the link took.
Then, just select all of the morphs and link them to the Parent head.
Hierarchy
To verify that the linking worked, click the Select by Name button to bring up the Hierarchy dialog box.
The hierarchy ought to have the Head on top with all of the morphs indented underneath it like the image below.
Export – Test Animation
You can export and test your .xmf as many times as you like. I typically test my head after every ‘set’ of morphs is completed.
For example, I test the head when the eyebrows are built, then when the blinks are built, then when the mouths are built, etc. Sometimes, I will test with an incomplete set (because it can take a long time to complete all the mouths. UGH!)
When all of the morphs are done and your head file is working in a Create Mode Editor – SAVE THAT BEEYATCH! Whew. Then submit it and show the world what you’re capable of.