Opa
For the purposes of this tutorial, we assume you have read the Avatar Body Parts Introduction, the Weighting in Phsyique Tutorial, the Export the Mesh – .xmf Tutorial, the Export Materials – .xrf Tutorial and the Intro to Create Mode.
Composite Skin
‘Composite skin’ is the technical name for an item of clothing that is skin tight but does not override the skin texture. This allows IMVU users to change skintight items while keeping their underlying skin texture on and thus still being ‘them’. Even better, it allows IMVU Creators to create clothing items simply by painting them on as opposed to having to mesh, map, weight and export their own entirely new geometries. As you can imagine, composite skin products deliver a pretty broad canvas to those Creators who are better painters than builders.
There really is no special magic involved. Although it might be a bit confusing as to why we built the functionality this way, it works and we are sticking with it! ha.
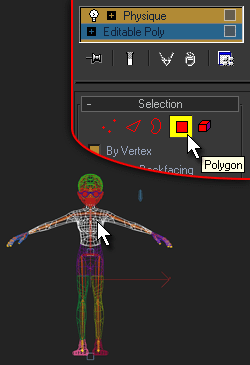
Build Mesh – Select the Mesh
We assume you have already read the Avatar Body Parts Introduction and therefore know where to get the default weighting avatars. No? You don’t remember? Fine. You can get the Female Weighting File here and the Male Weighting File here.
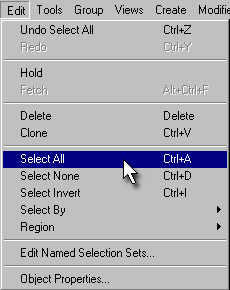
Build Mesh – Select All Polygons in That Mesh
In face select mode, select all of the faces of the mesh.
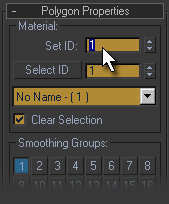
Build Mesh – Change Material ID
Change all of the material IDs on the mesh to material ID 1 – which is the UpperBody [0] material slot.
Build Mesh – Weight & Export

With the mesh selected (it should turn white in wireframe mode), choose Export in the file menu, scroll to the .xmf file format, name your mesh file, click save, choose the avatar skeleton file that comes in the ZIP files found in step 1 and then click next/finish until there are no Cal3D windows visible.
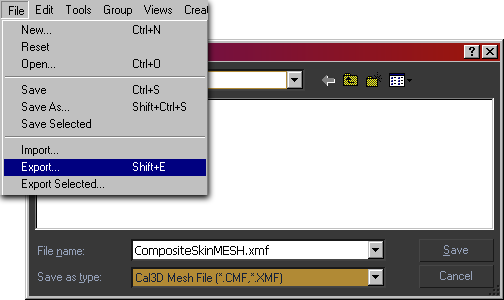
Build Mesh – Make Two Textures
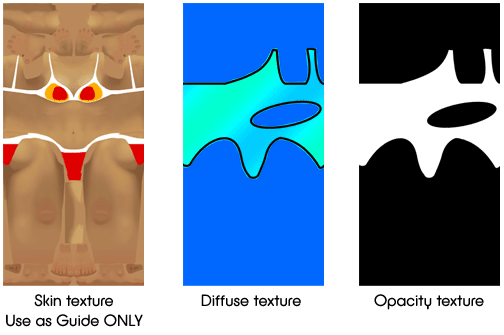
In an image editor like Photoshop, create a diffuse (opaque/color) texture and an opacity/alpha texture that match the size of the avatar’s skin texture. This texture can be either 128×256 or 256×512. So, using an avatar skin texture as a guide, you should make two separate textures: a diffuse texture and an opacity texture.
Create Material – Launch Material Editor
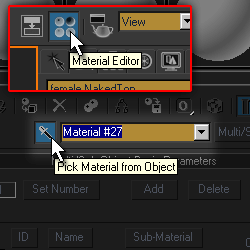
In MAX, open the material editor, use the eyedropper to select the avatar’s multi-sub material and then open the ID 1/UpperBody [0] sub-material – this is the upperbody submaterial.
Create Material – Add Diffuse Map
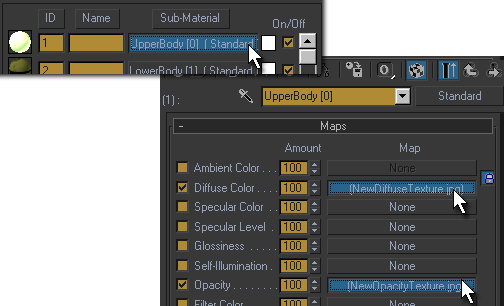
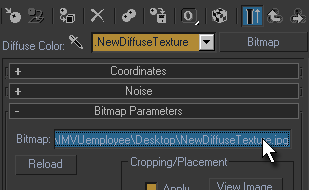
Click on ‘diffuse’ and browse for your newly created diffuse texture. Then hit the back button on the material editor to get back to the ID 1/UpperBody [0] main area.
Create Material – Add Opacity Map
Click on the button that says ‘none‘ next to the word ‘opacity‘ for this sub-material. In the dialog that appears, double click on the top option, ‘Bitmap‘, and browse for your newly opacity map. Now close the Material editor.
Create Material – Export .xrf
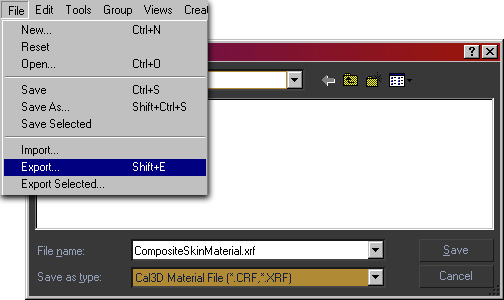
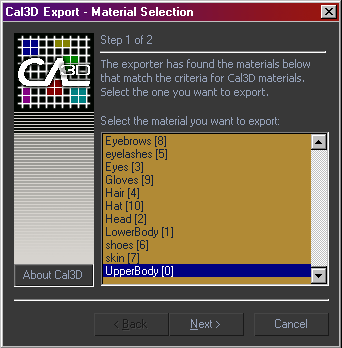
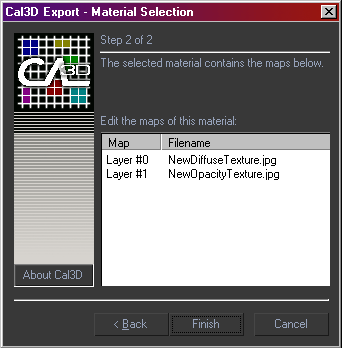
Select nothing in the main MAX window, choose Export, scroll to the .xrf file format, name your material file, choose the material named ‘UpperBody [0]’ and click next/finish until there are no Cal3D windows visible.
Editor – Derive
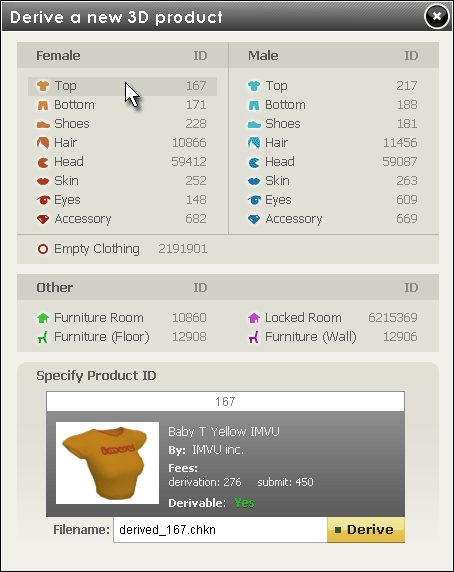
The first step is to open Create Mode and Derive from one of the following products:
Female: product 167
Male: product 185
Editor – Override Body Parts
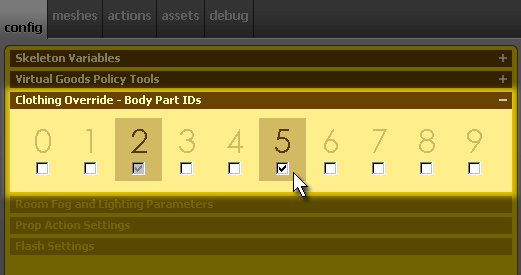
In the Config tab, choose which body part you want your mesh to replace.
Remember: If you want to use multiple body parts (ie – if you want to override both the Top and the Pelvis), you must add .xmf files for each body part you want to override. There are two ways to add multiple body parts to a product: The first is to just click on the ID number in the Config tab. The second is to click the ‘Add’ button at the top of the Meshes tab and choose which ID you wish the new mesh to occupy.
Editor – 1. Add Mesh .xmf
In the Meshes tab, browse for your newly exported .xmf file. and hit the Apply Changes button. Your new mesh should appear with the existing material applied to it. If this is the case, move on to the next step. If this is not the case, then something went wrong in the export process. If so, you will need to check:
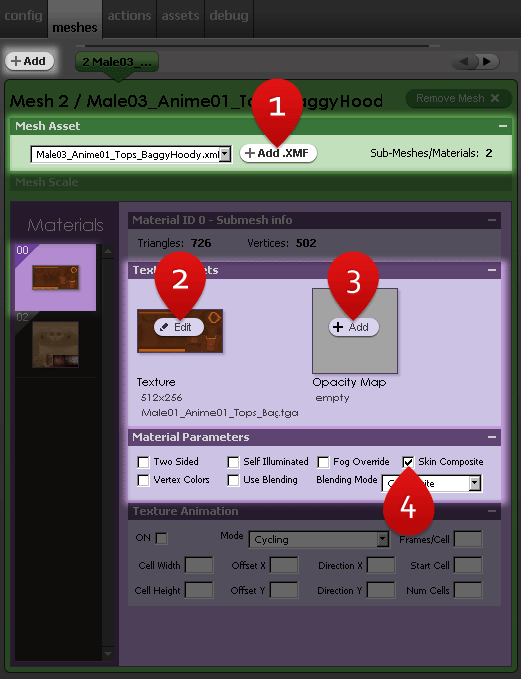
Editor – 2. Add texture
Click the ‘Edit’ button and browse for your diffuse (aka “color”) texture.
Editor – 3. Add opacity map
Click the ‘Add’ button and browse for your new texture.
Editor – 4. Check ‘Skin Composite’
To get your composite skin to show up on top of the avatar skin, make sure to check the ‘skin composite’ check box found in the Material Parameters panel.
Editor – 5. Check ‘Skin Composite’
To get your composite skin to show up on top of the avatar skin, make sure to check the ‘skin composite’ check box found in the Material Parameters panel.
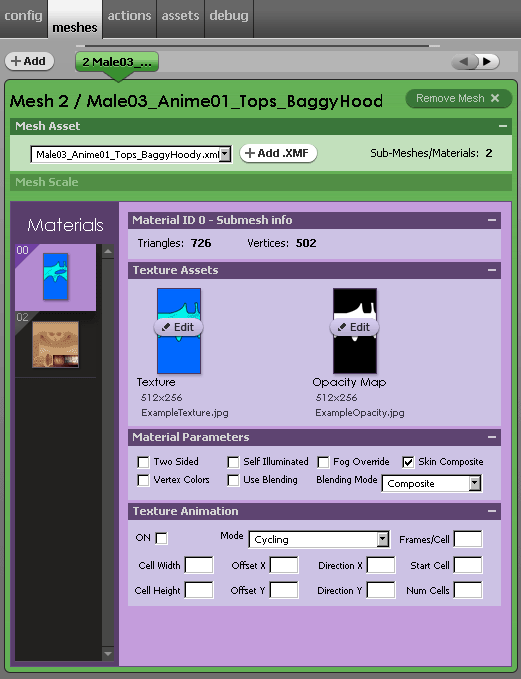
Editor – Save & Submit
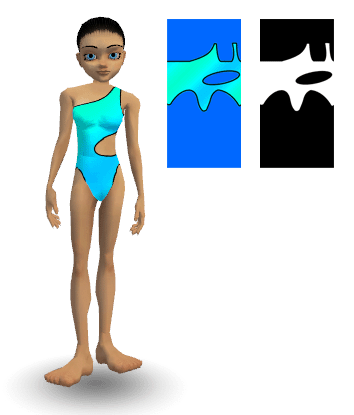
Save this product and Upload it. Voila! You have created a skin tight composite mesh that can be derived from by thousands of Creators from around the world.
