For the purposes of this tutorial, we assume you have read the Avatar Body Parts Introduction, the Weighting in Phsyique Tutorial, the Export the Mesh – .xmf Tutorial, the Export Materials – .xrf Tutorial and the Create Mode Introduction.
Hair Introduction
Hair is one of the most defining characteristics of an avatar. Arguably more so than any other characteristic (of human avatars, anyway). In IMVU, you have the power to create your own hairstyles – anything you can think of. Mohawks. Bobs. Crew cuts. Ponytails. Building beautiful hair is truly an art form. On top of that, there is some technical skill required. For example, you need to know how to build in 3D, build textures, map those textures and weight the mesh. Therefore, building hair should not be considered ‘easy’. That said, once you do it a few times, you will see that it can be one of the easiest body parts to create. While many of the basics of hair construction are shared with other body part creation tutorials, there are enough specifics to warrant its own tutorial. This tutorial will walk you through the essentials of building Hair and Hats.
Get the example files
We assume you have already read the Avatar Body Parts Introduction and therefore know where to get the default weighting avatars. If for some CRAZY reason you didn’t get them then, you can get the Female Weighting File here and the Male Weighting File here.
Build to the Head
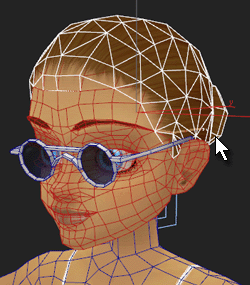
With the hair mesh selected, you can see how it conforms to the shape of the avatar head underneath.
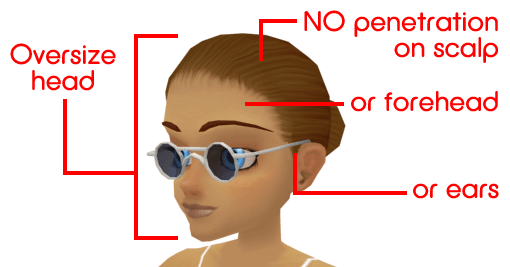
The default avatar heads in IMVU are of an enlarged, anime style. All of the accessories and hairstyles in the catalog have been built to fit these default heads. If you want your hair product to work across most of the IMVU avatar heads in the catalog, then your hair mesh should be built to fit the default avatar head embedded in the master weighting files. Basically, in MAX, your hair will look enormous in order for it to fit the original head. This is OK, though, as the size of the head varies across products due to the mesh scale feature.
Ears & Neck
If you are making a long hairstyle, that is meant to cover the ears & neck, then you can move on to the next section.
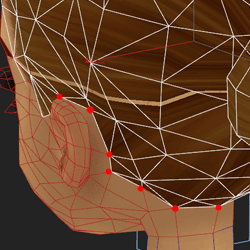
If you need to wrap around the ears & neck for any reason, then read on. Although you are free to use your own shapes, the shape of the hair around the ears & neck typically fits snugly to the head mesh. This is really handy as this means you can avoid ‘Z fighting’ along those edges.
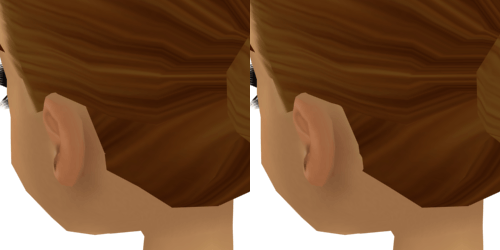
Z Fighting
When two polygons live very close together in 3D space, rendering engines have a tough time deciding which to draw first. The result is an annoying, shimmering effect. This looks especially bad on products that interface with an avatar head as that is what most people are looking at when chatting.
Two Materials
As you know from reading the Avatar Body Parts Introduction, one Body Part can contain multiple materials. For example, the avatar head contains both the head skin, eyes, eyebrows and eyelashes.
Hair meshes can contain two materials: one for Hair and one for Hat. Obviously, you can use these two materials however you like on the body part that is meant to override the hair slot. Said another way, you could use the ‘Hat’ material for a hairclip…or antennae….or a helmet…or a chicken antennae hairclip helmet…thing.
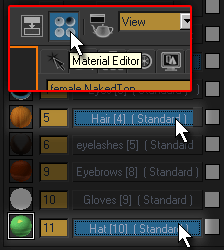
To see the materials in MAX, open the material editor and use the eyedropper to select the avatar’s multi-sub material. The material ID for Hair is ID 5 [4] and the material ID for Hat is ID 11 [10].
Budgets
Please remember to keep the polygon count of your hair down to as low as possible (while still looking like what you intended to build).
One of the biggest complaints IMVU receives is about the time it takes to load a scene that contains avatars with big hair (no Jersey jokes). IMVU will no doubt have to take action against such products in the future. Don’t let your products get procedurally reduced! Please keep your hair products small.
Hats Amore!
Although a hair body part is made up of one body part ID, it can contain a hat as well. Think of it as one product that contains both hair and hat.
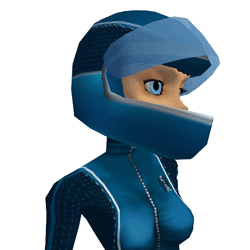
This is handy for things like helmets as you can force the avatar to not wear the spiky mohawk when wearing the helmet.
Mapping
Once you have built your mesh, it is time to map it.
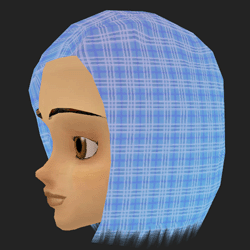
There are some Hair-specific mapping points you should know as well. The most important is that it is a very, very good idea to spend time getting the mapping on your hair to be as highly customizable as possible. This means that the mapping on your hair is detailed and refined. You could apply a plaid texture to it and see each vertical and horizontal line evenly applied to the whole mesh. Giving your future derivers the ability to expand on the details in this way ensures a highly derived product and, therefore, more sales.
To sum it all up, though, you must understand that if you use an opacity map on your Hair body part, then you run the risk of having that hair disappear in some circumstances due to an IMVU opacity bug.
Weighting – Use ‘Skin’ for solid masses
Once you hair mesh is built the way you like it and mapped to allow other creators to easily create textures for it, it is time to ‘weight’ it.
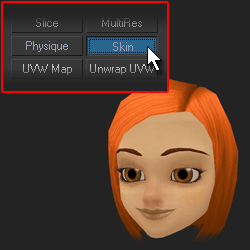
For hairstyles that are meant to move entirely with the head, we recommend that you use the ‘Skin’ weighting modifier in MAX.
Weighting – Use ‘Physique’ for the Rest
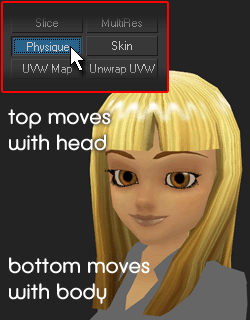
If your hair is meant to move partially with the head and partially with other parts of the body, you will need to use the ‘Physique’ weighting modifier in MAX.
Export .xmf
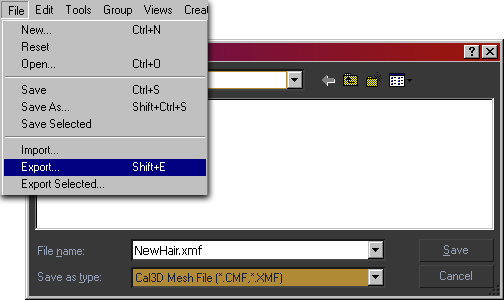
Once you have a mapped and weighted mesh, you can export it. Choose the export option in the File menu, browse to the ‘Cal3D Mesh File (*.CMF, *.XMF)’ option and name your mesh.
Editor – Body Part Override
As you no doubt remember from the Avatar Body Parts Introduction., the Config tab in the Editor contains the Clothing Override – Body Part IDs panel. The body part to override in the Editor is ‘1’. NOTE: You will not actually need to make any changes to this panel if you are deriving from an existing hair product.
Editor – Add Mesh
In the Meshes tab, click the Add .XMF button to browse for your newly exported .xmf file. Then hit the Apply Changes button. Your new mesh should appear with the existing material applied to it. If this is the case, move on to the next step. If this is not the case, then something went wrong in the export process. If so, you will need to check:
Editor – Add Textures
In the Texture Assets panel of the Materials section, click the Edit buttons to change the texture for your diffuse or opacity maps.
Remember: If you don’t want opacity on your hair product, you can either click the delete button or just add a completely white texture.
Editor – Save & Upload
Save this product and Upload it. Congratulations! You’ve created a new Avatar Hair product that can be derived from by thousands of Creators from around the world.
