![]() The following tutorial teaches you how to add an avatar Action to your furniture or room product.
The following tutorial teaches you how to add an avatar Action to your furniture or room product.
Actions
An Action is the delivery system for animations in IMVU. Furniture and Room products can include Actions. Avatars can also include actions. However, did you know that Furniture and Room products can contain Avatar actions? They can also both be triggered at the same time to make wonderful effects.
Using 3DS MAX, adding Avatar animations to furniture can be easy or complex. We’ll cover both of those options in this tutorial.
Separate Files
You must think of your furniture animation and avatar animation as two totally separate entities that will be pieced together later in a Create Mode Editor. Just because your avatar animates along with your furniture item in MAX does not mean that it will automatically just show up in the Editor. You will have to export that avatar animation separately.
The EASY Section
What makes this the easy section is the focus on adding the IMVU-made Sitting animation to the couch.
This means that, in MAX, you are only positioning the avatar to *roughly* the same place as the sitting avatar animation. Then, by naming your seat node correctly, you will be able to automatically call the Sitting animation without having to create the avatar animation file itself. Easy!
Default Animations
There are two Actions that come standard in the IMVU avatars: Standing and Sitting. Positioning these Standing and Sitting seat nodes should be pretty easy because IMVU supplies those positions for you in the example chair, example couch and example room files.
Merge Furniture into Av File
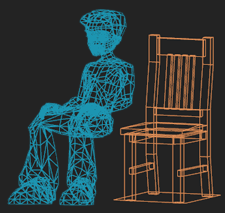
With the rigged avatar animation file open, merge in your already built Furniture item along with its root node (and all bones you feel could help). For the purposes of the easy portion of this tutorial, we will be adding a sitting animation to a couch.
It is very important that you import the root node as well as the furniture mesh. Having the furniture root node in the avatar file will be of great help later when you want to merge the avatar pose back into the furniture file.
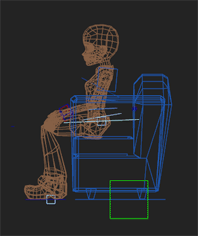
Position Avatar
With the couch in place, position your avatar so that it is sitting exactly where you would want it to sit on the couch.
 New Seat Bone
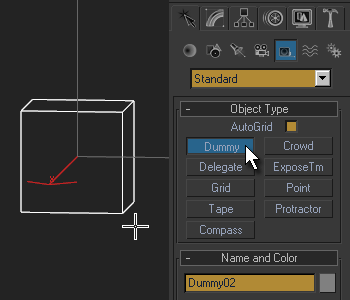
Now that you know where the avatar ought to be positioned in order for it to sit on your couch, you need to create a new seat bone and add it to the couch’s skeleton. To do this is easy.
Just click on the ‘Dummy’ button under the Create tab/Helpers section. Click and Drag on the screen to create your new bone.
Align to Av Root Node
Now Align that bone to the avatar’s root node. The root node is the bone at the top of the avatar hierarchy. It is called: Female03MasterRoot

Link Seat Node to Furniture Root
With your new seat bone merged into your furniture file, delete the BLERGEN bone.
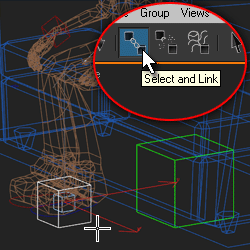
Now, you can link (or parent) the seat node to the Furniture Root node found in your furniture file. To learn more about bone parenting, go to the Bone Parenting Tutorial.
Rename Dummy Node
Now that the dummy node has been put in the correct place, it is time to rename it as a seat node. Name it seat01.Sitting.
Merge Seat and Root back into Furniture file
Your seat01>Sitting node is now in the right spot in your avatar animation file. However, your furniture file does not contain this information yet. It needs to contain a properly parented and named seat bone when it is exported or the seat will simply not show up in IMVU.
To get the seat node to show up in the exact right place in your furniture file, rename the furniture root node found in your avatar animation file to some nonsense word like BLERGEN. This node will be trashed after the merge so the name doesn’t matter. Next, merge both the BLERGEN node and the seat01.Sitting node into your furniture file.
The Complex Section
You have just learned how to utilize the Actions embedded in the IMVU avatars inside your room or furniture product. Ah, but what if you want to use a brand new animation? You can’t know exactly where to place your seat node if you haven’t created the animation yet. So, you must first create the avatar animation.
Lock Position & Orientation
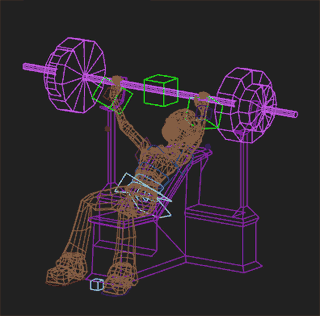
Sometimes, you will want to make the location of the avatar’s hands move with a piece of furniture. For example, if you wanted the avatar to lift weights on a bench press. To do this, you need to have two seperate animations: one for the avatar and one for the furniture item. To learn more about the Avatar portion of Pos/Ori, please go to the Position & Orientation tutorial. If you want the avatar and the furniture to move in unison, you would apply the same theory.
Lock PosOri Node Creation
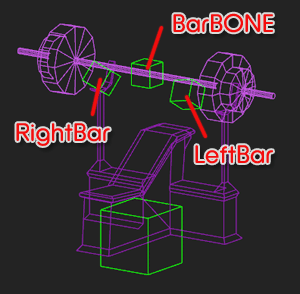
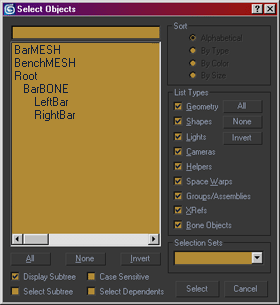
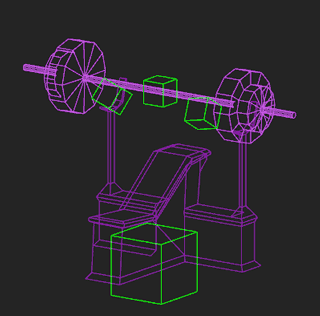
In the case of the bench press, you will need to create three new dummy nodes that will become part of the Furniture skeleton. Two bones will be for each of the avatar wrists that you want to move with the bar. We’ll call these LeftBar and RightBar. One more bone will be to drive the movement of the bar itself. We’ll call that bone BarBONE.
Lock PosOri – Linking
Link LeftBar and RightBar to BarBONE. To learn how to link bones to other bones, please go to the Bone Parenting tutorial. Now, you can move BarBONE and the other two will move with it.
Lock Wrists
Its time to lock the Pos/Ori of the avatar wrists to the LeftBar and RightBar bones.
Move the avatar hands into the exact position you want and then align the LeftBar and RightBar bones to their respective avatar wrist bones. Then, follow the instructions found in the Position & Orientation tutorial to lock the wrists to those bones.
Now, when you move BarBONE, the avatar hands will move as well. In this manner, you can create one animation in MAX and use that same animation to export the Furniture xaf (selecting the Furniture Root node) and the Avatar xaf (selecting the Avatar Root node).
Prop Action
In the case of the bench press animation described above, you ought to utilize a feature in IMVU called Prop Action.
A Prop Action is a room or furniture Action that is triggered when an avatar joins a seat. This allows you to begin both the room/furniture animation and the avatar animation at the same instant. If Prop Action did not exist, then your avatar might be pushing up while the bench press is coming down.
Export Avatar Animation
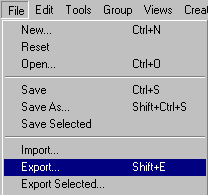
Once you have your avatar animation complete, export it as usual.
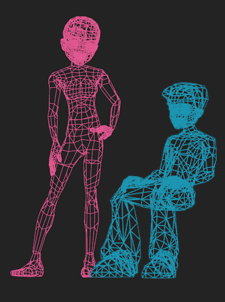
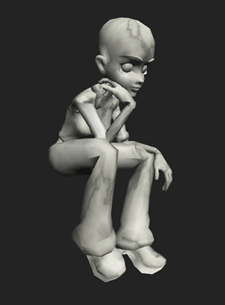 Avatar Statue
Now that your avatar animation exists, it is time to get your furniture file in order.
In more complex products, you may have multiple avatar animations. To more easily keep tabs on all of the poses in your product, you need to be able to see posed avatars in the exact right location. However, keeping multiple versions of the animatable avatar in one file makes your file unworkable – the file size becomes just too large.
In these situations, you ought to turn your avatar into a more easily managed ‘statue’ that you will add to your furniture file.
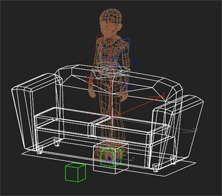
On to Create Mode
With a furniture skeleton and mesh built, PosOri enhancements resolved, an avatar animation exported, *and* and avatar statue merged into your furniture file…you are now ready to export your furniture skeleton as usual.
The avatar animation you exported earlier will not just show up in the furniture item, though. You have to add it to the Furniture product while using the Create Mode Editor. However, since you now have a seat node just waiting to accept an avatar action, adding yours will be a cinch.