Room animation (furniture/feature)
Animated room, rooms that include animated components, are essentially exactly the same as normal rooms with the exception of an animated component that, depending on the action being performed, requires one or two additional steps to create an actual animated sequence, and slight modifications if the underlying room skeleton to accommodate this.
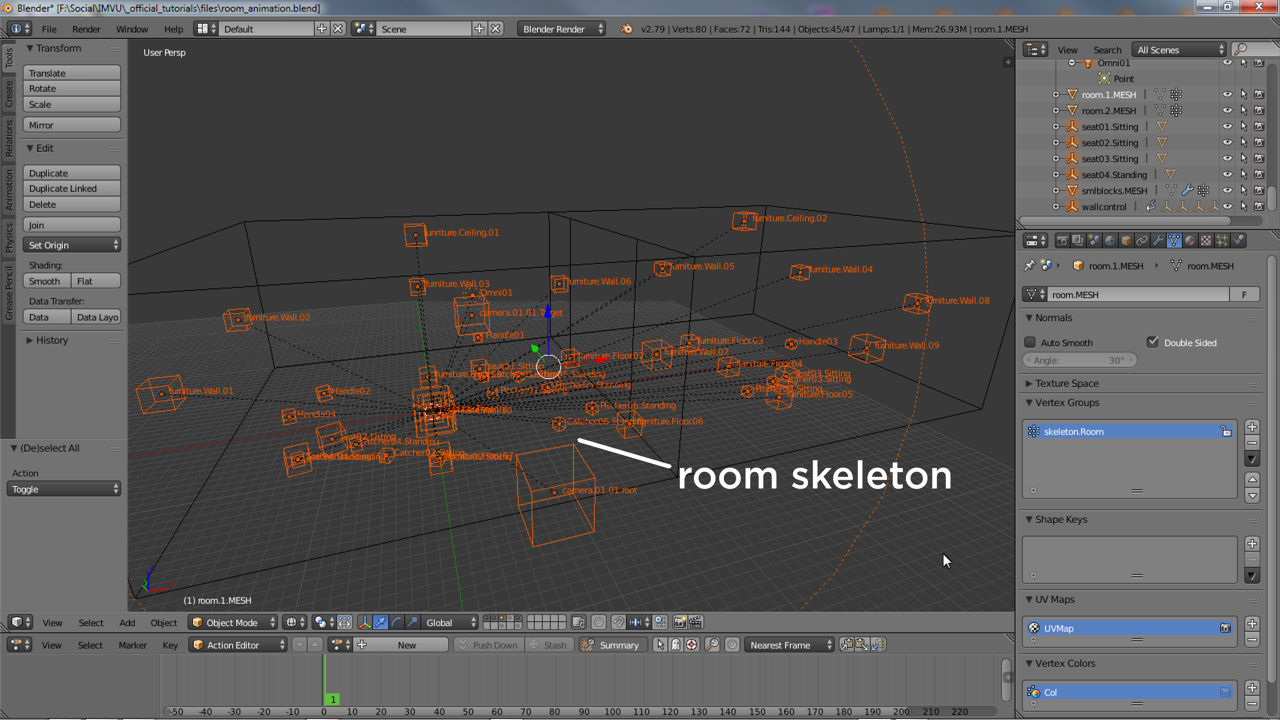
Skeleton set up
The first aspect to adding animation to a room is to modify the underlying skeleton to allow for whatever is to be animated. This means adding to the skeleton an extra node or two, depending on the action required, which will act as animation controls for associated mesh components and/or room/avatar nodes – a spinning wall for example might require a node to spin the wall and nodes for an avatar to spin with it.

Using the spinning wall as an example, once the basic room has been set up and all the furniture, seat and room nodes correctly parented to skeleton.Room, select one of the nodes, duplicate (Shift+D) and position at at a wall so it can act as a pivot point for the mesh. In Object Properties rename this new node to something suitable i.e. wallcontrol, and ensure it’s parented to skeleton.Room – select wallcontrol then skeleton.Room and from the Object menu click Parent » Object, then Object (Keep Transform);
skeleton.Room
- node.Room
- - Omni01
- furniture.*
- seat01.*
- wallcontrol
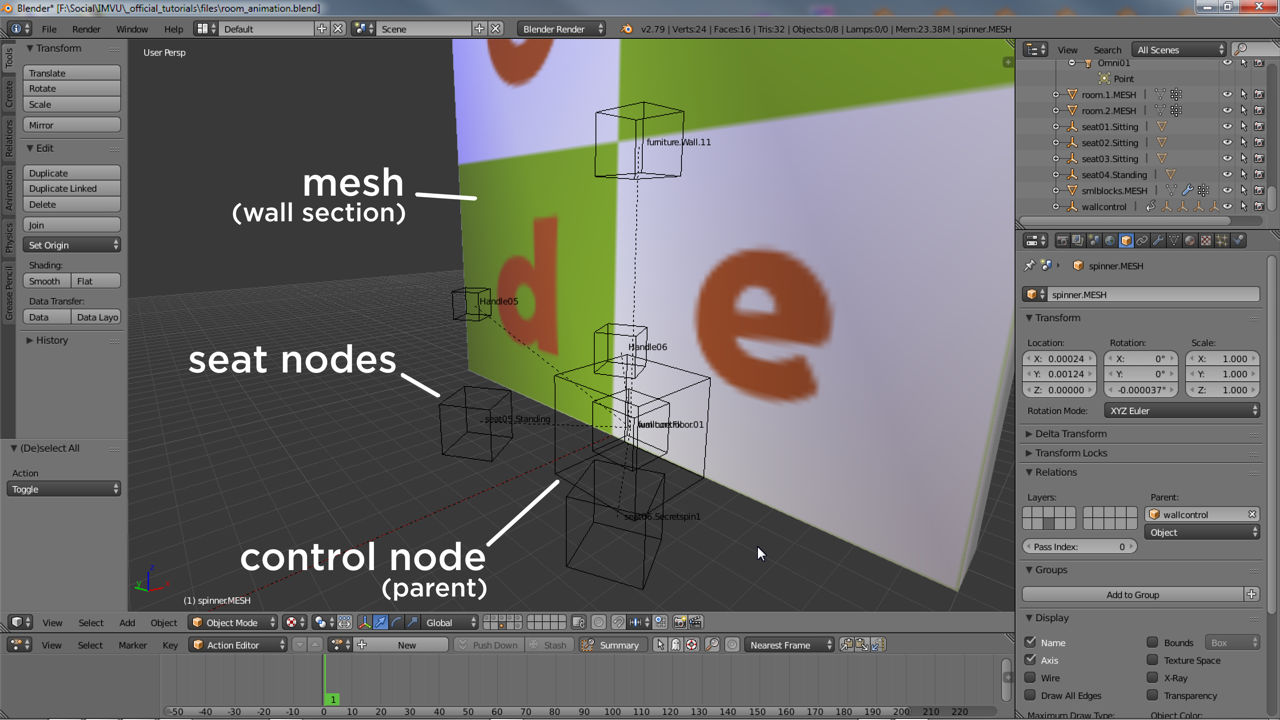
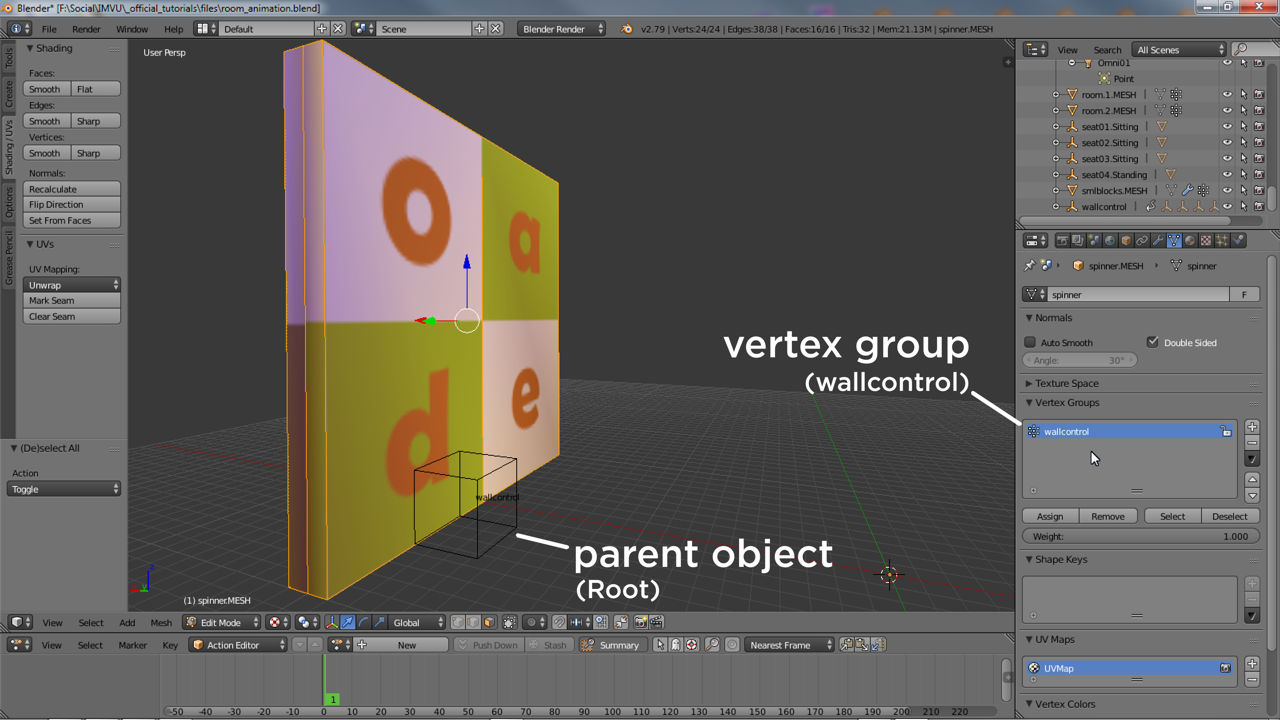
Mesh set up
Once the skeletons basics are set up to accommodate an animation then mesh needs to be linked to the node using an appropriately named vertex group. Before doing that however then mesh may need to be split so the section is question can move freely when animation. To do this, with the mesh selected, in Edit Mode first highlight the wall section that is to spin then from the Mesh menu click Vertices » Split, separating the selection from its neighbours. Next with the newly separated section still highlighted, in Object Data Properties create a new vertex group in the Vertex Groups subsection (click the + button) and rename it "wallcontrol" (double-click and type). Once done click the Assign button to associated the group with wall, and wall with control node.
Animation
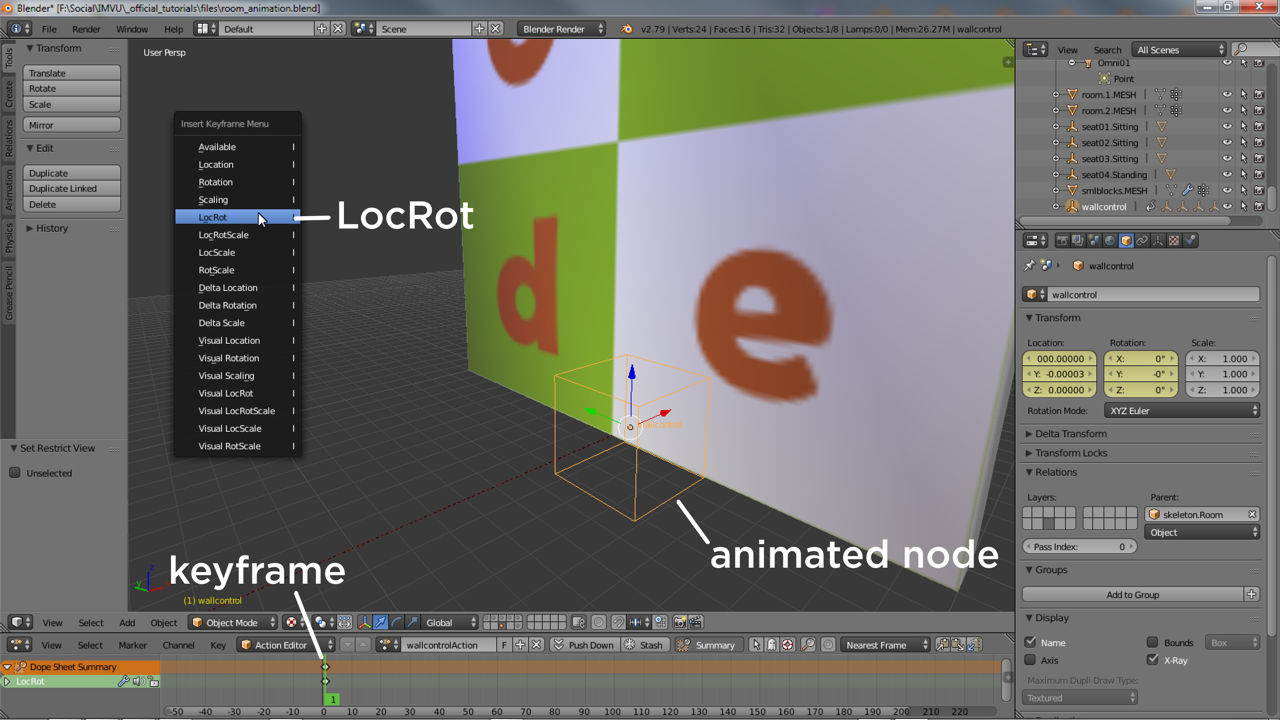
To create a simple animation that rotates the wall 360 degrees around the vertical axis an Action is needed, a sequence holding a set of frames, or fixed positions, that when played through give the impression of movement. To create a sequence first select the wallcontrol node in the 3D View, this being the object to be animated it must be actively selected. Next, in the Action Editor move the timeline marker to frame 1 (click or drag-move). These initial steps essentially prime the sequence. To save the walls current position, from the Object menu of the 3D View click Animation » Insert Keyframe.. then LocRot in the Insert Keyframe Menu that appears. An orange diamond appears marking the nodes current location and rotation (LocRot). This is frame 1.
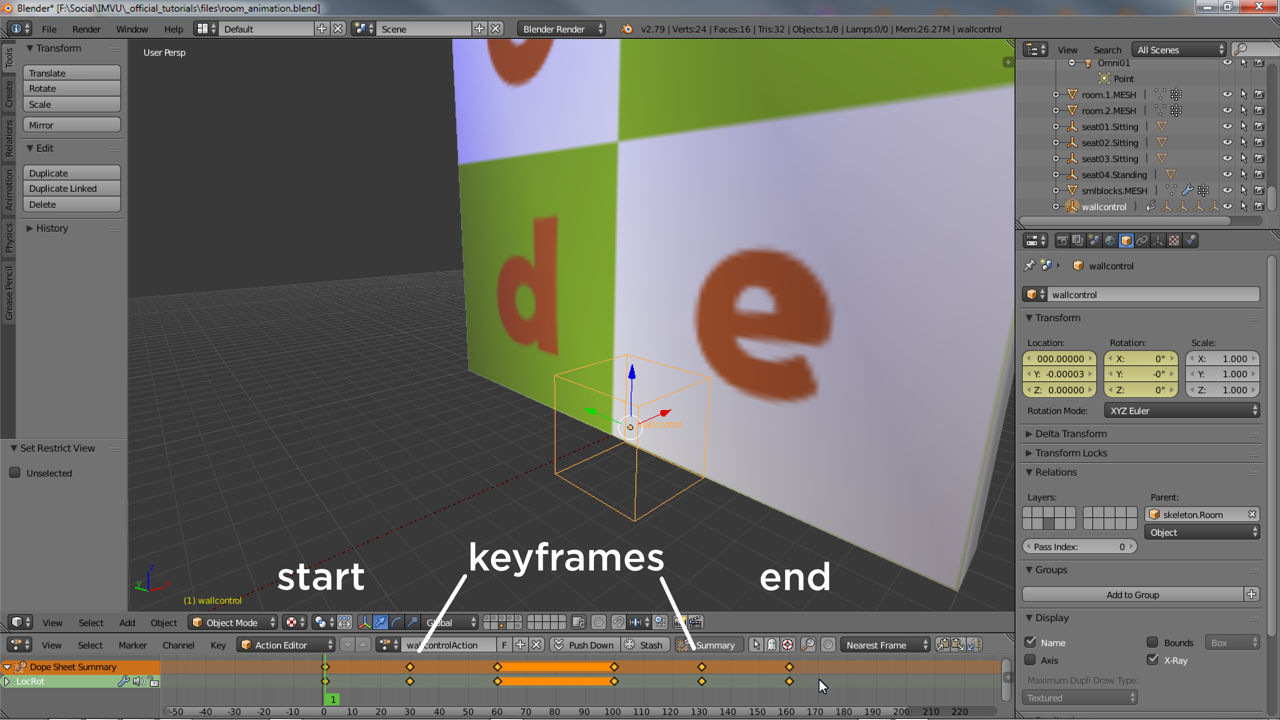
For the next position in the sequence, move the green timeline marker to frame 15 and in the 3D View rotate wallcontrol by 90° degrees around the Z axis. Press I to Insert the new position. Another marker will appear. Repeat this step moving the timeline marker to a new frame (15 frames on from the last in this example – 1, 15, 30 etc.), rotating the node 90° before then inserting a new marker into the timeline. When done the completed sequence will have the wall rotating a full 360° returning back to its start position ready for export;
frame	|	rotation
1		|	0°
15		|	90°
30		|	180°
45		|	270°
60		|	360°
Animating Furniture Nodes & Avatar Spots
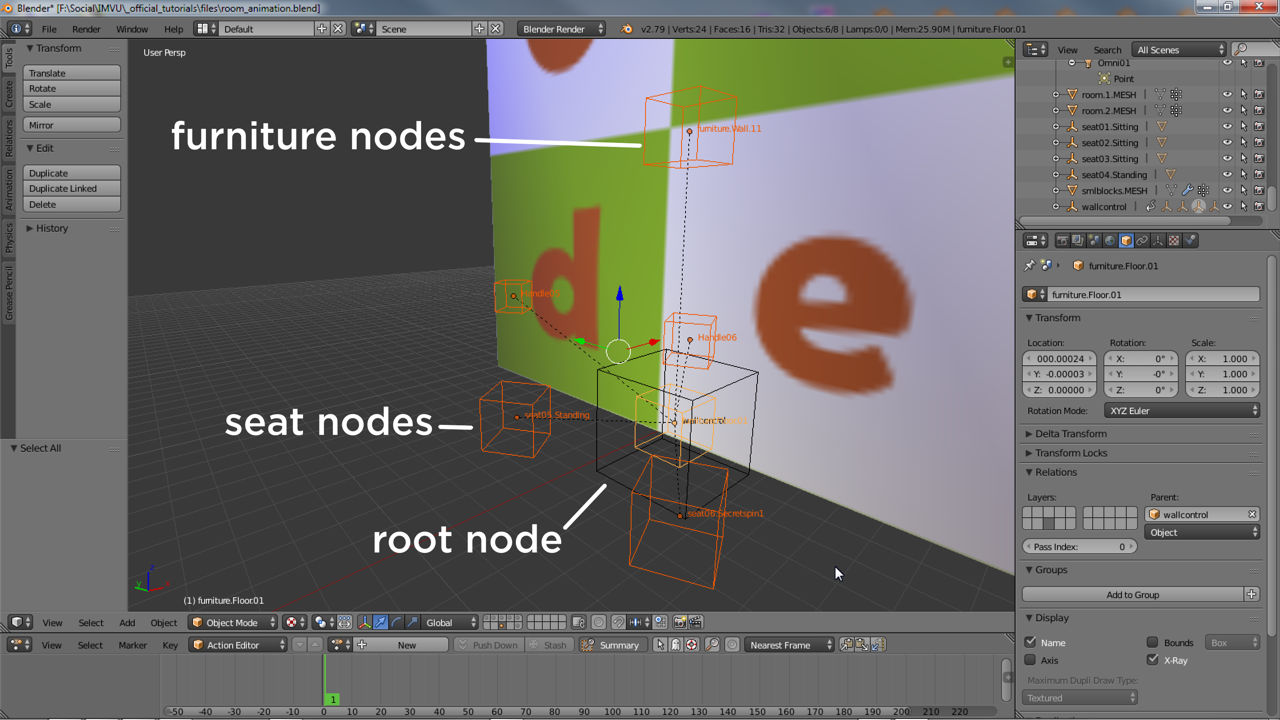
An advantage of using control nodes to animation rooms or their features is that they also allow for the easy inclusion of furniture nodes (floor, ceiling, wall and others) and seating or avatar spots. In this situation by linking a furniture node to wallcontrol, the end user could hang a picture item on a wall node and stand admiring it as both rotates with wallcontrol. As the animation is already in place all that’s needed is to ensure the extra nodes are correctly parented to wallcontrol.
So for example, to add a wall node, furniture.Wall.[n], onto which a picture item could be hung, the rooms skeletal structure would be similar to the following – furniture.Wall.[n] being parented to wallcontrol;
skeleton.Room
- node.Room
- - Omni01
- furniture.*
- seat01.*
- wallcontrol
- - furniture.Wall.[n]
To then include a typical avatar standing spot, seat[n].Standing, the rooms skeleton might be as follows;
skeleton.Room
- node.Room
- - Omni01
- furniture.*
- seat01.*
- wallcontrol
- - furniture.Wall.[n]
- - seat[n].Standing
- - Handle[n]
- - Pitcher[n].Standing
- - Catcher[n].Standing
In this scenario, as mentioned above, whatever wallcontrol does, the nodes linked to it as children will follow, they do not need to be animated. At export this also then means an Action sequence is generated to accommodate only wallcontrol‘s movement.
Exporting Animated Rooms
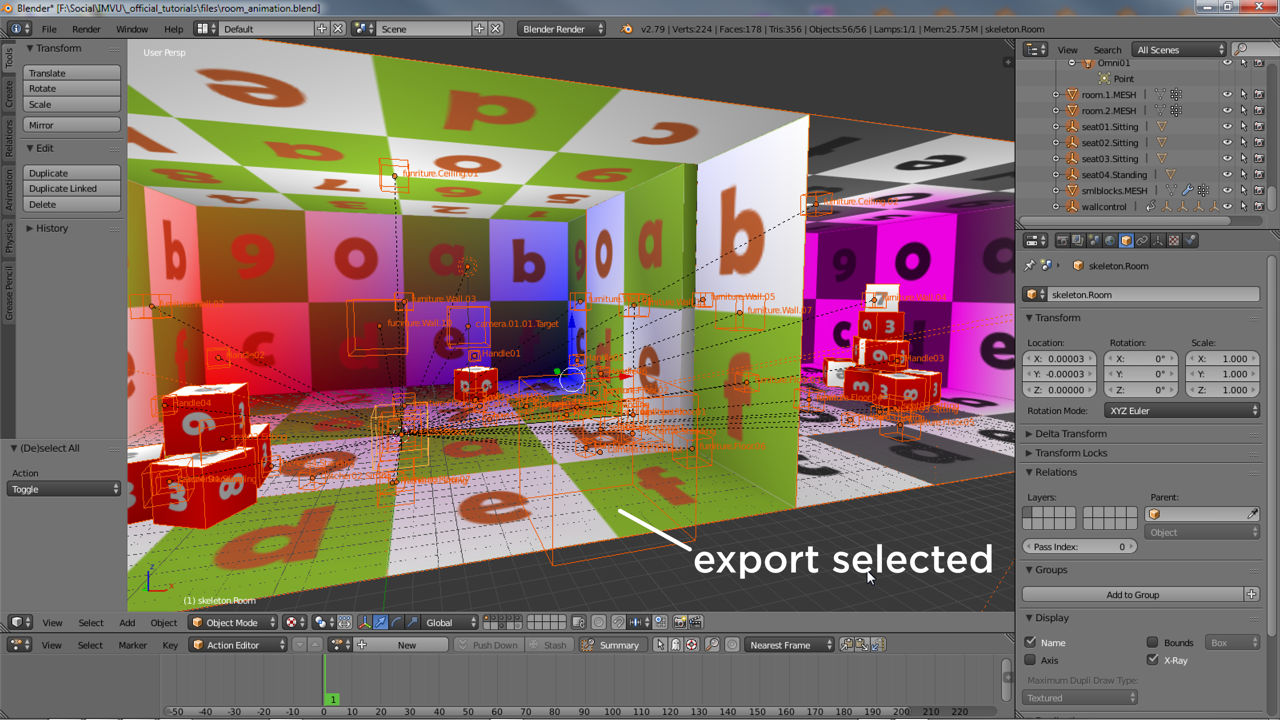
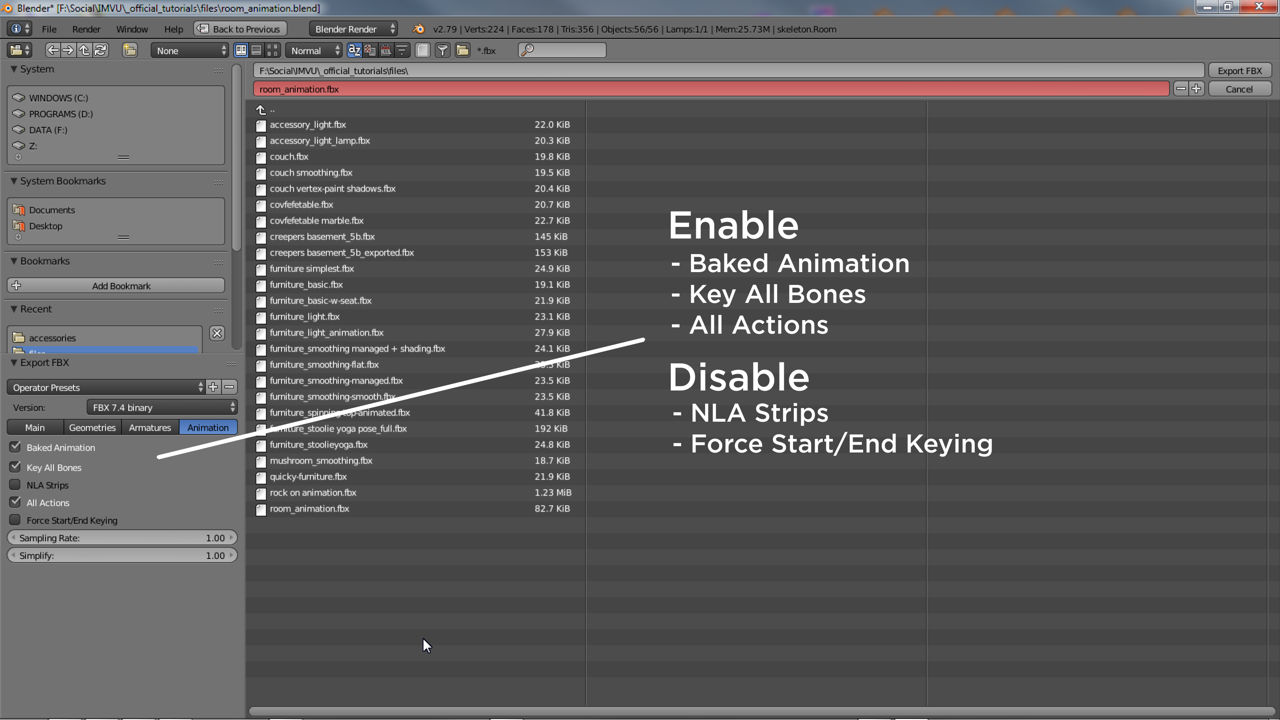
Rooms that included animated elements are exported from Blender the same way as other product types with the general exception of needing some options set so animation is properly included. To do this select all objects comprising the room in Blender – separate meshes and nodes can be exported at the same time to the same file – and then click File » Export » FBX (.fbx). Enable Selected Objects (Main), disable Use Modifiers Render Settings (Geometries) and Add Leaf Bones (Armatures), deselect NLA Strips and Force Start/End Keying (Animation) then click Export FBX top-right to generate an FBX file ready for import and assembly in IMVU.
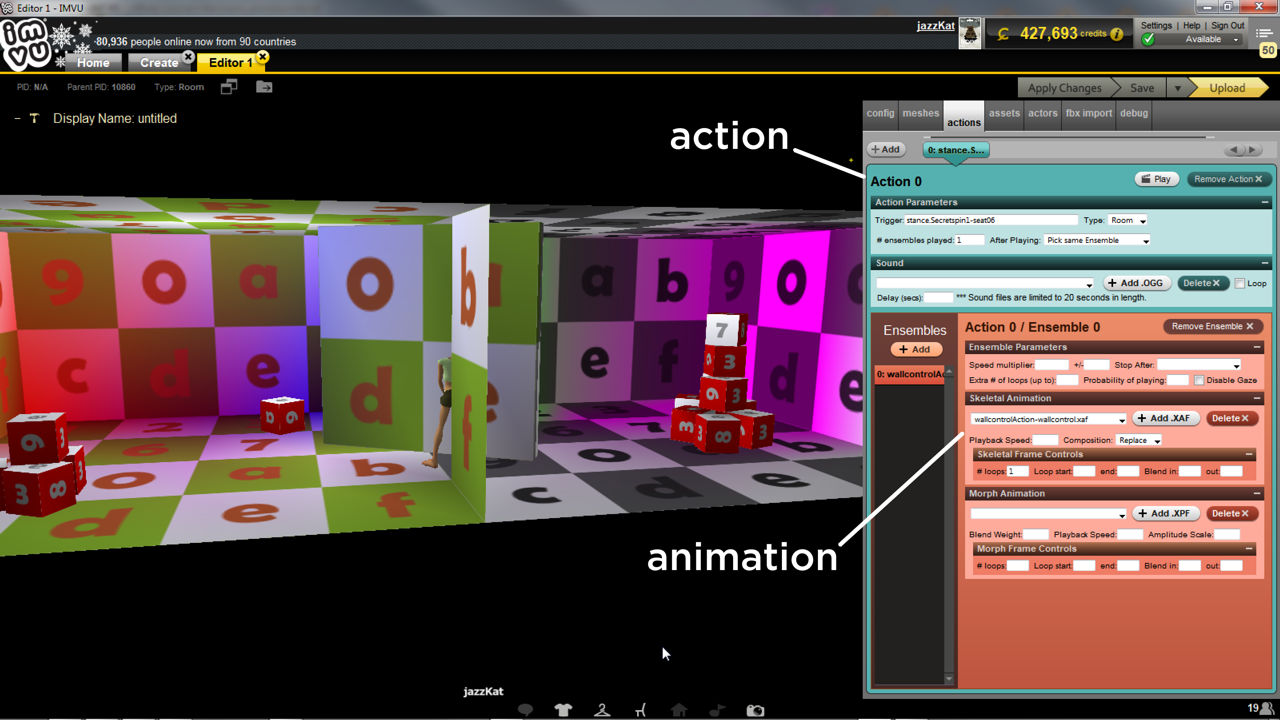
Animated Room Assembly
Once the room has been imported IMVU will automatically assemble the core components into the derived product except for the animated element. This needs to be set up manually. In the actions tab create a new action. In the upper selection set Type to Room and After Playing to Pick same Ensemble (#ensembles played is optional depending on requirements – 0 loops infinitely). For the trigger, the event that activate the animation; use stance.Idle if the animation is to start when the room loads; a word or phrase if the action is to be manually triggered by typing in chat; or stance.[seat node name]-[seat number] if the animation activates upon using a seat node or avatar spot, e.g. stance.Secretspin1-seat06.