In this tutorial you’ll learn about exporting from Blender to IMVU. [Download Blender FREE here.]
Exporting to FBX
Using FBX as an alternative to Cal3D, exporting individual meshes, groups of objects or entire projects to IMVU from Blender is now much easier.
Export Checklist
Export to FBX from Blender
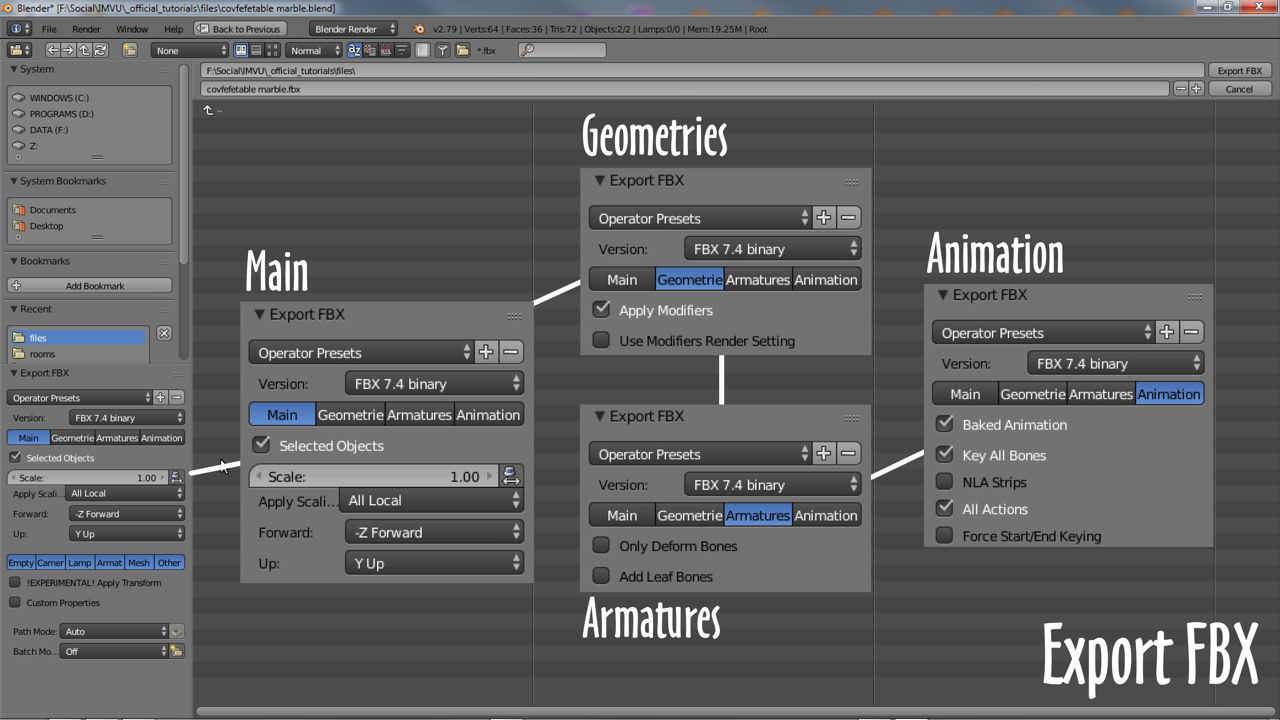
In the main 3D View right-click or Shift+right-click the items to be exported, then from the File menu select Export » FBX (.fbx). This opens the File Browser. Browse to a location the file is to be saved and amend the file a name as necessary (defaults to the name attributed to the *.blend file itself). Once set, in Export FBX export settings bottom-left;
Main activate Selected Objects.

Geometries select Apply Modifiers (optional - disable for Shape Keys/Morphs).

Armatures deselect Add Leaf Bones.

Animation deselect NLA Strips and optionally Force Start/End Keying.
Once done click the Export FBX button top-right to export an FBX file (*.fbx) that’s then ready for import into IMVU.
Import FBX to IMVU
Importing FBX files into IMVU differs slightly depending on the product type, largely due to differences in skeleton set up and use, importing a Pose for example, the Select Skeleton Root dialogue will be displayed whereas it might not for a furniture item or room.
To Import and FBX file into IMVU, first;
Start an Editor instance deriving an appropriate product

Once an Editor is open click the fbx import tab

Click the +Load FBX button in the panel that's displayed

Browse to and select the FBX to be imported and click the Open button
This opens the fbx file into the importer. Next, with the file loaded;
Select/deselect the items listed per requirement; Meshes, Materials, Animation and Morphs

Set the Mesh ID for each mesh, e.g. 0 replaces the furniture default, 2 the accessory default

Change Apply scale to 0.01

Click the Import button

Click the Import Changes button in the Import Status pop-up (note any errors)
IMVU will convert the selected data, creating a set of compatible XML files (xrf, xmf, xsf, xpf and xaf). Once done the FBX Import panel will appear blank confirming import. Finally click the Apply Changes button to see the result automatically assembled in the Editor.