In this tutorial you’ll learn about how to use smooth shading for IMVU in Blender. While this tutorial specifically references Blender, many of these steps will apply in other 3D software applications. [Download Blender FREE here.]
Smooth Shading
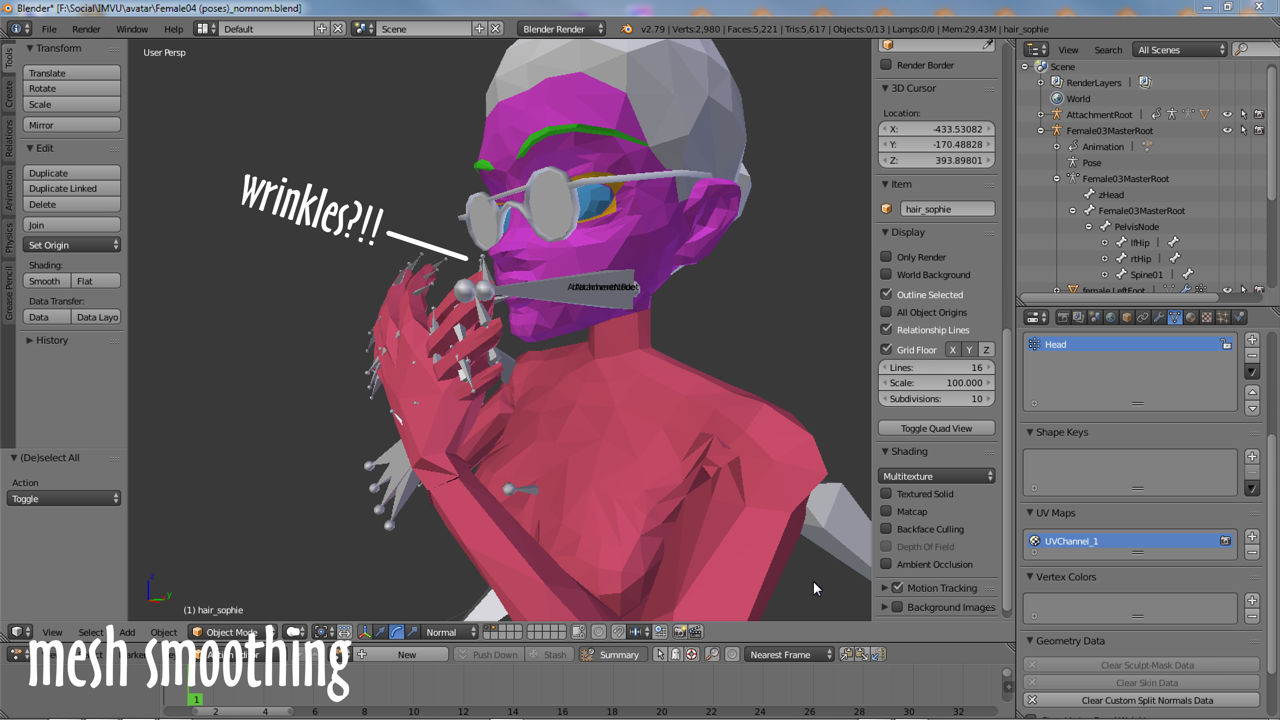
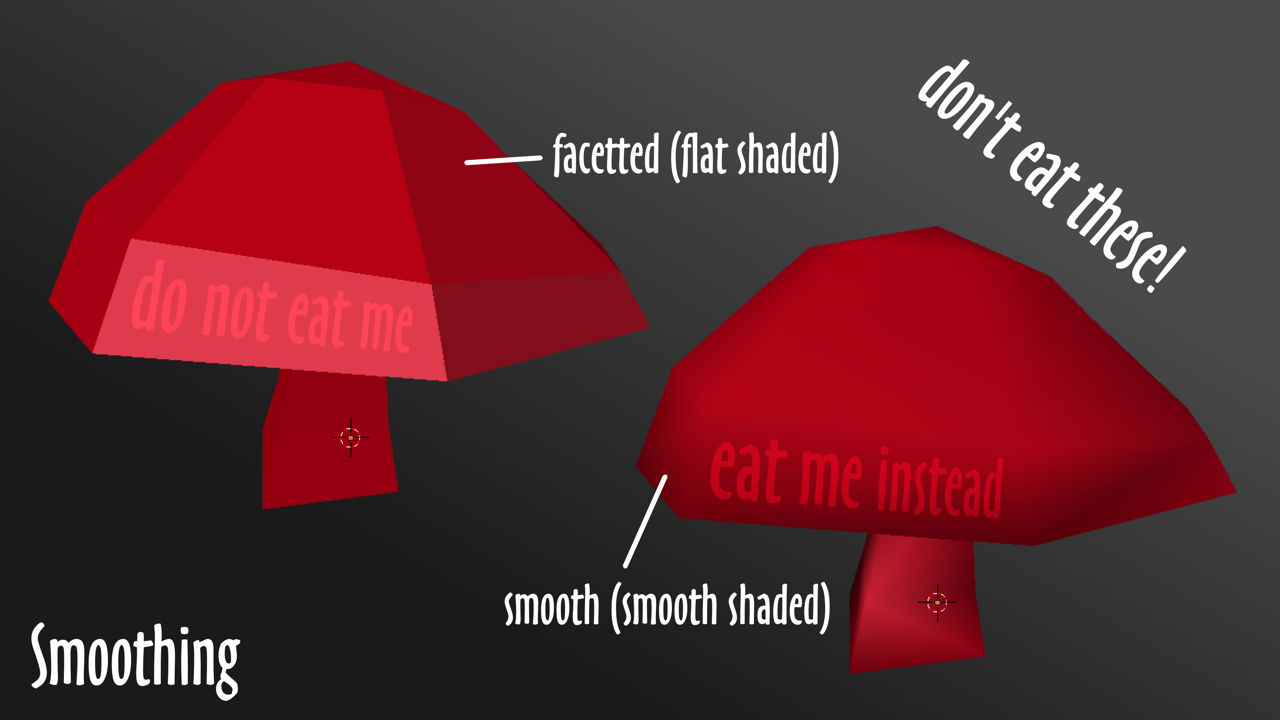
One of the best ways to improve the appears of a mesh is to use something called Mesh Smoothing, or Smooth Shading as its called in Blender. In a nutshell, Mesh Smoothing changes the way surfaces behave when illuminated, suitably marked they appear facetted or smoothed next to neighboring faces. Mesh smoothing is particularly useful for round or curved surface.
Smoothing in Blender
In Blender mesh smoothing is a Shading property available in the Tool Shelf. Here two global settings are provided; Smooth and Flat. With Smooth assigned or active, the selected object will appear entirely smoothed and undefined. With Flat active the same object appears facetted. To assign, simply select an object and in the Tools tab of the Tools Shelf click the Smooth or Flat buttons. This assigns either/or property globally (equally to everything).
Controlling Smoothing
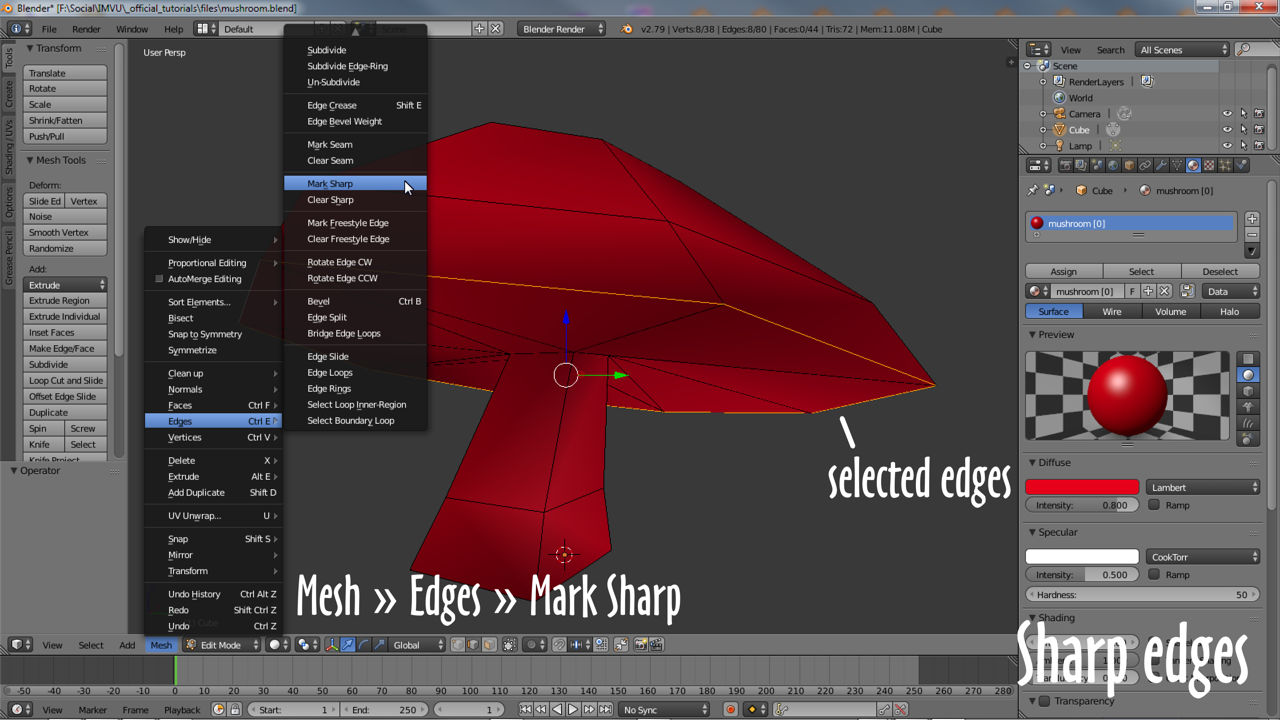
For most objects simply activating or assigning smoothing won’t produce the best visuals because the entire mesh is assigned the property. For better results smoothing needs to be controlled in some way so some sections of an object appear more defined than others. To do this in Blender specific edges are first selected (right-click, Shift+right-click etc.) and then marked or tagged with a special property called Sharp (Mesh » Edges » Mark Sharp) – edge colour changes to pale-blue indicating assignment of the property.
Modifier or Property
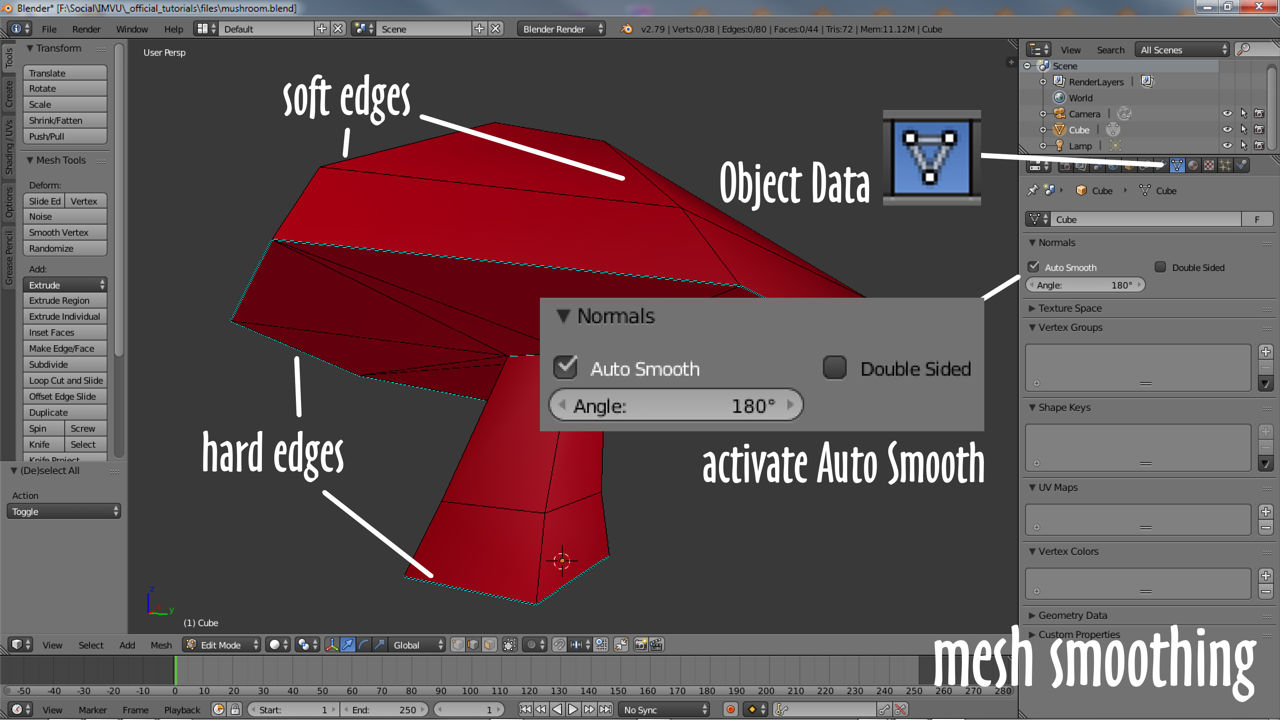
To see the effect once specific edges have been marked Sharp (select, Mesh » Edges » Mark Sharp), to see the result, in Object Data (Data) Properties enable the Auto Smooth option. This will ‘smooth’ the mesh based on the edges that have been marked and/or the Angle value (in ° degrees) that’s set – anything under the threshold is sharpened/given a hard/sharp edge.
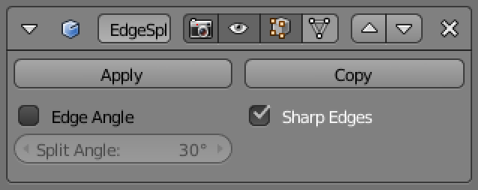
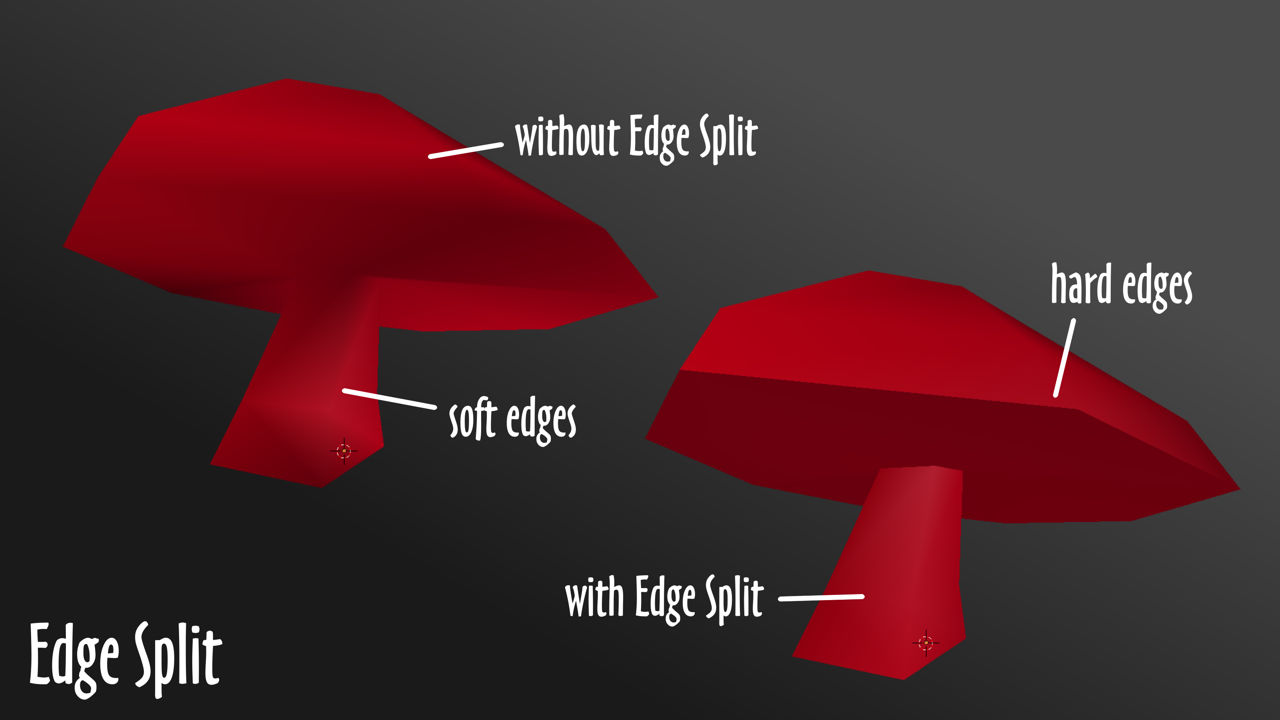
Or for even greater control over where sharp edges appear, once marked, in Modifiers Properties (wrench icon) select Edge Split to add an instance to the stack (panel) – this changes or ‘modifies’ the appearance of the mesh.

Of the two options available, Edge Angle and Sharp Edges, deactivate/disable Edge Angle leaving only Sharp Edges active, smoothing, the presence of hard edges on the mesh, will only occur where Mark Sharp has been used.