Exporting to CAL3D
To get products into IMVU’s catalogue and available for purchase and use they need to be exported from Blender. Currently there are two ways this can be done, exporting to FBX or exporting to Cal3D, both, generally speaking, result in the same outcome, a 3D project that can be assembled in a Create mode Editor once the files have been imported (FBX) or opened (Cal3D).
What is Cal3D
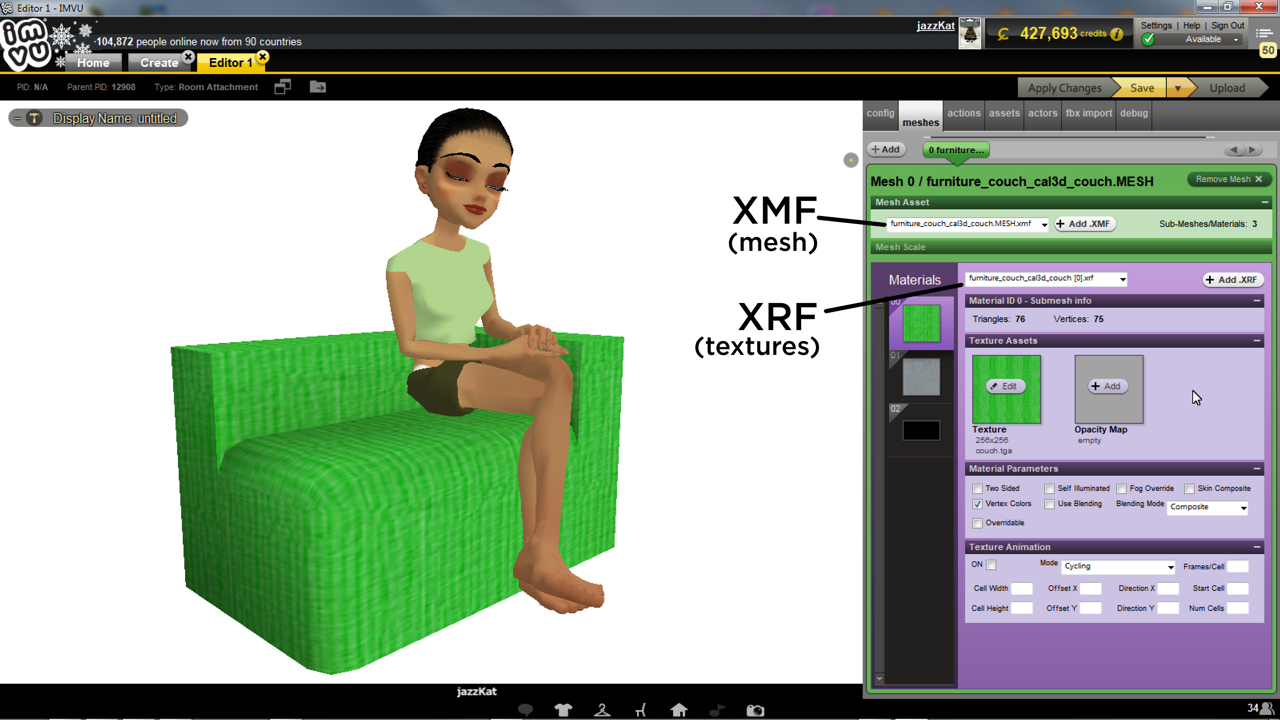
Without going into too much details, Cal3D is the name given to a group of XML data files each representing a different aspect of a project. For IMVU products they are;
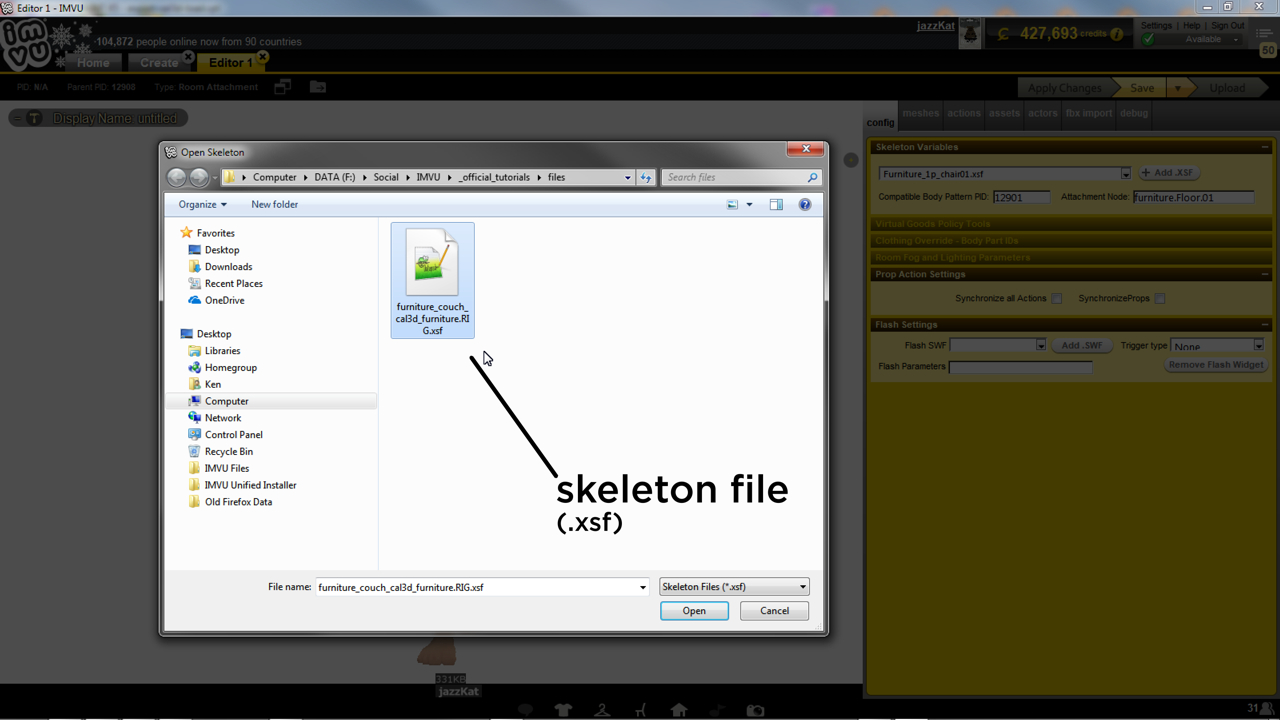
XMF - mesh
XSF - skeleton
XRF - materials (obsolete)
XAF - animation
XPF - morph animation
Opening one in a text editor reveals structured code that’s similar to the html used to display web pages on the Internet. Depending on the file it will hold coordinates for mesh vertices, bone positions for animation or skeletal reconstruction (hierarchies), material information and so on. Once a new derivable project is open in Create Mode the various Cal3D can be loaded as needed for product assembly, typically XMF to add the mesh or visual element of the product and XSF, the underlying skeleton that might include avatar spots.
Exporting Cal3D
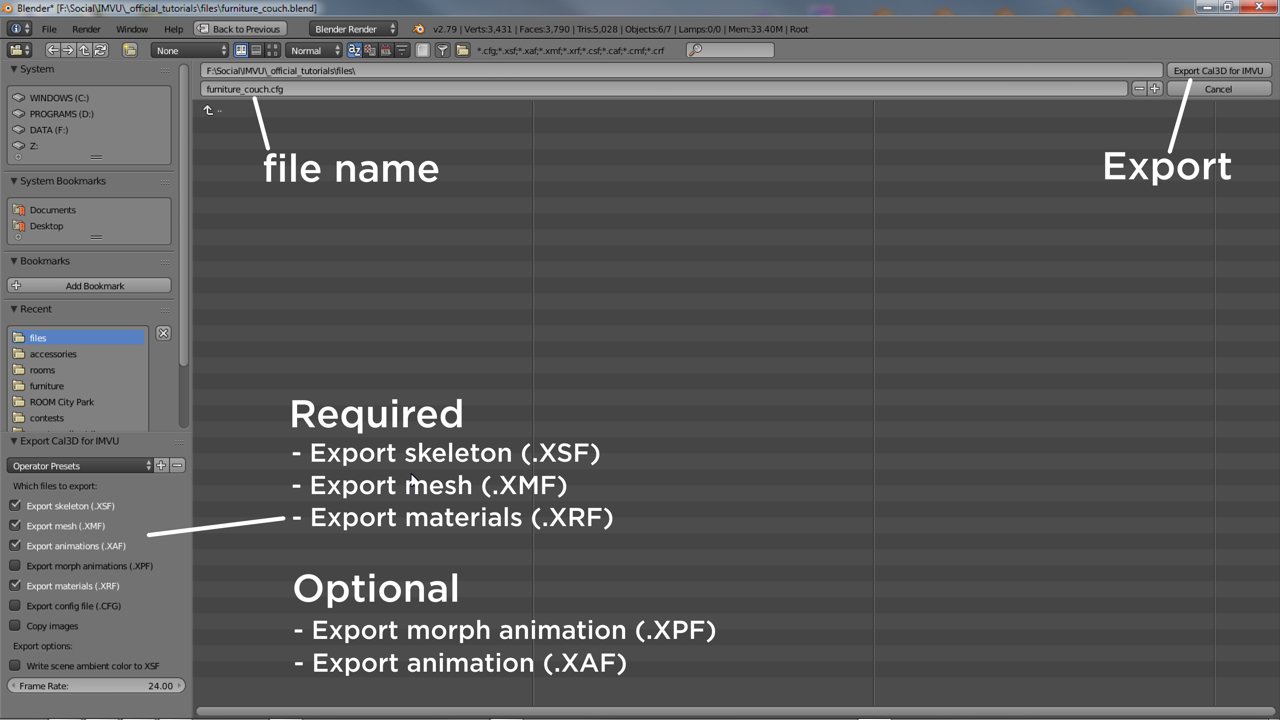
Cal3D export is not supported by Blender natively, it’s included by the addition of a third-party Python (*.py) script that is then activated for use. Once available the components or data that need to be exported are selected in the 3D View and then exported to the appropriate X*F file from File » Export » Cal3D. In the File Browser that appears the type required for export is set bottom-left (the type of x*f file selected), the file given an name where needed before the Export button is clicked top-right completing the process.
Cal3D vs FBX
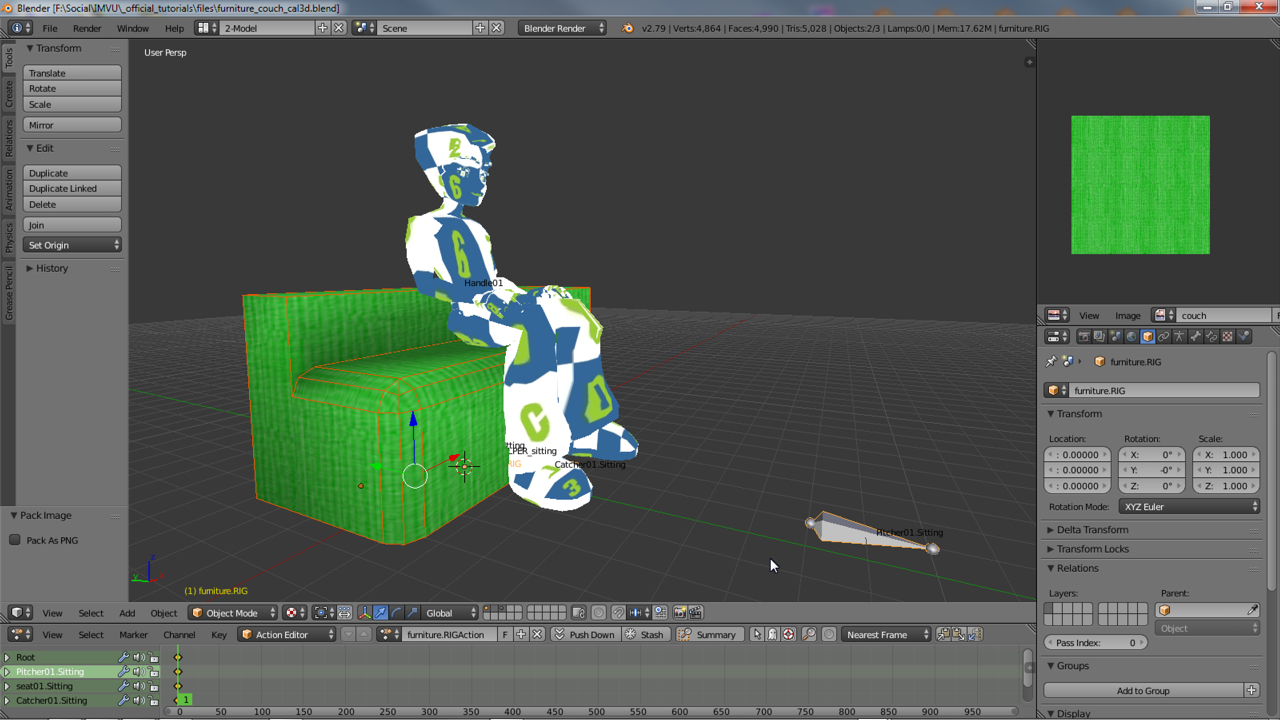
The use of Cal3D as an export option requires Blender users give some thought to the way their products are built because the format does not support some of the options available when exporting to FBX, namely ‘nodes’ and ‘lights’. For Cal3D users all product skeletons MUST be built using an Armature entity and Bones – this is required for rooms, furniture and accessories where the underlying skeleton is largely assembled to suit the product.
Everything else is largely the same regardless of the export format, the design, placement and position of objects, avatars are exactly the same – a couch is meshed is UV unwrapped, textured and parented/vertex grouped to an underlying skeleton, an Armature object with Bones instead of a Nodes. Export is also similar, components are selected exported and then imported or loaded and assembled in IMVU.