When you are creating a Room for IMVU, you will need to include a 3D Camera before exporting. The Camera will determine the starting point view of your Room and its relationship to the avatars within it.
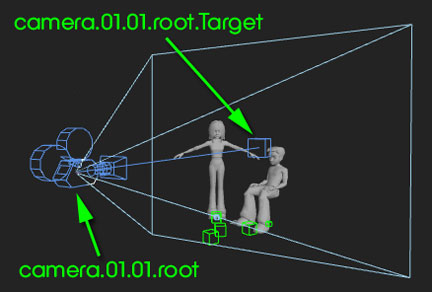
Camera Naming Convention
Each exported Room must have one camera. The default camera should be named camera.01.01.root. Every time you load a Room in IMVU from scratch you will start in this camera position so it is pretty important that you frame things correctly.
IMVU has multiple camera paradigms. From the default camera, it is possible to zoom in and out and rotate around the camera’s target by just dragging your mouse in the IMVU window.
You can also pan left/right and up/down by right clicking on the window and moving your mouse, AND use the arrow keys to move around your Room. When you switch to another seat within the Room, the camera then tracks your avatar and will zoom into and swivel around to face your avatar’s head.
Camera Field of View
What follows is from the IMVU Developer forums:
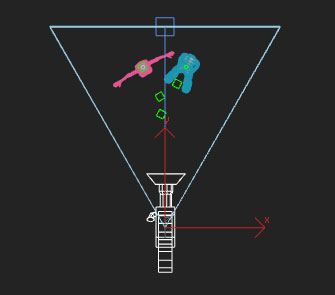
“The field of view for the IMVU camera is currently set to 45 degrees. However, IMVU is currently faced with two options insofar as the basic camera is concerned: 45degrees horizontally or 45 degrees vertically. We have opted for vertically. This means that when you start building your own Rooms from scratch the camera focal length in your 3D program ought to be set to 45 degrees. (In MAX, you have three FOV options: horizontal, vertical and diagonal. For a one to one correlation between what you see in MAX and what you see in IMVU, choose the Vertical button. This is located right next to the FOV editor).”
Camera Parenting
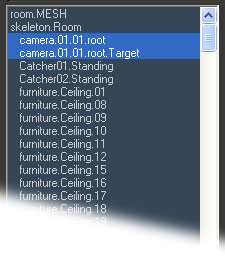
The camera needs to be Linked/Parented to the skeleton.Room Node.
Camera Targets
When creating the camera in your 3D Room, you will notice the target of the camera is automatically generated with the proper name. The target (which is also automatically named) can be moved separate from the camera itself.
Seeing What the Camera Sees
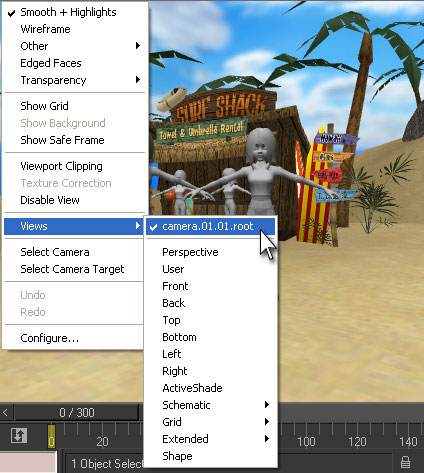
To see what the Camera sees within 3D Max, you can switch one of your Viewport windows to disply camera.01.01.root. From here you can adjust the view with your Arrow Keys, or grab the camera with the Gizmo and move it via one of the other views.
Auto Head Zoom
The position of your camera’s target node matters, as there are some behind the Rooms wizardry at work. Since IMVU has so many avatars of varying heights, we ran into the problem of the target node’s position being the place you zoom into. We kept zooming into the chest of one avatar, the chin of another and the forehead of the third. SO, we built in auto head zooming. Imagine that the seat node in a room has a centrally placed, meter wide cylinder around it that goes up and down to infinity. By placing the target of your camera within this invisible cylinder of influence, you are effectively telling the IMVU code to zoom not to the target position but to the head node of the avatar that is sitting in the seat. Pretty neat.
CloseUp Nodes
CloseUp nodes act much like the Auto Head Zoom feature detailed above. In this case, however, you are prescribing exactly where you want a camera to zoom rather than having it dictated by proximity to the seat node. By tacking on the suffix .CloseUp to a new Dummy node that has been named after a camera (camera.01.01.root.CloseUp, for example), you are effectively overriding the target node of the camera as the zoom destination. When the camera is at the position identified in MAX, it is still looking at the target node. However, when you begin to zoom in, the .CloseUp node takes more and more control until, at full zoom, you have arrived at the .CloseUp node’s location.
For an example of this functionality, take a look at the Snowy Mountain backdrop room (product510.cfl).

Animating the Camera
The camera in IMVU Rooms can animate! Like any other Node in the Room, the IMVU camera can be animated using translation and rotation. Like any other camera, these animating cameras will be included in your skeleton file when you export.
