In this tutorial you’ll learn about weight painting in IMVU. While this tutorial specifically references Blender, many of these steps will apply in other 3D software applications. [Download Blender FREE here.]
Weight Painting (Vertex Groups)
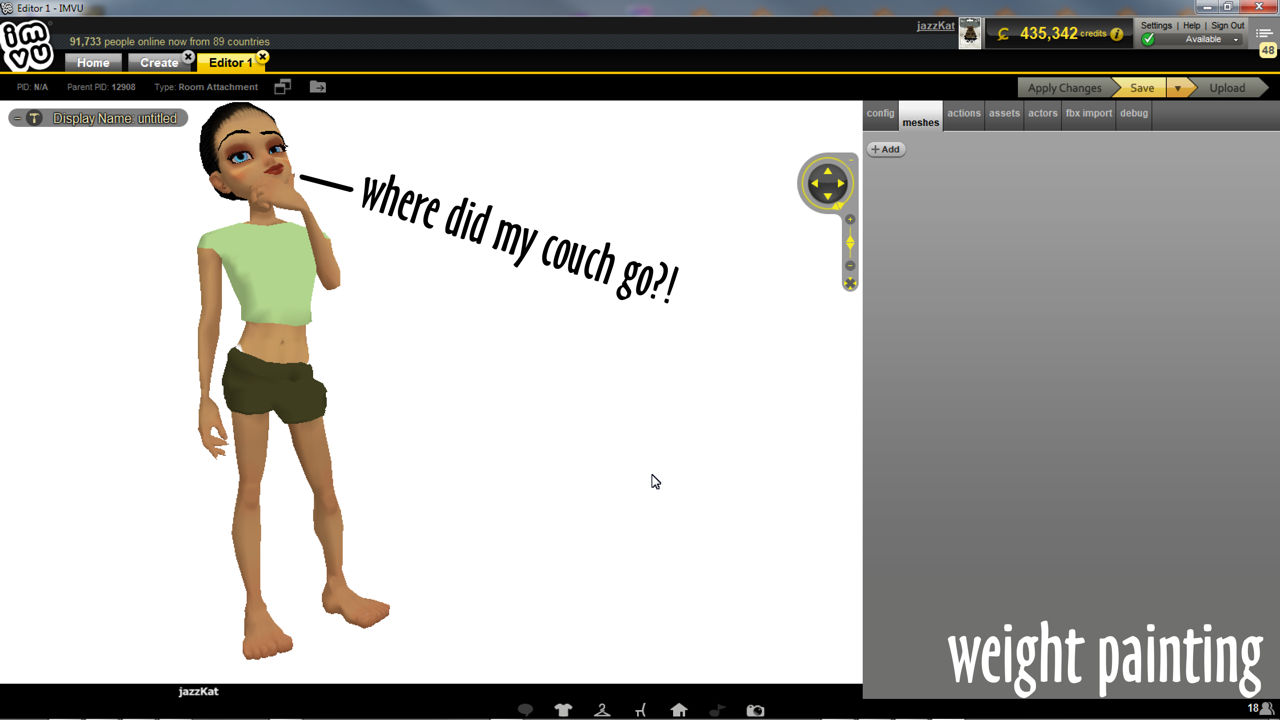
To export meshes to IMVU they need to be associated with the appropriate skeleton for the product being made, a couch for example has to be linked to a furniture item skeleton otherwise nothing appears in IMVU and/or the item won’t work, articulate or move the way it should. In Blender this is a two part process; 1) Parent mesh to skeleton or Armature, and 2) link nodes or bones with mesh vertices using Weight Painting.

What is weight Painting?
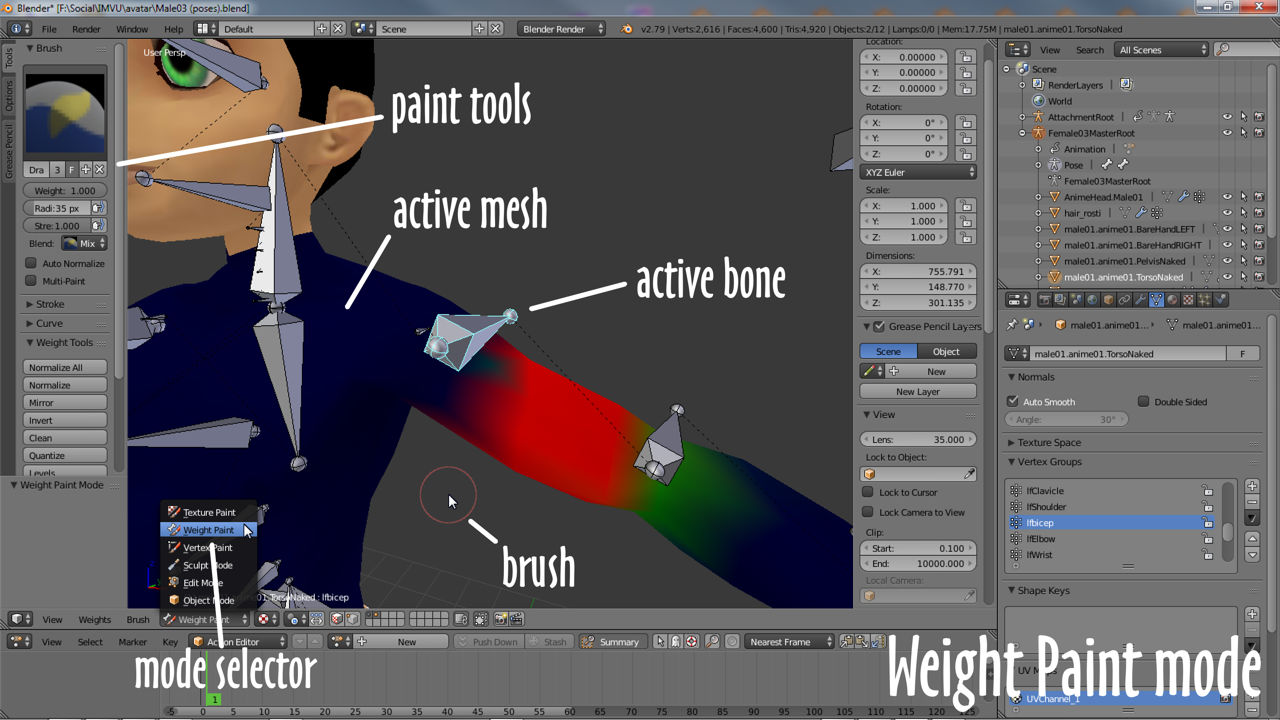
Weight Painting is two things; assigning an ‘influence’ value to something (weighting), and the act of doing this (painting). In Blender this is done in a dedicated Weight Paint mode; with a mesh selected choose Weight Paint from the interaction mode selector menu (or switch using Ctrl+Tab shortcut). When enabled the current active mesh turns blue, the Tool Shelf updates showing a new set of options, and the mouse cursor displays a pinkish tinted circular outline representing a brush.

Weight Painting
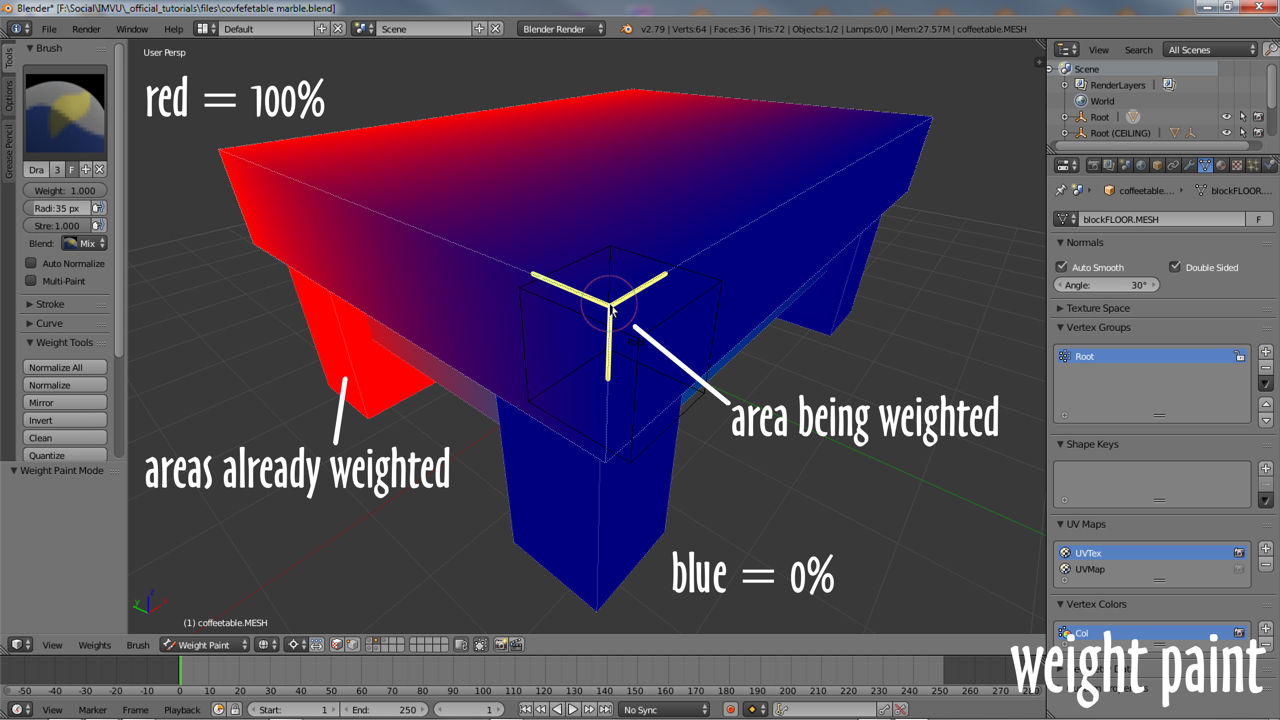
The next step once Weight Paint mode is active is to select a bone or node and then paint the mesh with the cursor/brush to link painted areas with the skeletal element highlighted. As this is done a corresponding Vertex Group is created, named or labeled to reflect the bone or node chosen prior to painting. Depending on the product this painting process then needs to be repeated for each bone or node that’s to influence the mesh, for example 86/7 bones for an avatar replacement, or just one for a simple furniture item.

Weight Painting vs. Vertex Groups
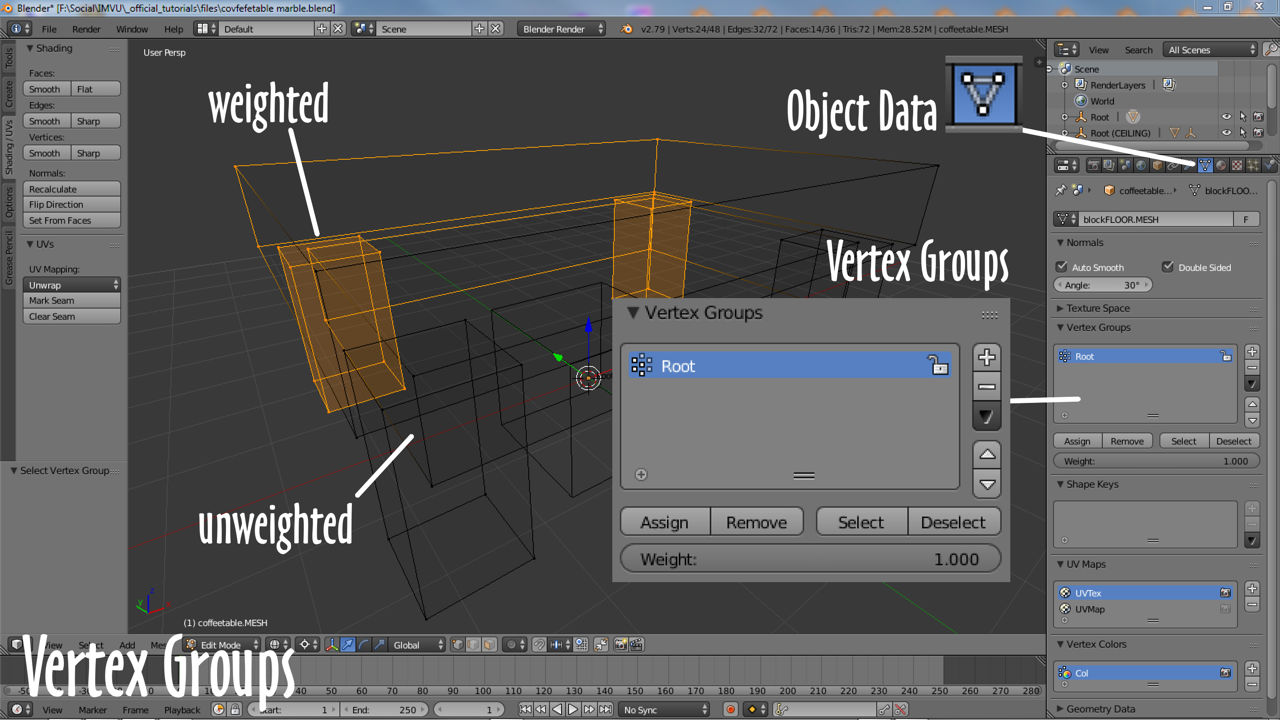
Weight Painting is a more intuitive way to create, assign and manage Vertex Groups, the colours are immediately readable as representing values of influence, the degree to which a bone or node can move, articulate or manipulate a given vertex or mesh section – red is 100% effective, blue is 0% or ineffective. Painting can be tricky for symmetry, when something has a left and right that need to articulate equally, so some manual editing of vertex group values may be necessary in Edit Mode rather than trying to balance values using colour – in Object Data Properties select an entry in the Vertex Groups list and use the buttons below to Assign or Remove selections, or (Shift+) right-click individual vertexes and Assign or Remove, changing the Weight value below where needled, altering the degree of influence the group has over the selection.

