In this tutorial you’ll learn about material assignments and how these apply to IMVU. While this tutorial specifically references Blender, many of these steps will apply in other 3D software applications. [Download Blender FREE here.]
Material Assignments in Blender
For meshes to appear textured in IMVU they need materials. In Blender this is done by assigning Material properties to selections that essentially identify surfaces so specific images or additional functions can be mapped to or associated with them in IMVU. For materials to work correctly, especially in situations where more than one is being used, they need to conform to a particular format, that of;
[label] [n]
In this simple formula [label] represents a case-sensitive word, short phrase or term, generally descriptive in nature, relating to the surfaces being referenced, wood, glass etc., augmented with [n], a sequential numerical value appended to uniquely identify the material its associated with. This allows the same [label] to be reused, perhaps to signify different wooden sections of the same table, whilst also distinguishing each instance from its neighbours based on the [n] value given. For example as a single instance (note: there is always a space between ‘[label]’ and ‘[n]’);
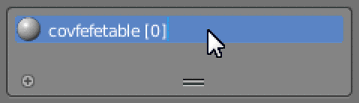
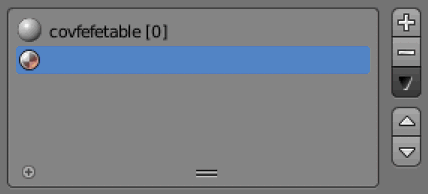
covfefetable [0]
Or duplicated for additional instances of the same label;
covfefetable [0]

covfefetable [1]

covfefetable [2]
The numerical sequence would also then continue even where new [label] references are used, like so;
book [3]

vase [4]

magazines [5]

flowers [6]

covfefemug [7]
All of these materials might belong to a single object set up to use multiple materials (a multi-material), or multiple objects using individual or small groups of materials per-mesh. Either way the numerical sequence appended after the label is what distinguishes each instance, not specifically the word used to describe or define the material.
Materials in Blender
Materials in Blender consist of three stages or slots; an underlying object-assignable Material (this gets assigned to the object or surface), an associated set of Texture properties, to which an Image is linked. Together they form a hierarchical structure;
Material

   Texture

       Image
This structure is important for materials to work Blender, and IMVU, which gathers the information it needs from the Material data created, namely the label (name) from Material properties, and the image linked in Image settings. So long as this both the hierarchy and naming conventions are followed Blender will export fully compatible materials to IMVU.
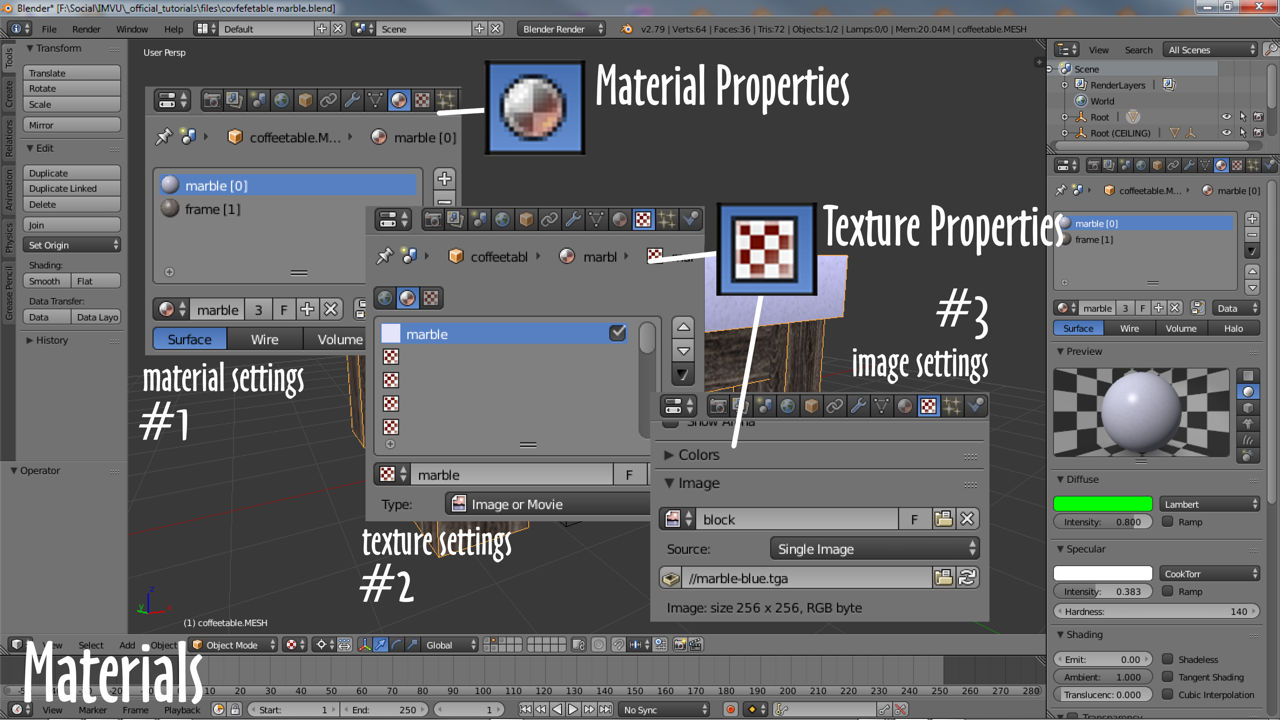
Setting up Materials
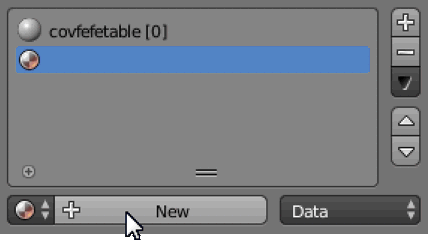
With an object (made in Object Mode) or mesh selection (made in Edit Mode) available, to create a material left-click the Material Properties button (sphere icon).
If the panel that’s displayed is blank click the + New button to populate with an entry called Material (or Material.[n], for example Material.001 if Material already exists, or more than one new material is created).

The settings and options now displayed are the materials core properties. Next left-click the Texture Properties button (checker icon).
And again if the panel is blank click the + New button to populate.
This creates a set of Texture Properties linked to the initial Material slot. Once these two sets of properties are available, whilst still in Texture Properties, scroll down to the Image sub-section and do one of two things; 1) click the + New to generate a new Image (in the pop-up type a Name, set a Width and Height size, select the Generated Type then finally click OK) or 2) click Open to browse to, select and load in an external image file, a TGA, PNG or JPG (to match what IMVU can use/convert).
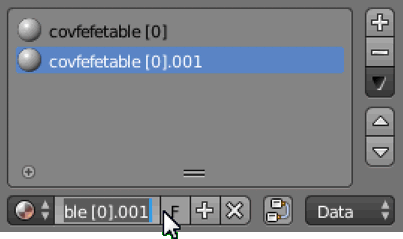
Once a bitmap image is loaded into Image settings click the Material Properties button again and either; 1) double-click the entry in the Material List to activate for editing and give the Material a name following the convention outlined above, covfefetable [0] for example.
Or 2) left-click the ID input box and similarly type a name following the convention discussed above.

Once this last step is done the Material is set up and ready to be assigned. It will also be properly exported to IMVU.
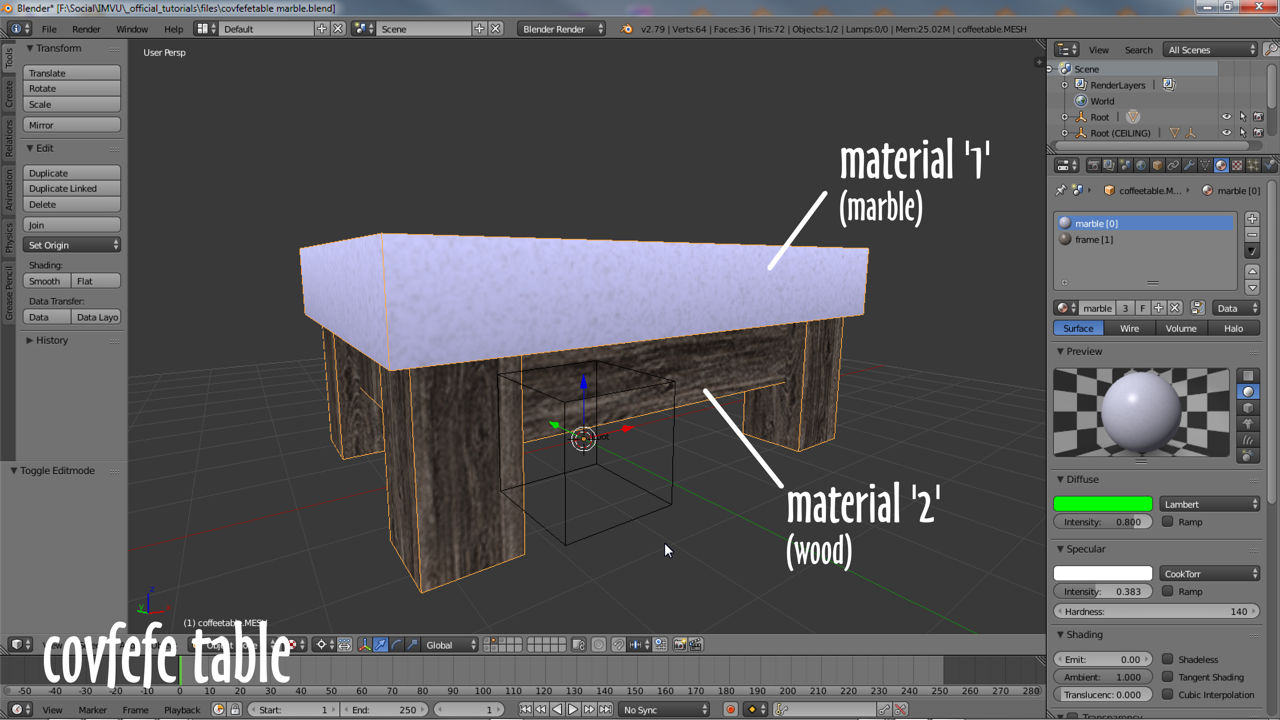
Multiple Materials
Once an initial Material is created, for situations where more than one needs to be used the process outlined above can be repeated with one or two minor changes. To generate a new material click the + button to the right of the Material List creating a blank Material slot in addition to the original (a sphere icon will appear absent a name).
With the new slot available either; 1) with the new slot selected click the + New button below and repeat the above steps to populate.
Or 2) select the original Material, click the + button in the Material ID block to duplicate, (re)select the new Material then click the Browse Material to be linked button (sphere icon to the left of the ID field) to select and assign the duplicated data to the new slot.
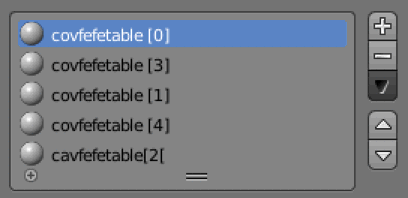
Once the materials are created and assigned, managing multiple instances associated with different sections of the same mesh means making sure the numerical appends given to identify each are in-turn sequential – the materials themselves do not then need to be shown in the Material List in numerical order, i.e. 0, 1, 2, 3, 4, they can be listed as 4, 1, 3, 0, 2, just so long as the are all present.
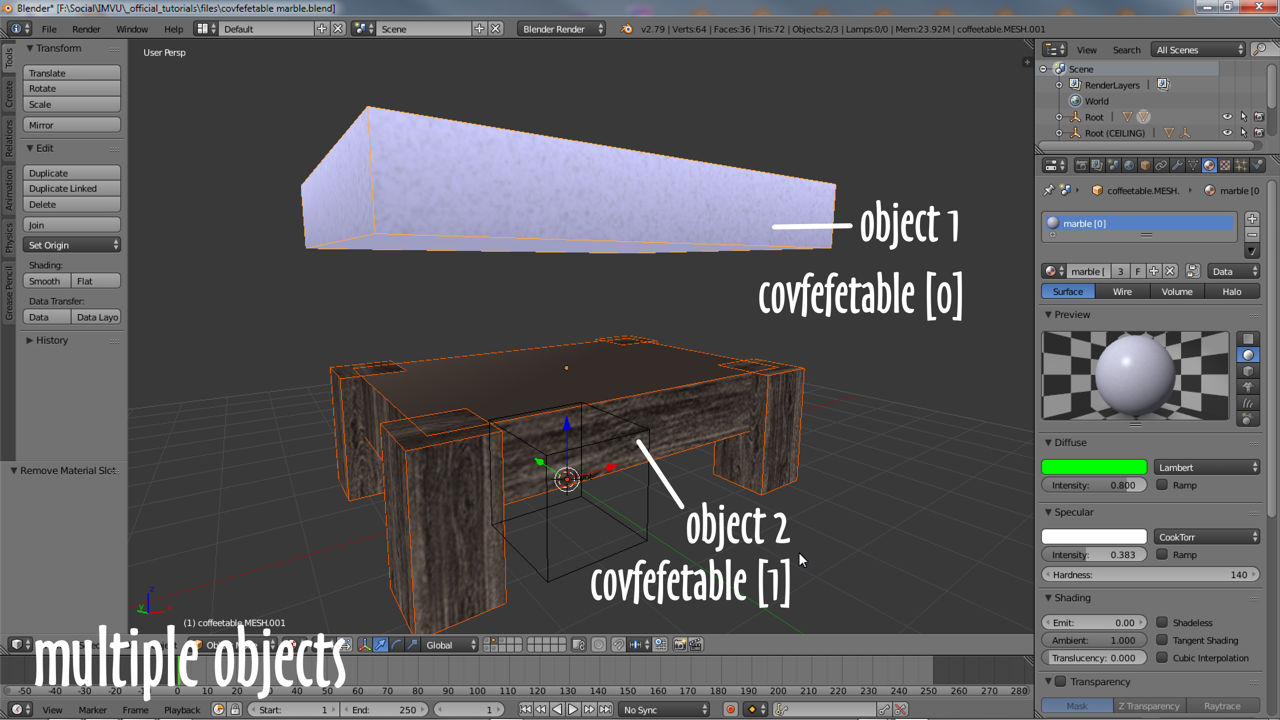
Multiple Objects
For projects comprising a number of separate meshes, working with materials will still generally be the same in terms of creation and assignment with one exception; the names given to individual materials across a set or collection – if the aim is to bring several distinct meshes into the same IMVU project, care must be taken in Blender to ensure material names are properly sequential as part of the overall project, that when imported no particular material appears where it shouldn’t unless intended. For example;
Mesh 1

    Material [0]

    Material [3]

Mesh 2

    Material [1]

    Material [4]

Mesh 3

    Material [2]
As with using multiple materials generally, the order they are assigned or appear to be listed does not matter, so long as the numbering is complete they will import correctly into IMVU. When using this approach to make content for IMVU use the Outliner Editor top-right to check material assignments – select an item in the 3D View to expose the information associate with it in the Outliner.