Animation in Blender
Animating in Blender differs slightly depending on what’s being animated and how complicated the animation needs to be. Most furniture and rooms for example use very simple skeletal structures that don’t require complex articulation whereas avatars, and some accessories, do. In practice this means that although all animation is generally created the same way, changes in behaviour have to be accounted for to ensure an expected outcome.
FPS
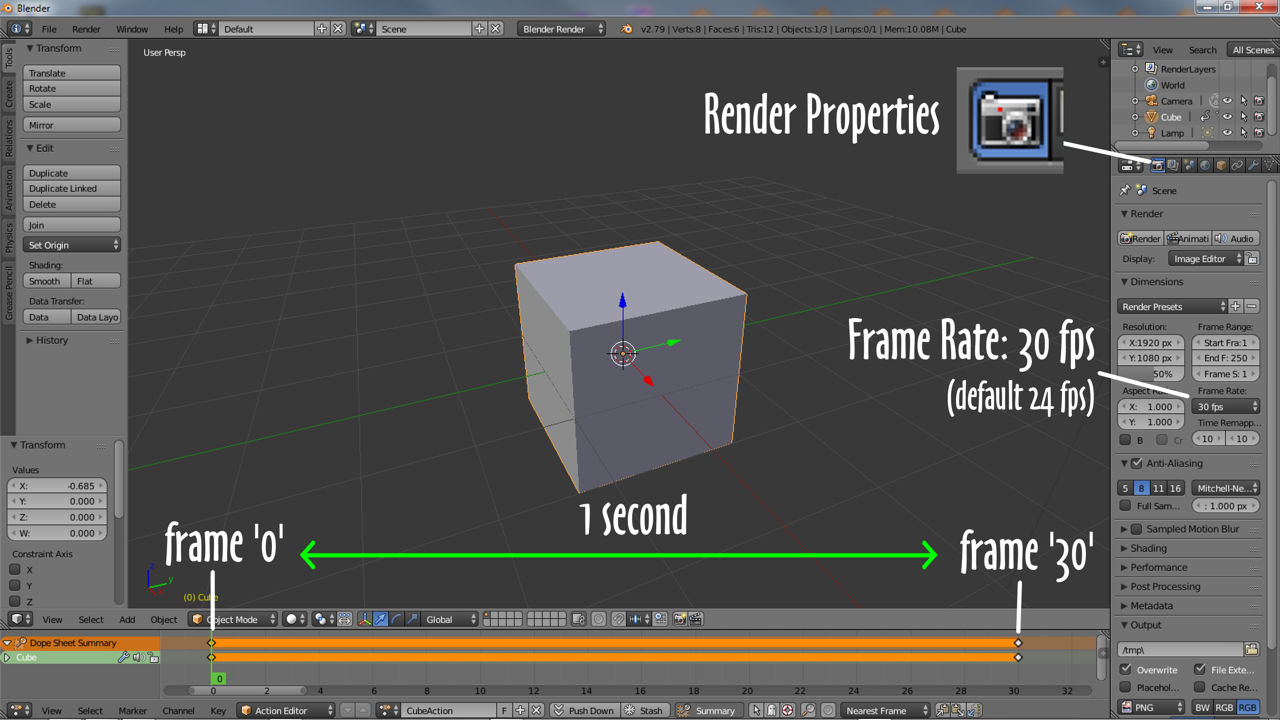
Animation works by playing through a sequence, a collection of individual frames, as a given rate. In Blender this rate or FPS is set to 24 frames per second. In IMVU this same rate is 30 frames per second, an extra six frames. If the two rates don’t match it tends to mean Blender animations rending faster than expected in IMVU. To solve this both rates need to be identical. In Blender this is changed in the Frame Rate setting under Render Properties, click the selector and choose 30 instead of the default 24. This will then mean Blender and IMVU are fully synchronized.
Sequence duration
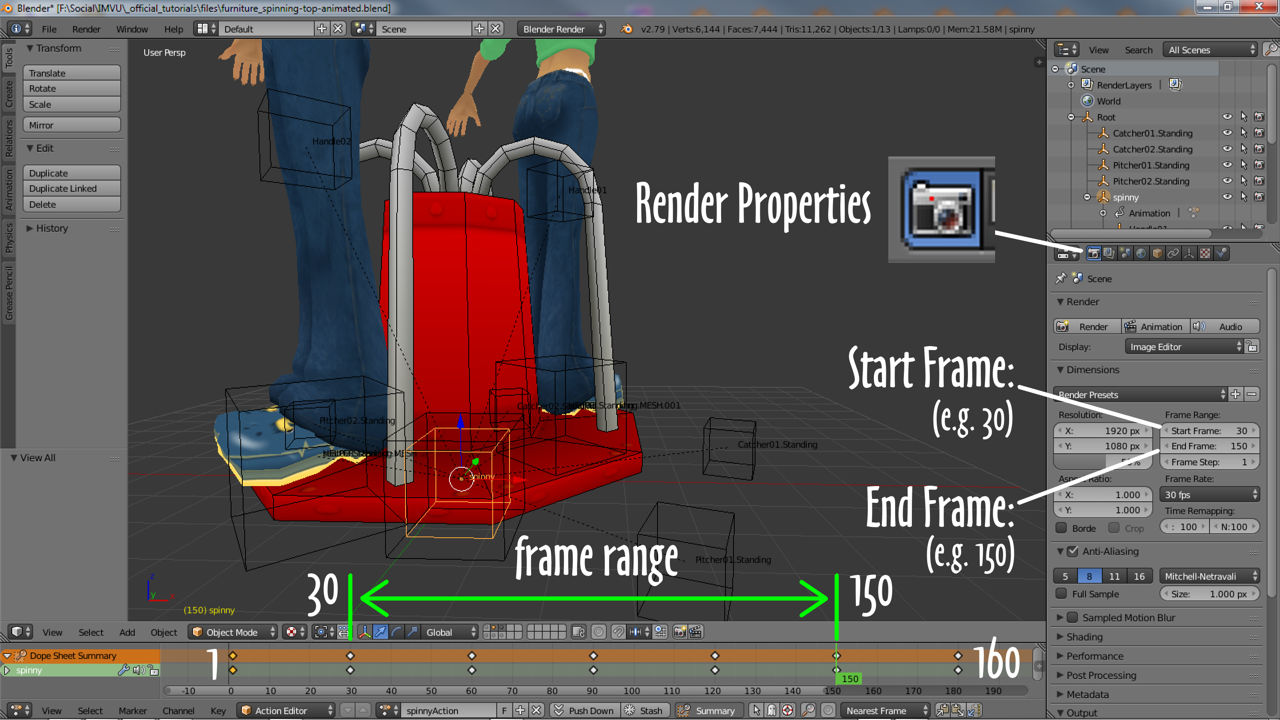
Generally speaking the length or duration of a sequence is determined by the start and end keyframes marked to the timeline, this determines how long the sequence plays. Whilst working on a sequence however, it can be advantageous to set different start/end points, something that helps with cycling animation [link animation – looping-cycling], which can then be utilised in IMVU to force uninterrupted playback, especially for looped sequences.
To do this in Blender, in Render Properties and under Frame Range, set Start Frame: and End Frame: to appropriate values corresponding to the range required – if an entire sequence is 160 frames long but only frames 30 to 150 were needed, Start Frame would be set to 30, End Frame to 150.
Auto-insert keyframes
By default Blender does not automatically insert keyframes when animating anything, it has to be enabled. And all though it might be active and usable, its properties are not be available other animation related editors, e.g. Dope Sheet, Action Editor, Graph Editor, NLA Editor etc.
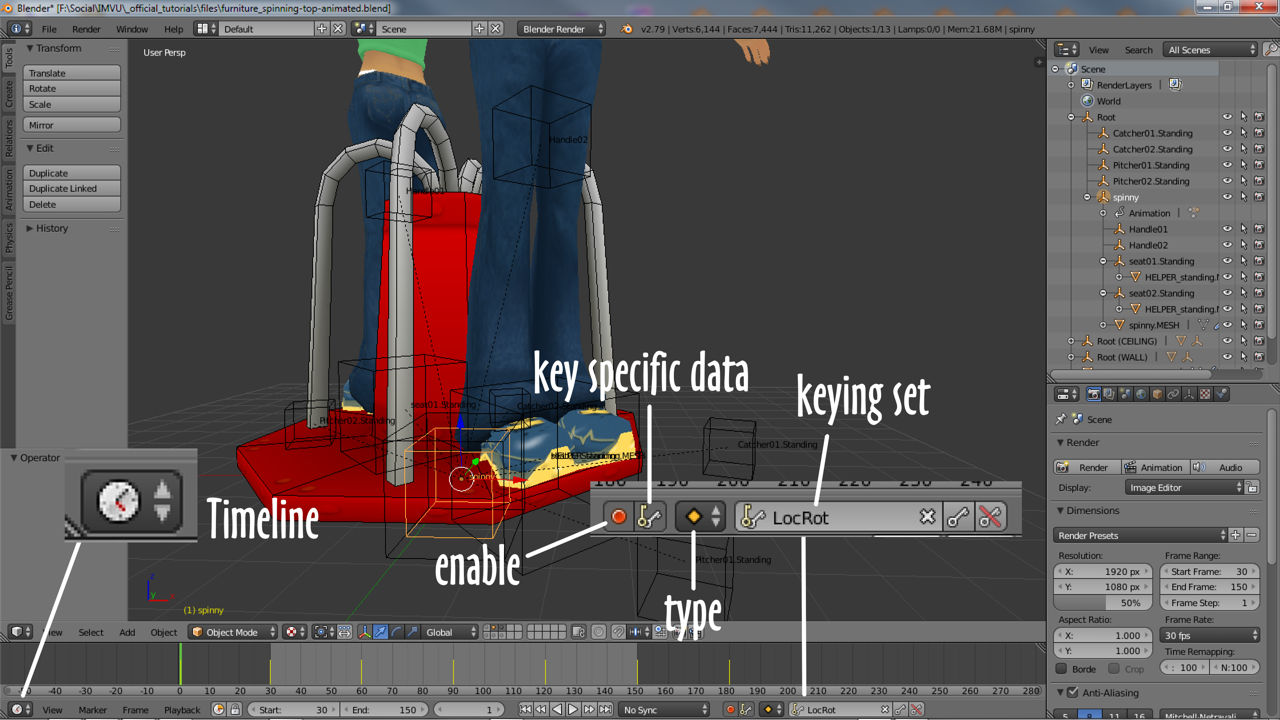
To enable, access the Timeline Editor and click the red Automatic keyframe insertion for Objects and Bones button;
Automatic keyframe insertion using active Keying Set only button; set Type of keyframe to create when inserting keyframes to Keyframe;
Finally… set LocRot as the Action Keying Set used to insert/delete keyframes.
Action Editor
Blenders flexibility means a number of different editors can be used to create animated sequences. Whichever is used however, the results need to resolve to an Action, the active data that’s exported to FBX and Cal3D.
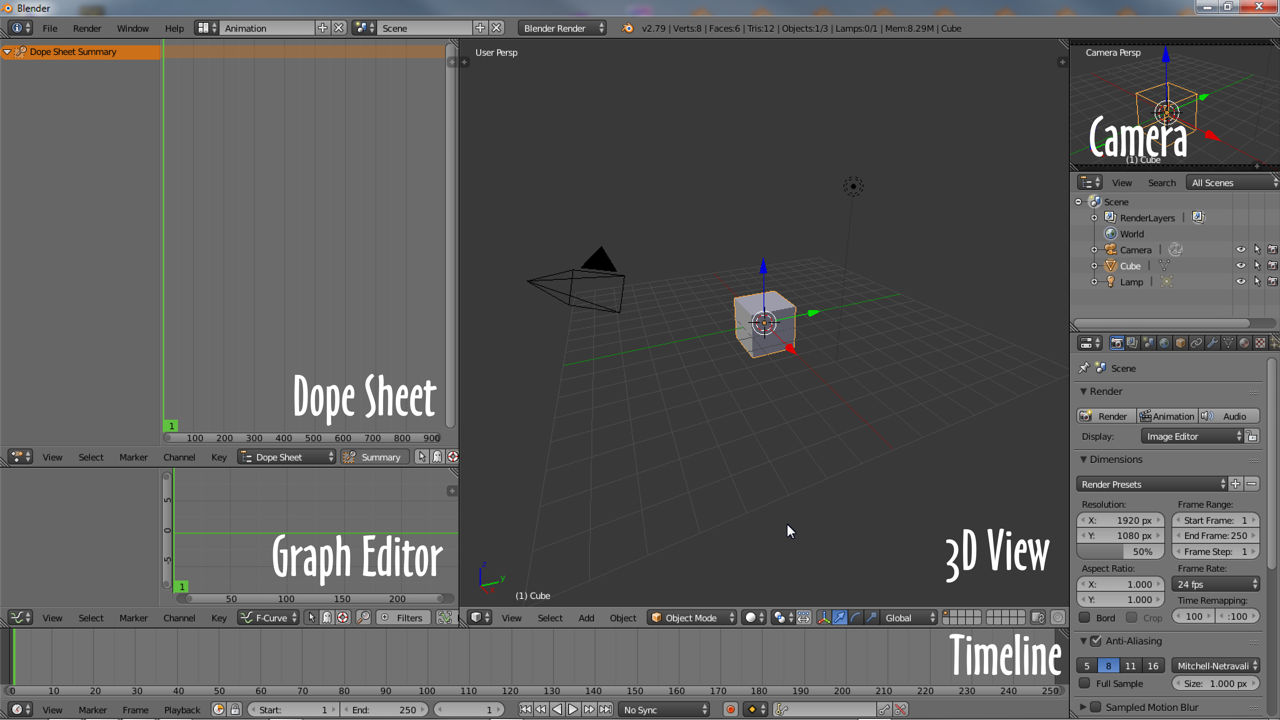
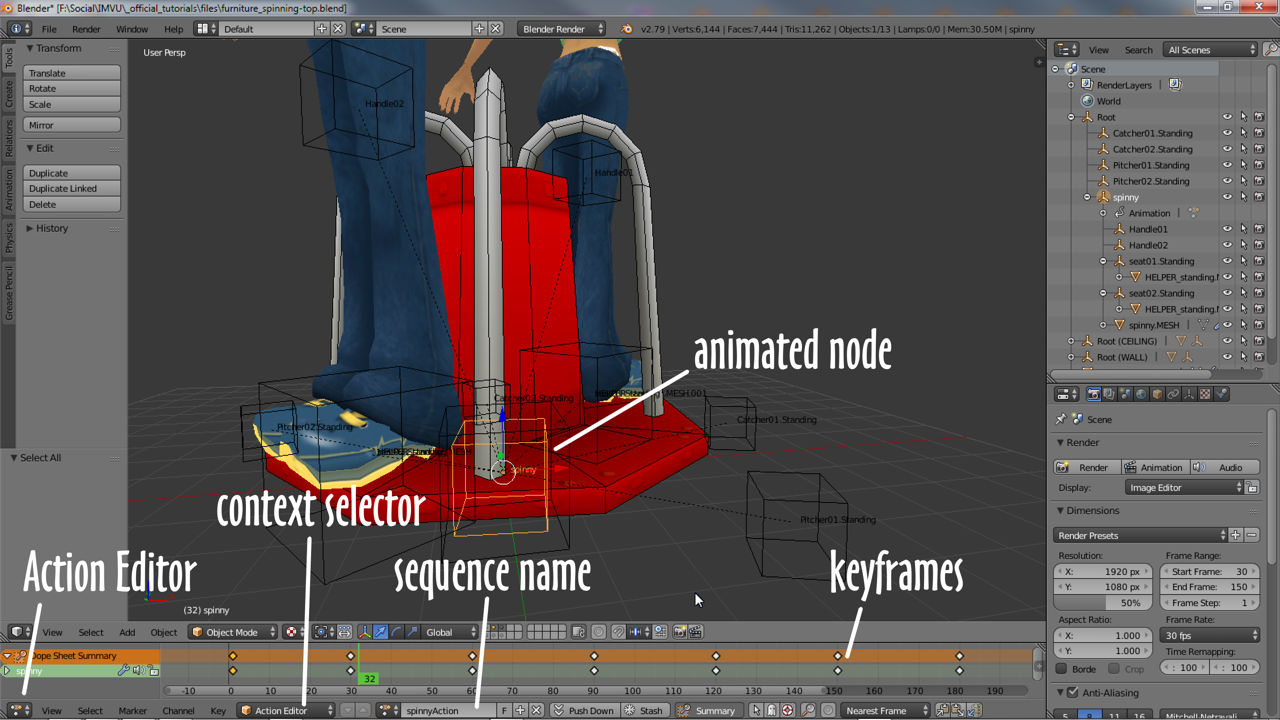
To display the associated Action Editor switch any available area to the Dope Sheet – click the Current editor type for this area button –
Then select Action Editor as the context from the Editing context being displayed menu – if a sequence has been generated using another editor the results will typically be shown in the timeline.
If not, scrub the timeline slider back and forth confirming the objects move as expected, then at specific frames in the timeline insert the LocRot data for the selected objects at that point (click Object » Animation » Insert Keyframe, LocRot).
Looping
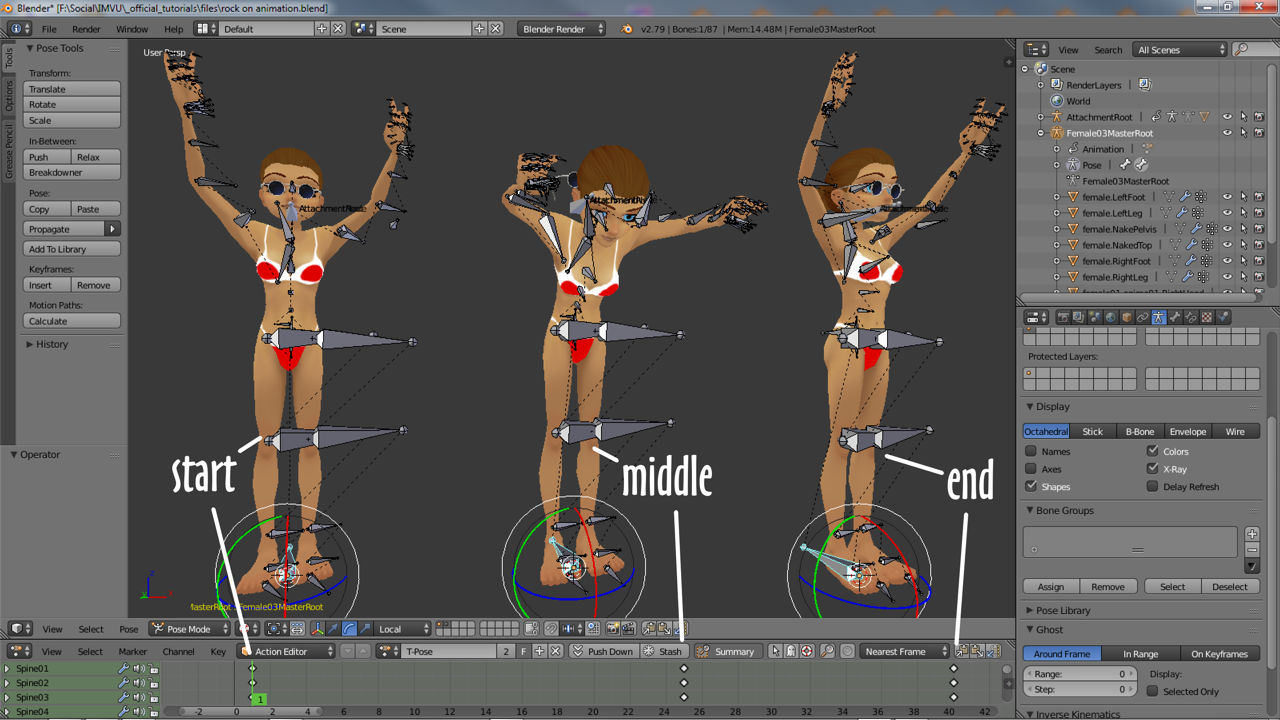
Static poses aside (click here for more), most animated sequences will need to loop so when played or triggered in IMVU they repeat without there being any sudden jumps or hiccups as playback crosses the start/end threshold.
The way this is generally done is to make the start and end frames of a sequence identical to one another. With that said, looping is not just as simple as copying one to other, but doing so being mindful to allow for the transition from the start frame to the middle, and again from middle in to the end frame – something has to occur between the two, a transition, else objects, poses, appear to change abruptly, breaking the actions immersion and realism (think a dance animation that reset mid-pose).
Playback
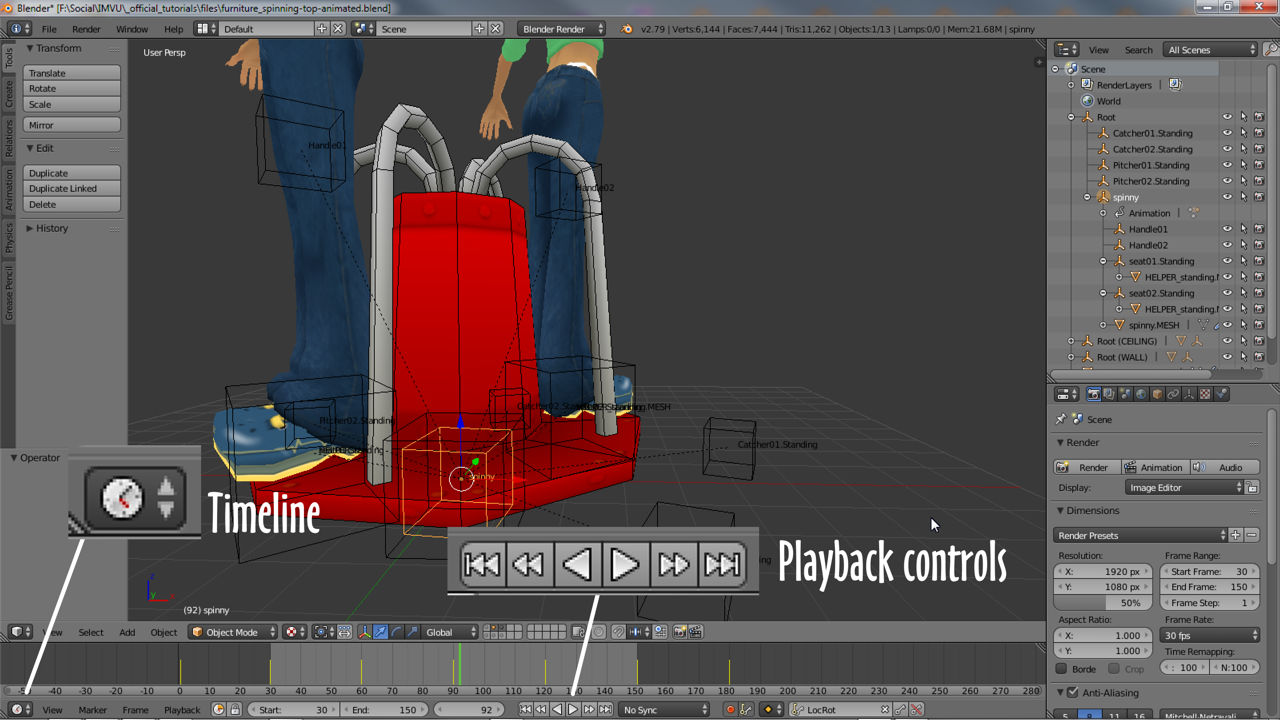
Once a sequence has been created it can be previewed using Blenders playback controls or by using the Alt+A shortcut. To use the playback controls switch to the Timeline Editor and click the playback buttons to start/stop playback, skip to start/end and skip to next/previous keyframe. Alternatively Alt+A can be used to perform a quick start/stop.
