 The Editor is where product creation occurs. The tools afforded in the Editor are for both amateurs and professionals alike. While its true that there are easy things that can be done in the Editor (like swapping out textures), the Editor is complex like an airplane cockpit. The thing to understand, though, is that you don’t have to use all of the tools available.
This tutorial will help you understand what each piece of the Editor does so you have a better idea of what you will use. So, grab a cup of hot cocoa and get ready to ingest gobs of useful information…and all of your cocoa.
Create Mode interactions
Most of the time, you will be entering the Editor through Create Mode. In those instances, you can always get back to Create Mode by clicking on its tab.

You can also open several Editors at once. This is helpful for comparing how you’ve set up one product with another.

The bar along the top of the Editor includes useful tools that you will use or reference every time you run the Editor. On the left side, you will see information for the PID, Parent, and Type.
Next to those you will see icons for UI toggle and Local Directory. Let’s talk about each of these, shall we?
Local Directory
The local directory allows you to directly edit assets included in a product. For example, if you are exporting a mesh, you can just save it into the local directory and it will be automatically included in the project. An economic approach, to be sure, considering that the initial loading of a newly saved asset can take up to seven steps.
Anything you add to the local directory is included in the project. However, at some stage in the near future, we will be stripping unused assets from products. While hot-swapping assets is cool, we strongly recommend you not rely on the local directory system as a place to store your assets. No doubt you will want to delete the local directories at some stage and it would be a shame if you lost all of your original work because you only backed it up in the local directory.
![]()
IMVU uses changes in the button in the upper right to help walk users through the most typical creation experience. That typical creation experience is that you make a change, save your product and then upload. However, several buttons are clickable even though their art is not in the highlighted active state.
As you make changes to a product, the Apply Changes button becomes highlighted. When you click this button, the changes you have made in the Editor get applied to the 3D product. You can also trigger apply changes by typing Ctrl+a.
After you apply changes, Save becomes highlighted. You can save a product by clicking that button or by pressing Ctrl+s. When you Save the project you’re working on, it is saved as a .CHKN file.
Save As
You can also click the little arrow to the right of the save button. This shows the Save As button. Clicking Save As allows you to rename the project. You can also Save As by pressing Shift+Ctrl+s.
Upload
When Save or Save As are clicked, the Upload button becomes active. The Upload button is smart in that it knows whether you are uploading a new product or re-submitting over an existing product.
When you click Upload, a copy of your .CHKN file is made and converted into a CFL as only CFL files can be submitted via the web submission flow. That CFL file is placed in your C:\Documents and Settings\[username]\Local Settings\Temp folder
Bottom Tool Bar
In the Editor, you have full access to your clothing inventory. You can add any product or outfit to the scene as long as it doesn’t conflict with the one you’re editing. If it does conflict, the Editor will alert you to that fact.
You can also add different scenes and furniture from your inventory. You can also take snapshots using the standard snapshot tool.
Editor Tool Tabs:
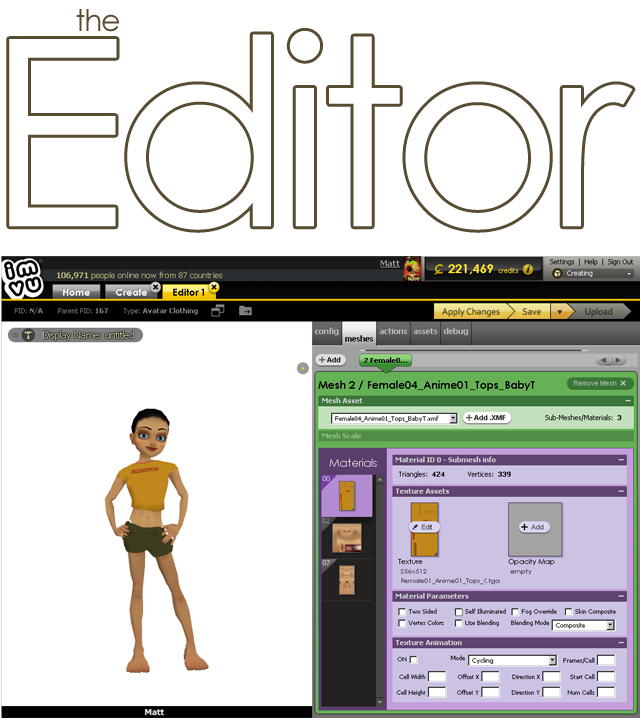
Meshes
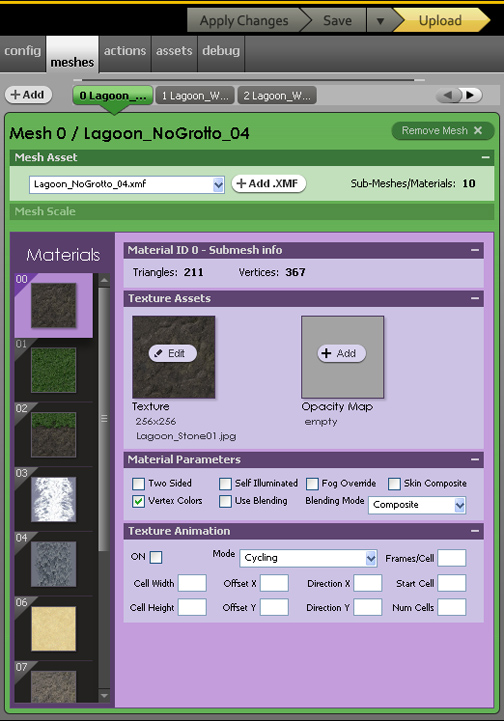
The tab that the Editor opens to is the Meshes tab. This tab contains information for both the geometry and material assets that you will add to your product. As is the case with all of the tab tools, panels can be opened & closed and their state is remembered between sessions
Editor Tool Tabs: Config
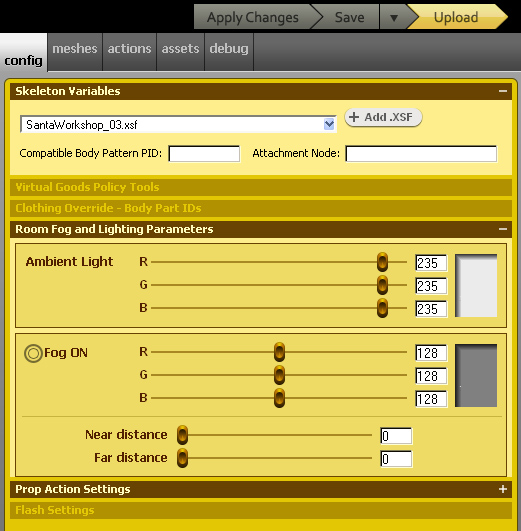
The Config tab is where the Skeleton asset and it parameters are edited. This tab reveals functionality based on which product type is being edited. For example, for Avatar Body Parts (aka clothing), you can select Skeleton Variables, MCG tests and Body Part IDs. For Rooms, you can select Fog & Lighting and Prop Actions.
For Furniture, you can select Skeleton Variables, Body Part IDs, Prop Action and Flash Settings. Note: If the parent product you are deriving from has a flash widget you don’t like, you can choose to turn that flash widget off in your derivation.
Editor Tool Tabs: Actions
Editor Tool Tabs: Assets
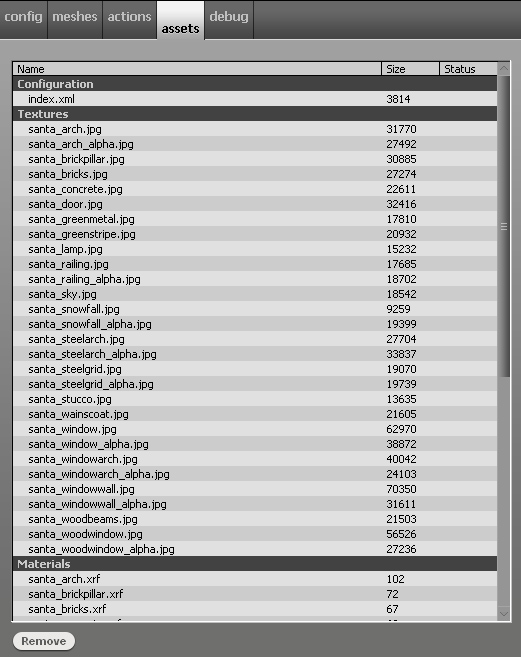
The Assets tab is simply a list of the assets currently housed in your local project folder. It can differentiate between assets that are actively in use in the other tabs and those that are not.
Adding assets to a project occurs in one of two ways:
Editor Tool Tabs: Debug
The Debug tab is for the professionals. The Debug 01 and Debug 02 sub-tabs list asset changes that this product has set. This helps you verify (or “de-bug”) that changes you have made in other parts of the Editor are actually set the way you intended. The Add Actor sub-tab allows you to add a 2nd avatar to scene.
Editor Tool Tabs: Particles
Due to the interface being SO AWFUL, we have decided not to port Particles to Create Mode for now. We have a new design and will take that on at some point in the future.
Hot Keys