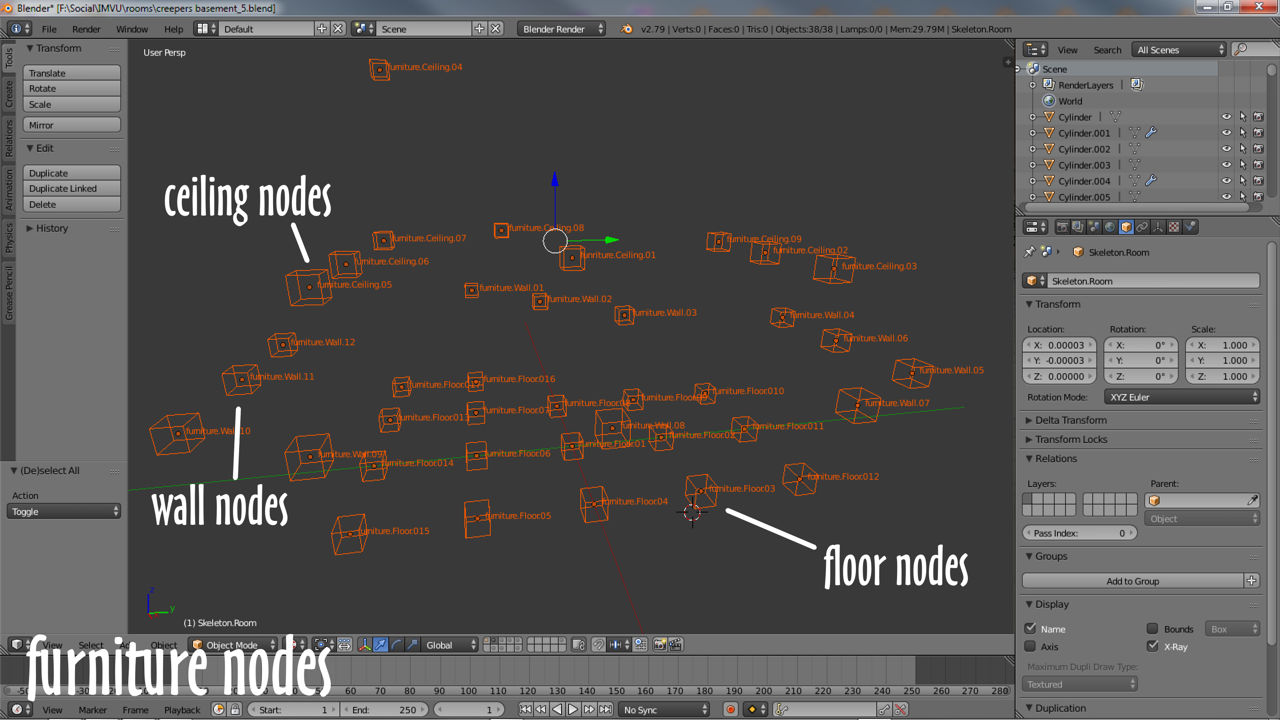
An essential aspect of rooms, furniture nodes are mounting points for furniture item, the position a chair might appear when added to a scene. In Blender they will generally be linked to the rooms root bone, skeleton.Room, and are included based on the degree of interaction a room is to have (what avatars can do). Normally arranged in a grid pattern, they can also be randomly placed where needed, on a cliff face for example. And although they are needed for furniture, not all node types need be included, omitting ceiling nodes from an outdoor scene for example.
Type of Furniture Node
There are three main types of furniture node;
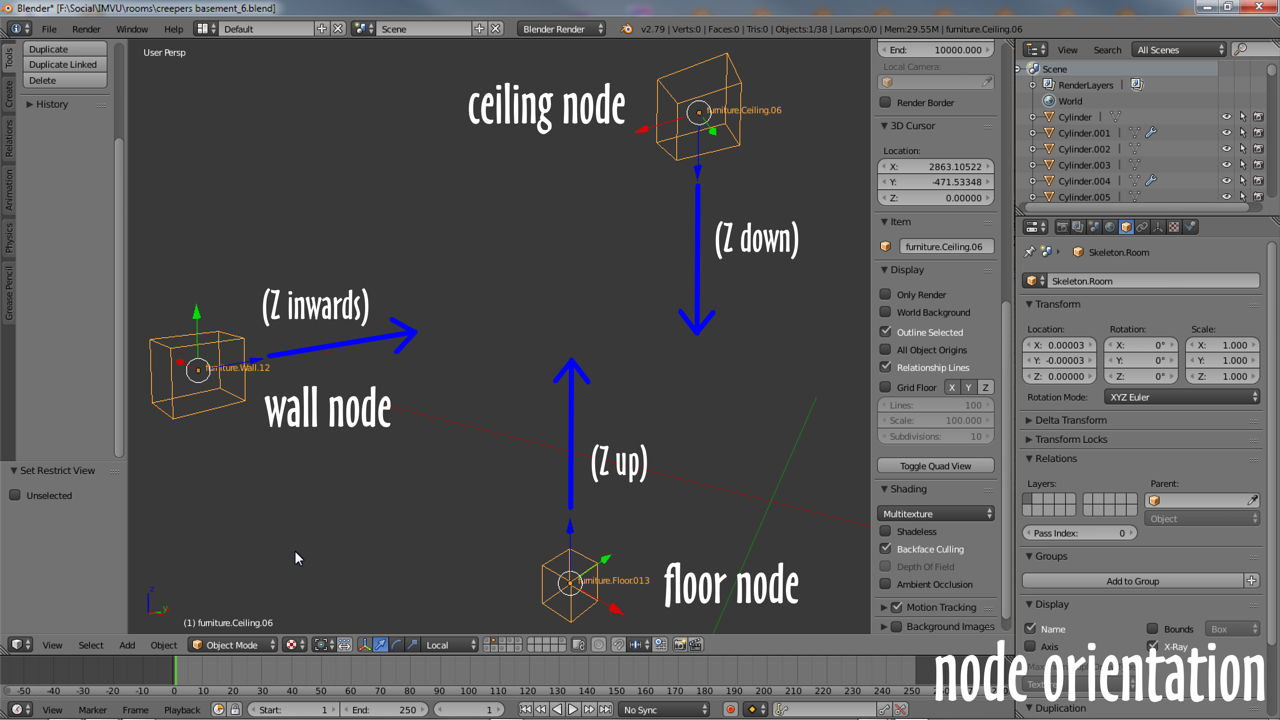
Generally speaking floor (*.Floor) nodes are used for furniture that should appear upright on surfaces, seats, benches, couches etc.; wall (*.Wall) for furniture appearing on walls or orientated to face inwards/outwards, suitable for windows, pictures, mural hangings etc.; and ceiling (*.Ceiling.) for furniture hanging from ceilings, pointing down into rooms, or from ‘upside-down’ surfaces, lamps, light fittings and so on.
Furniture Node Names & Numbers
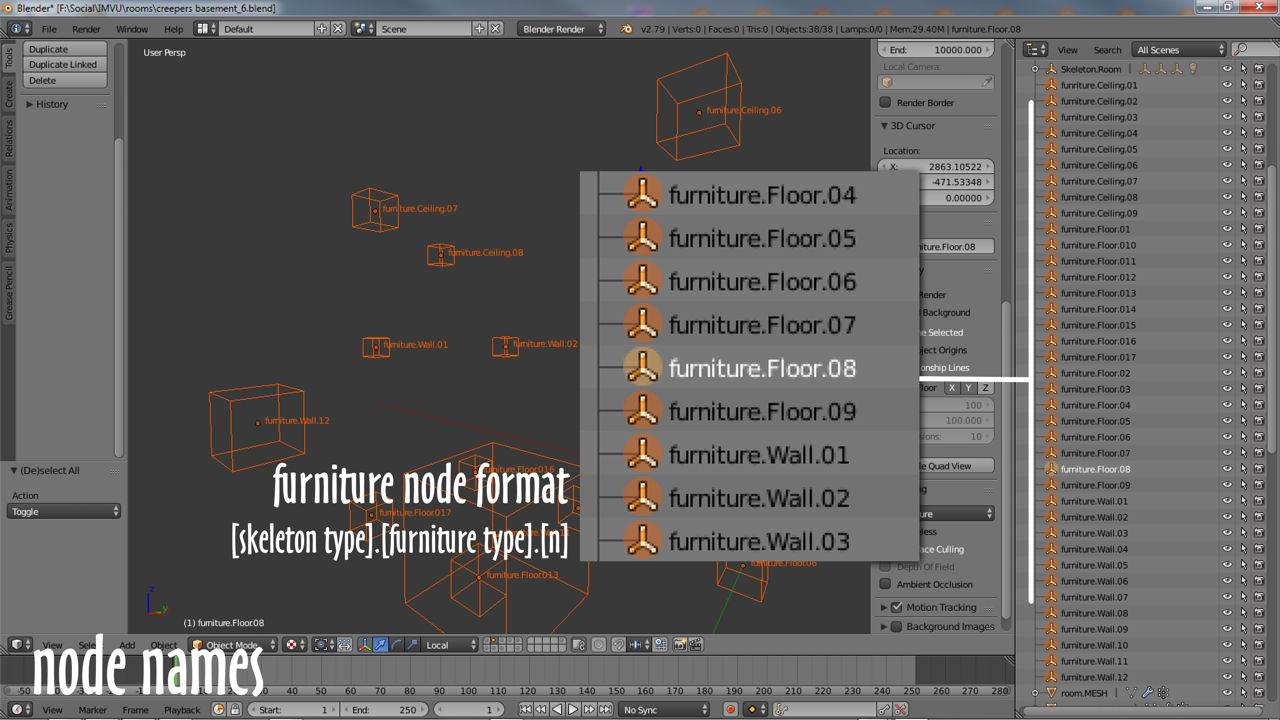
To distinguish furniture nodes from one another – floor from ceiling, and nodes in a rooms overall skeleton – furniture from seat, each is given a specific name or label based on the following ‘expression’;
[skeleton node type].[furniture node type].[n]
Here [skeleton node type] represents the position of the node in the rooms overall skeletal hierarchy, e.g. a furniture node instead of a camera node; [furniture node type] denotes the type of furniture item the node is associated with, e.g. chairs, picture frames or hanging lights; with [n] being a unique identifier that also acts as an incremental counter – how many nodes there per-type. Using this simple expression the 135th floor node would be labeled;
furniture.Floor.135
Whilst the case sensitive labels attributed to each node, furniture.Floor., can be duplicated across a set, the appended numerical value, [n], must be unique to each node so IMVU can properly distinguish them individually, that is;
furniture.Floor.01 » furniture.Floor.999
furniture.Wall.01 » furniture.Wall.999
furniture.Ceiling.01 » furniture.Ceiling.999
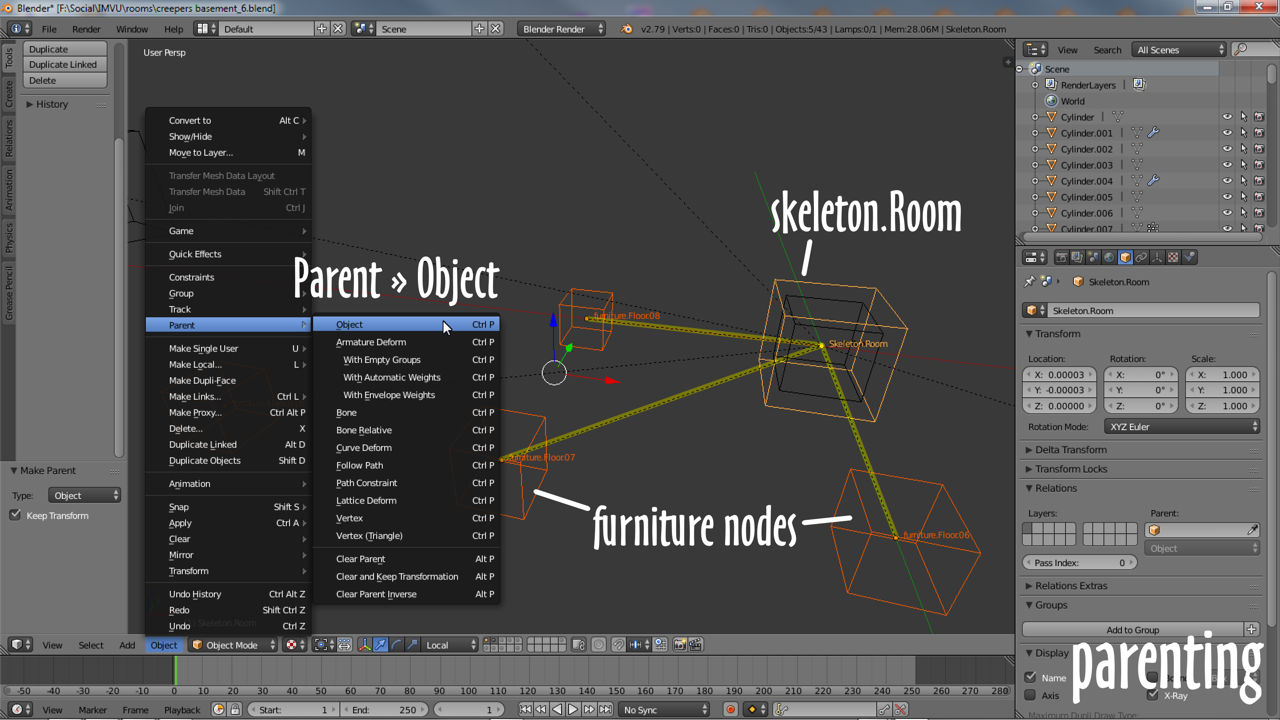
Node Parenting
For standard furniture rooms all furniture nodes need to be linked to the rooms origin, skeleton.Room. This is done through the use of Parent in Blender. First select the furniture nodes to be connected using (Shift+) right-click then skeleton.Room – this must be selected last. Once the nodes are highlighted, from the Object menu choose Parent » Object, then Object (Keep Transform) from the Set Parent To pop-up that appears, this links everything together so skeleton.Room now influences the furniture nodes.
skeleton.Room
» node.Room
» » Omni01
... + misc
» furniture.Floor.01
... + floor
» furniture.Wall.01
... + wall
» furniture.Ceiling.01
... + ceiling