Furniture – Custom Poses
For greater interest or interactivity furniture can include custom avatar actions in the form of static or statue poses that make the avatar appear frozen in time. For Blender users this is a two part process that requires the furniture to be modified, which is itself then used as a guide in creating an associated avatar pose. Both parts, the furniture item with seating and the separate avatar pose, are then exported and assembled in Create mode.
Furniture set-up
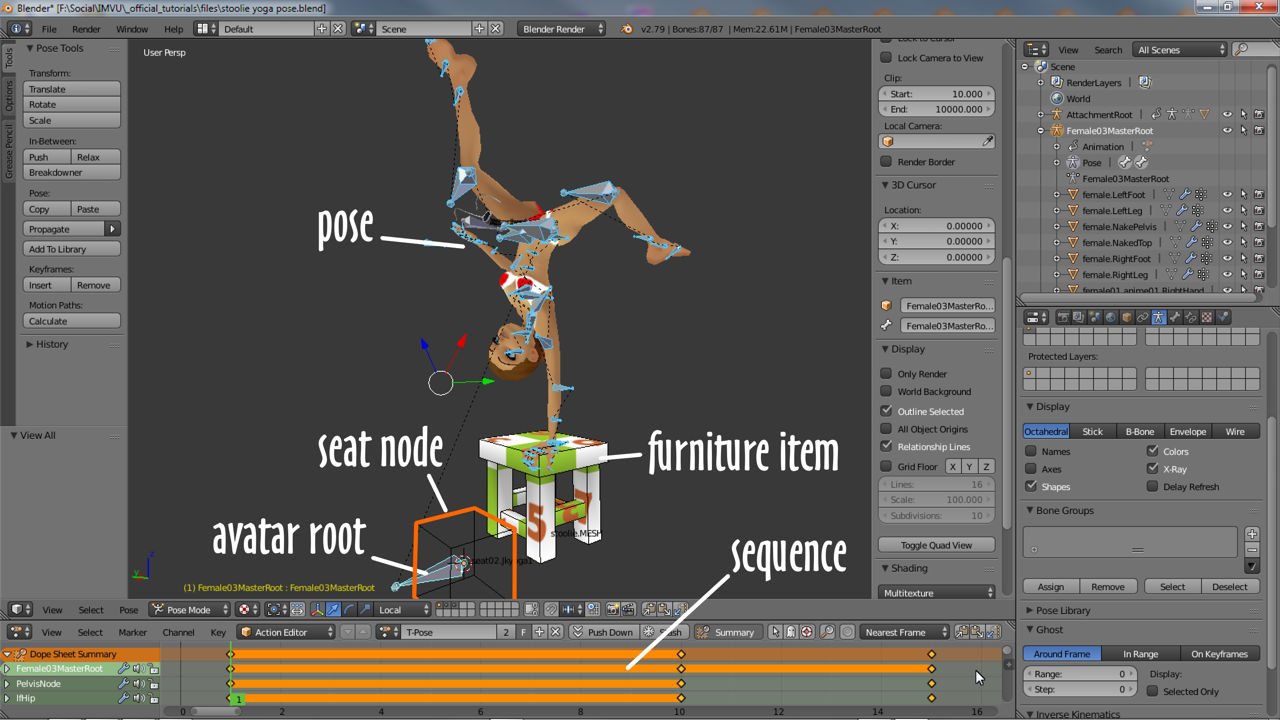
To add what is in effect a custom pose to furniture the seat node/s associated with the pose will need to be modified slightly. This means changing the append, by default either *.Sitting or *.Standing, to something more appropriate, for example *.Stoolieyoga – if the furniture item had a single seat this would be seat01.Stoolieyoga. This node will then need to be parented as normal to Root (or other bone where animated). This initial steps helps later when assembling the parts together in IMVU.
Pose file set-up
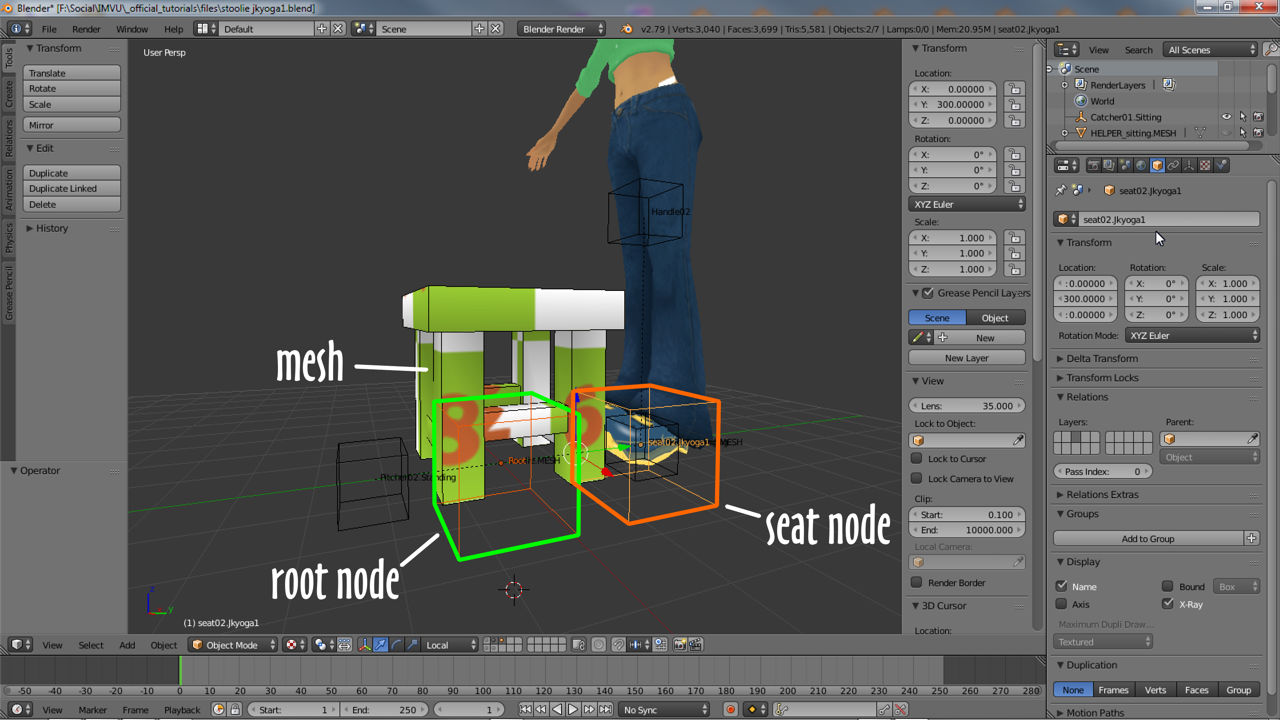
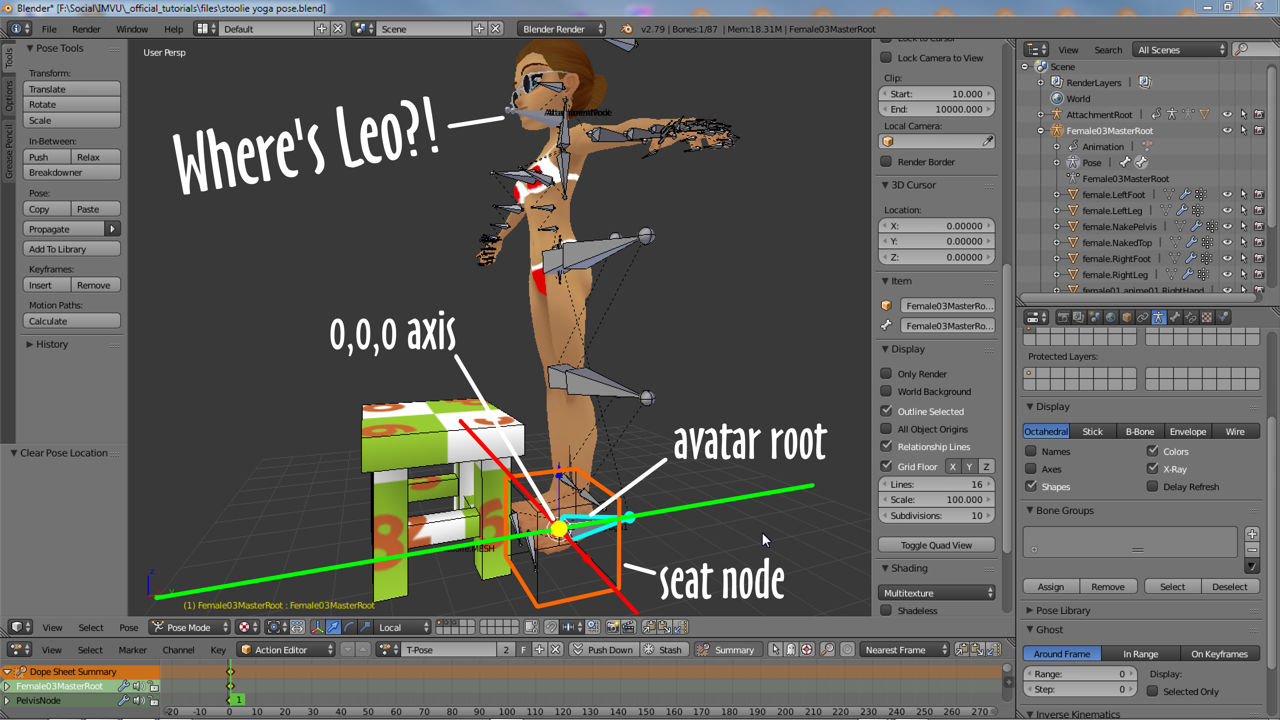
Once the furniture is set up in can be imported into the pose file that contains the avatar using Append. This will act as a guide. Here the seat node (seat01.Stoolieyoga) and furniture are positioned relative to the avatar so they both face in the same direction (they face the direction the avatar is expected to appear) – seat node needs to be placed exactly at grid centre, 0,0,0, matching the avatars skeleton root, Female03MasterRoot. This is important. With this done the avatar skeleton can be posed in Pose Mode , individual bone manipulated into position, automatically inserted into the Action Editor timeline below as a sequence.
Pose reset (fbx only?)
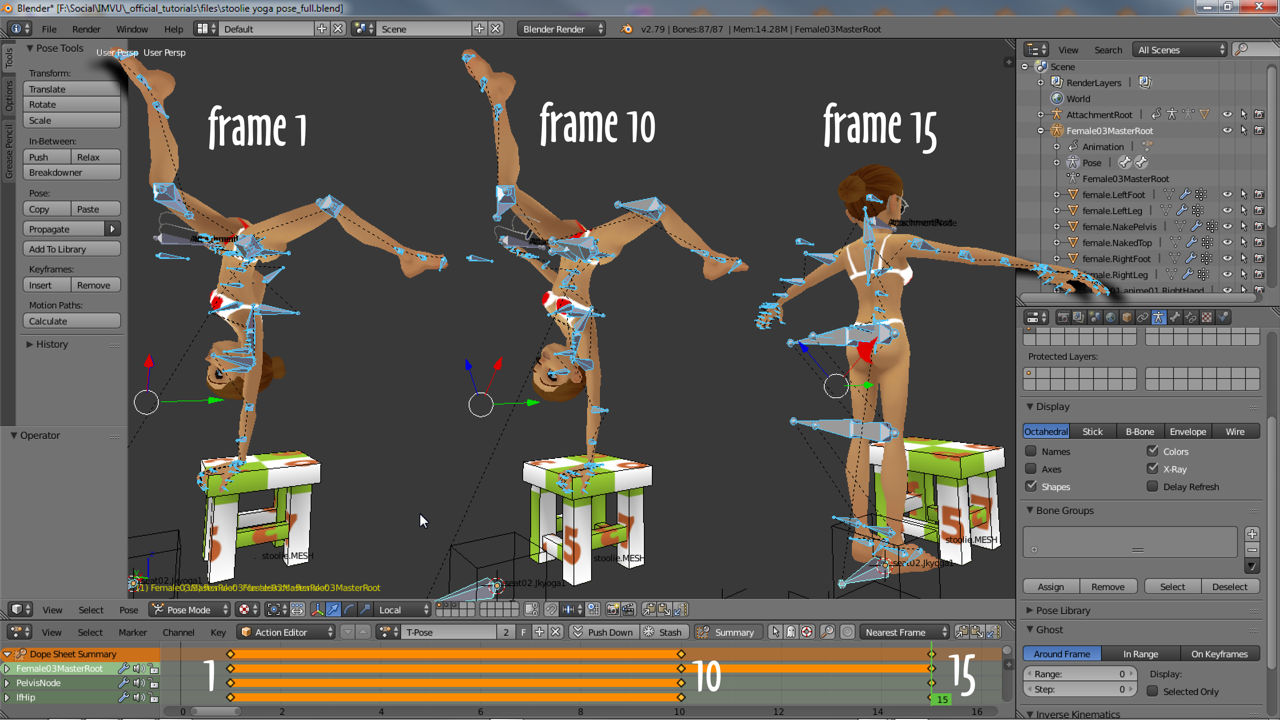
For static poses to export correctly to FBX the sequence needs to be set-up so that; 1) the pose is duplicated to another frame, and 2) the pose is completely reset. Both ensures the export/import pathway parses the file properly. So, once the initial pose is created at frame 1, whilst still in Pose Mode select all the Armatures bones, A, and copy (Ctrl+C)/paste (Ctrl+V) the data into another frame, 10 for example, creating a second keyframe duplicating the pose. In one more frame, e.g. 15, clear all pose data using Pose » Clear Transform » All to reset the skeleton. There should then be 3 poses across 15 frames.
Export
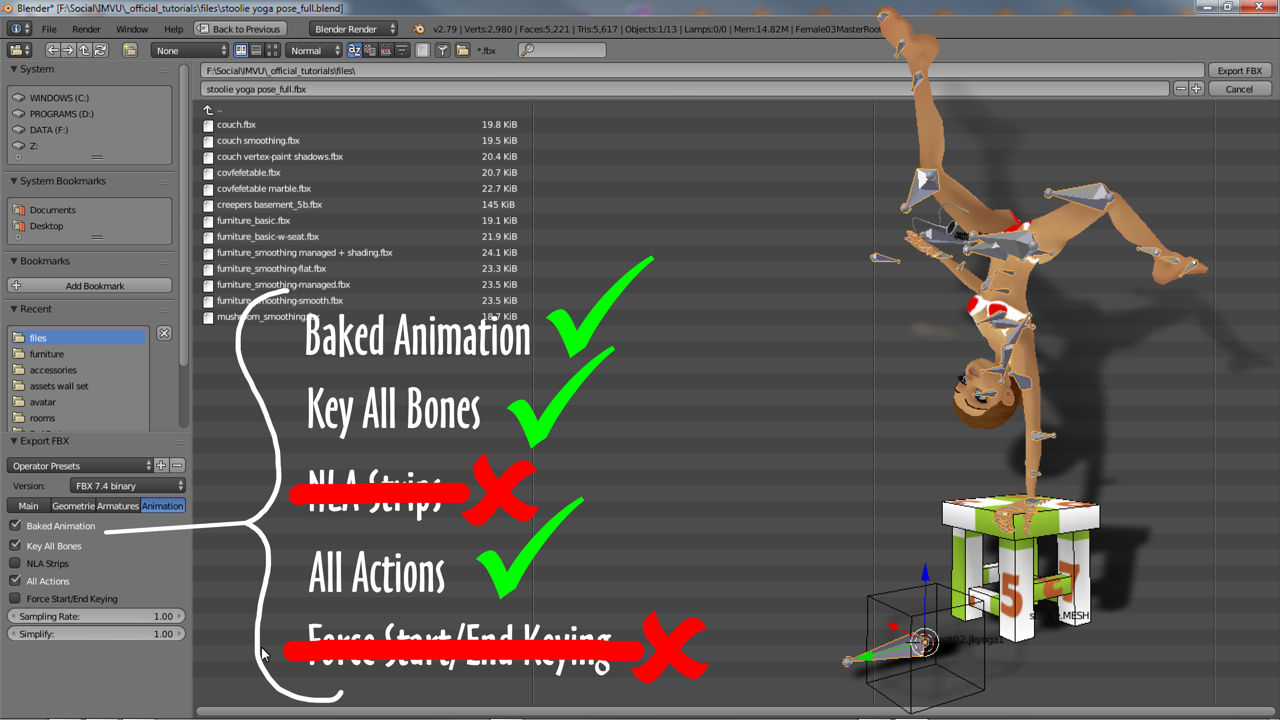
Once the sequence is available it can be exported. In Object Mode select the Armature and export using File » Export » FBX (.fbx). In the File Browser that opens, bottom left make sure Selected Objects is enabled in Main and the options for Animations are set as follow;
Baked Animations (Yes) Key All Bones (Yes)NLA Strips(No) All Actions (Yes)Force Start/End Keying(No)
These settings force Blender to parse sequences as individual tracks in the exported FBX file rather than collated together, which IMVU cannot use.
Import
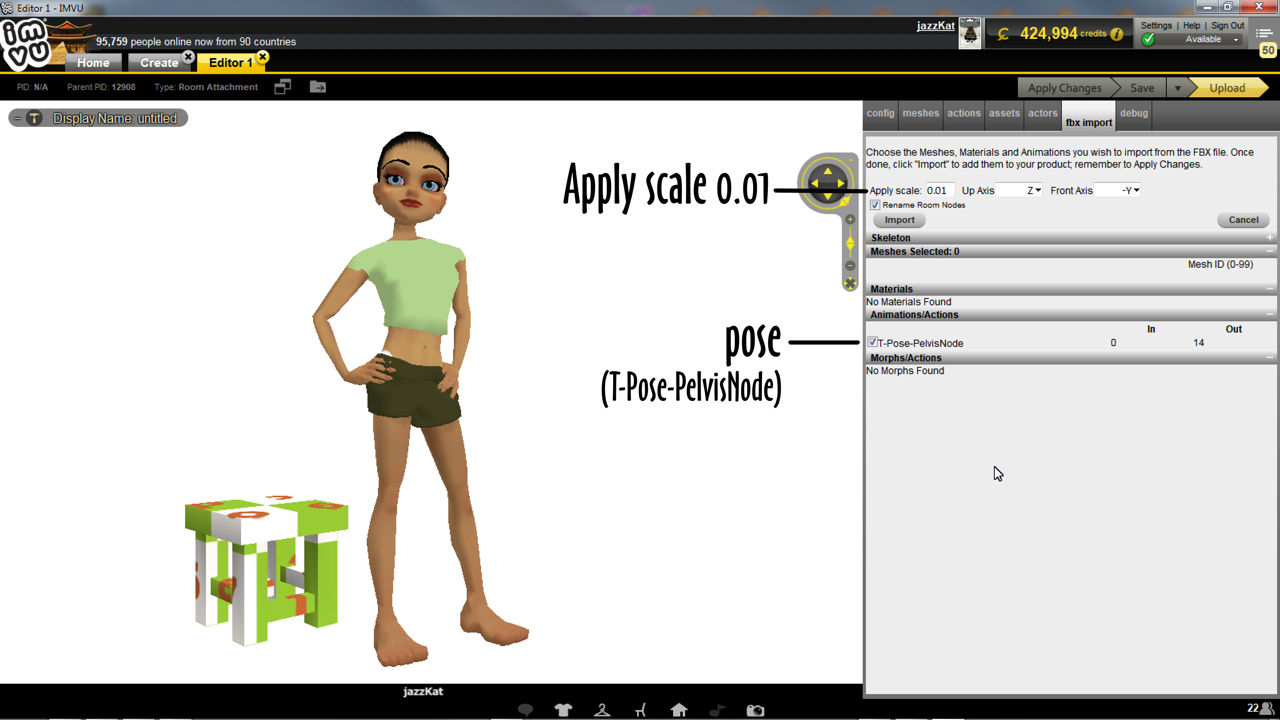
To assemble the furniture item with custom pose in IMVU the two fbx files need to be imported into the same project. Derive a furniture item and import the furniture FBX first. Check which assets are imported, set the Apply scale value to 0.01 then import. This will replace the default items assets.
Next import the pose. Follow the same procedure but when the the Select Skeleton Root pop-up appears, disable Hide [n] skeletons that contain no meshes and select the entry with 86 bones (86 bones, 0 meshes). Continue the import process; check the animation is brought in (listed under Actions/Animations); change Apply scale to 0.01 and then complete.
Assembly
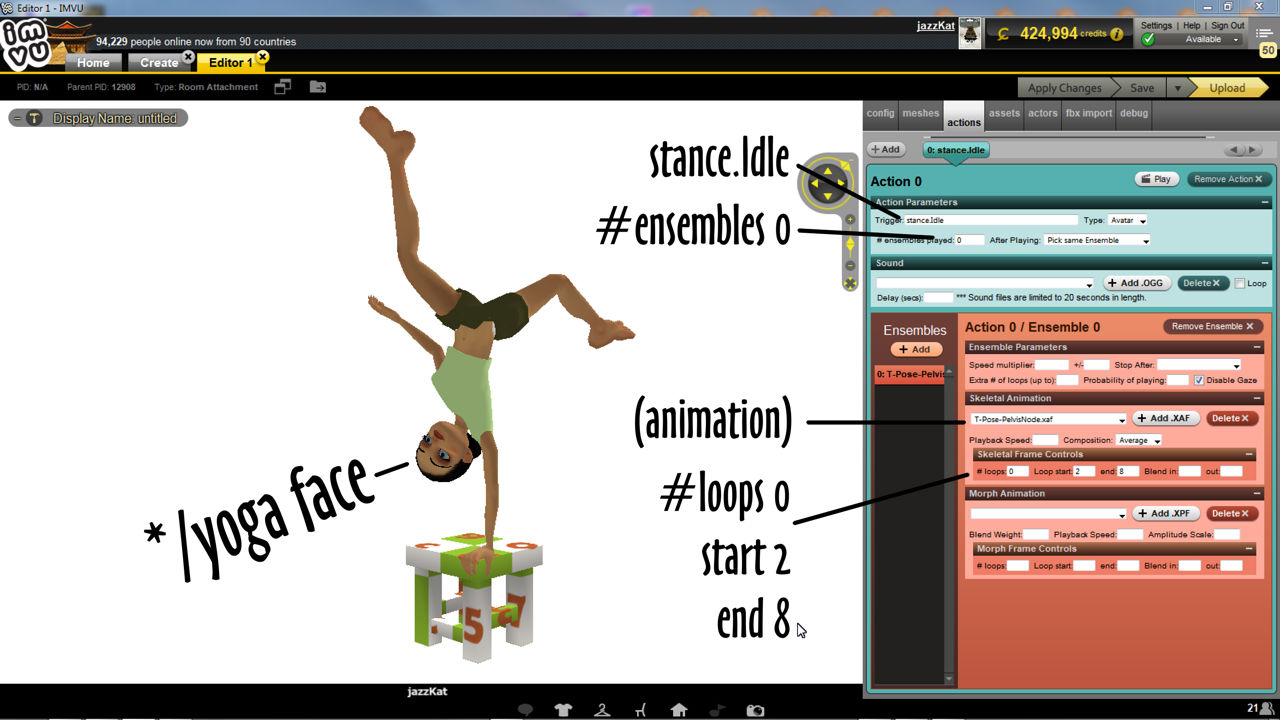
Once the two FBX files have been imported into the same project click Apply Changes to make sure they are available for assembly. To link the pose click the actions tab and create a new action, Action 0. In Action Parameters set;
Action Parameters
- Trigger:		stance.Idle
- Type:			Avatar
- #ensembles player:	0 (infinite loop)
- After Playing:	Pick same Ensemble
This sets up the overall Action. Next, the Skeletal Animations options. First select the animation from the drop-down, e.g. T-Pose-PelvisNode and set Composition to Replace. Finally because the sequence loops over a number of frames and only one or two are needed, set # loops to 0 and select a Loop start and end range that will show the pose as being static (even though its looping across a few frames), e.g. Loop start: 2, end: 8.
Skeletal Animations
- XAF:			T-Pose-PelvisNode (example)
- Composition:		Replace
- # loops:		0 (example)
- Loop start:		2 (example)
- end:			8 (example)
When the avatar is moved to the custom spot the animation will play as a static pose until the another spot it used.
