
Once you have assembled your 3D assets in a Create Mode Editor and saved those assets as a local Project, it is time to Upload that project to the IMVU catalog. Once it has been uploaded, it will become a Product. This means it will be added to the IMVU catalog and given a product identification number (or “PID” for short.)
When you are ready to use your new product in the IMVU 3D Chat and allow others to see it, you must publish the product. Clicking the ‘publish’ link on a product info page will push the product into Peer Review where other IMVU users will have a chance to vote on whether it meets the requirements set forth in the Virtual Goods Policy and ought to be added to the IMVU catalog.
Once it passes Peer Review, you can use it publicly yourself and sell it to others. If you do not have enough Credits or Developer Tokens to submit a product, the submission card will not launch. Rather, you will be presented with a dialog alerting you to the fact you don’t have enough Credits. From this dialog, you can choose to go and buy more Credits if you like.
Quick Overview: Submit
Submitting a product is easy
Click Upload
In the upper right corner of the Editor are a series of buttons. When your product is Saved, then it can be uploaded. So, when you’re ready, click Upload.
The Upload button is smart in that it knows whether you are trying to submit a brand new product or just editing an existing one.
Submission Card
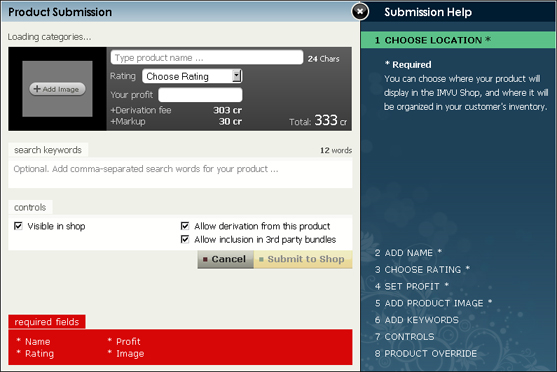
Can you hear the harps? I can hear the harps. Anywho… When you click upload, you will be presented with the *unimaginably beautiful* product submission card. This card contains input fields for everything your product requires in order to be submitted to IMVU.
Cancel anytime
If you happen to click Upload by accident or simply change your mind, you can either click the X or the ‘Cancel’ button to close the submission card.
Help! I need somebody. [Sorry. Couldn’t resist.]
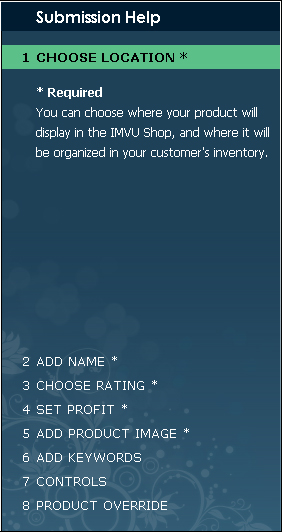
On the right hand side of the submission card is a panel dedicated to quick reference help. As you select topics in the help panel, the relevant fields in the submission card are highlighted. The opposite is true as well: as you click around in the various input fields, their relevant help topic is shown.
Required Fields
While every field in the submission card is useful for adding your project to the IMVU catalog, there are five fields that are required.
A big, red bar lives at the bottom of the submission card until all required fields are completed. If you see that red bar, then you have not yet completed one of the required fields and, therefore, can not submit.
When all required fields are completed, the red bar is replaced by the fee reminder (described below) and the power of the Submit to Shop button is unleashed.

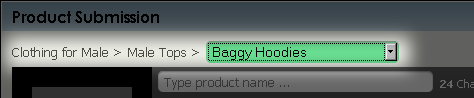
Location
The first required field allows you to tell IMVU where in the catalog your new product ought to live. This same, single location choice will be where the product lives in your customers’ inventories.
The available locations are based on product type. For example, Room products are only allowed to go into the Room section of the catalog. This prevents The Great Confusion as it is known amongst your consumers who genuinely want to know that the product they’re purchasing is actually a Room, a piece of Furniture, or an item of Clothing.
If you want a product to end up in Female Tops, you ought to derive from a Female Top product. If you want a product to end up in Furniture, you ought to derive from a Furniture product.
Location: Empty Derivable Clothing
Certain products and product types reveal more than one drop down list. One of these products is the Empty Derivable Clothing product. If you derive from this product, you will have the option of choosing the Gender, Type and sub-category.
Location: Accessories
Another product type that allows for more broad catalog placement is Avatar Attachments – aka Accessories. The top level category choices for this product type are Female Accessories, Male Accessories or Pets. From there, you can choose a sub-category to your heart’s content.
Product Name
The second required field is the product name. You’d be surprised how much impact a good, clear product name has on sales. In addition, product names matter to a product’s relevance in catalog searches.

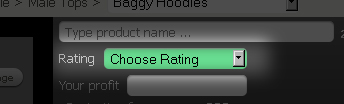
Rating
The third required field is the Rating drop down menu. The IMVU Terms of Service requires that every Creator rate each product they submit to the IMVU catalog appropriately.
Every product available for purchase in the IMVU catalog has a rating of either General Audience or Access Pass Only. Here is what the ratings mean:
There is another rating, which, when applied to a product, causes it to be invisible and removes it from everyone’s inventory. This is
If your product is inappropriately rated, it will fail Peer Review and/or be flagged for review by a member of the community. So, please make sure you understand the Virtual Goods Policy before setting the rating.
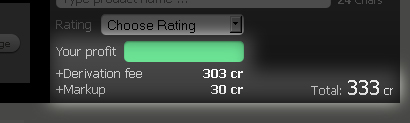
Profit
The fourth required field is for setting how many credits you earn when credits are used to purchase this product. You can set any number you like in this field from 0 to 999,999.
As you type in your profit, the total price of the product is calculated on the fly. The total price is made up of three components:
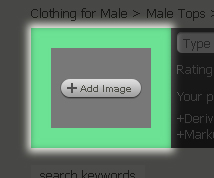
Product Image
And last but not least on our list of required fields is the product image. This is the first thing about your product that your customer sees. This image is used in both the Shop and Inventory and so is very important. In fact, it could be the most important of the five required fields.
The basics are as follows:
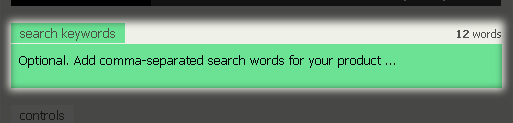
Keywords
Many of your customers search for products in the Shop. Keywords help the Shop know whether a product ought to match a particular search term. To add a keyword, just click in the keywords field and type it. If you’d like to add multiple words, just make sure they are comma separated. ex. – Matt, Bribe, Cookies. You can add up to 12 words.
Controls
The last panel on the submission card is the Controls panel. This is where you can CONTROL THE MINDS OF FERRETS LIKE A TRUE EVIL SCIENTIST!!! MWAHAHAHAHAHA!!!! Ahem… not really. This is where you can control whether your product:
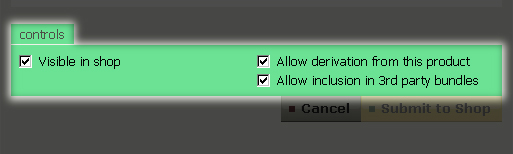
Controls: Account Settings
You can change the default settings for Derivability and Bundleability used in the submission card. To do so, go to the Creator Preferences panel on the Account page and set either flag to On or Off.
Submit Availability
The Submit button makes its parents proud. Its just so smart! The Submit to Shop button is only available when you have correctly filled in the required fields. The moment you fill in those five fields, the Submit to Shop button is available so, if you don’t want to add keywords and the controls are how you like them, go ahead and submit.

Fee Reminder
When the big, red, required fields reminder goes away, the Fee Reminder takes its place. The fee reminder lists what you are about to pay in order to submit this product to the Shop. IMVU charges a submission fee on top of the fees you pay to the Creators you are deriving from. You pay the Creators you are deriving from because IMVU gives each Creator any product they submit to the catalog for testing purposes.

Submit to product info page
When you have all of your fields filled out to your liking, click the Submit to Shop button. When this happens, the Submit to Shop button will become inactive again and a browser window will open to your newly submitted product’s information page. From this page, you can do a lot of things like add custom HTML, toggle visibility, and, most important, Publish the product.
As mentioned above, you must choose to Publish your product in order for it to be made available for purchase. Each product info page contains an important number on it. This big, RED number can be found in the Creator Tools panel. This number is your product’s ID number (aka – “PID”.) If you ever want to edit or derive from this product in Create Mode again, you will need to know its PID.
If you close this page and then can’t find your product in your catalog don’t panic, it will take a while for IMVU’s servers to catch up and see the new item in your catalog. You can either get back to it by using your browser history, the ‘more info’ link on the item in your inventory, or your Creator Center dashboard under ‘My Projects’.
TEST TEST TEST
Even though Create Mode is in IMVU, it is possible that bugs can arise in your product after you submit. Just taking a few moments can save you a lot of headache later. If you want to make changes after this product has gone through Peer Review, it must again go through Peer Review before those changes get out to the IMVU servers. Again, test test test before publishing.
Edit Settings
NOT set in stone
If you find that you need to make changes to your product, we have made it easy to do so. There are two links found in the ‘Creator Tools’ bar found below the description panel. The first is Edit Settings. Click this link to open up the Submission Card in the Editor again and make changes.
Additionally, you can just go to Create Mode, click the Edit a Product button and type in your product’s ID number.
Edit Product
The second edit option is ‘Edit Product’. Click this link to open your new product (complete with new, PID-based name) in Create Mode. You can then make changes locally on your machine. When you’re ready, click the Upload button in the upper right corner of the Editor to add your newly edited version to the catalog (and override the old version).
You can use either of these links before and/or after you publish your product.
Publish
When you want to use your product out in public and/or want people to be able to buy it, you are ready to Publish.
After you submitted, your keen detective skills no doubt revealed the big, red publish bar found at the top of your product info page. The ‘Publish’ link puts this product into Peer Review. Once the product has passed Peer Review, you can start making sales and earning credits! And others can derive from your products so you earn even more credits!
Once in Peer Review, your product info page will receive a bar at the top warning potential customers that this product is in Peer Review and may not pass. This typically deters customers from purchasing the product (as it could be taken away from them if it doesn’t pass Peer Review) so you might want to hide your product until it passes. When it does pass, that warning bar will turn green and people will know it passed.
You can wait to publish for as long as you like. There is no hurry and your product will never be force published. Remember, though, that while your product is unpublished, YOU can use it and test it but no one else will know it exists in either the catalog or in IMVU. You can be wearing it, but no one else has permission to see it so they will not see it (in some cases, that means they will see you in the default option). If the product is a room, you will not be able to use it as a public room.
Peer Review
Peer Review is an opportunity for your fellow-Creators to test your product and its description.
We also encourage you to be a peer reviewer yourself. Once you sign up to be a Creator, even if you have never submitted a product, you can review products. This will give you ideas about how to test your product as well as help get more products into the catalog.