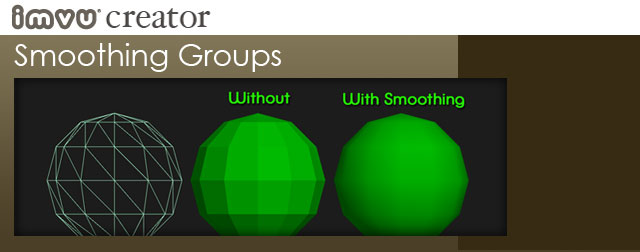
One of the drawbacks to building 3D objects with a limited polygon count is that surfaces can appear faceted. Our guilty tendency is to try and squeak in just a few hundred more polys to give our model a smoother surface. The only problem with that is that the more polys our model has the larger the file size, and the slower the IMVU Client will run, especially if there are many high poly models in one space at a time.
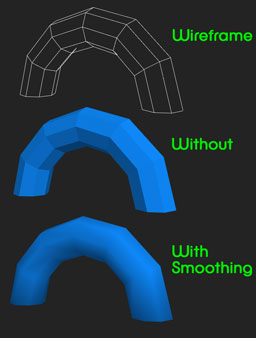
 One trick we do have at our disposal are Smoothing Groups. This is a function within many 3D applications that will give the illusion of a smooth surface, even if there really isn’t one. In the example on the left, I have created an 8 sided, 6 segmented cylinder and bent it into an arch. As you can see from the middle example, each facet of the arch is quite visible. Once the Smoothing Group is set the facets disappear and create a facsimile of a smooth surface. The edges of the model do give away the true nature of the mesh, but the Smoothing Group does soften the overall effect quite a bit.
Correct looking Smoothing Groups


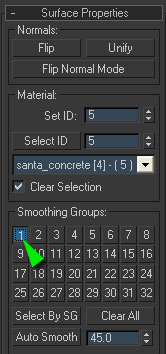
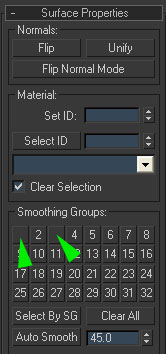
When building a product in 3D Max, you can only have ONE Smoothing Group per Mesh. If more than one is selected it may cause problems later on when you go to work in on it in the Previewer. In the 3D Max Surface Properties window, the left image shows one Smoothing Group button depressed. In the right image several are selected, indicated by the absence of numbers on the buttons. If no buttons are selected then your model will appear faceted, which in some cases may be exactly as you want it.
To make sure there is only one Smoothing Group applied to your Mesh, select the entire Mesh and make sure only one button is selected for all the geometry in your Mesh. If your product has several Meshes, each being exported separately, then each Mesh can have their own unique Smoothing Group number.
