Blender quick start – furniture
In this quick-start Blender 3D will be used to make a very simple item. The aim is to provide a basic overview of the process using a starter or example file, how to set up a furniture item, its exported from Blender as an FBX file, its import and assembly in IMVU before being uploaded to the catalogue.
Starting Blender
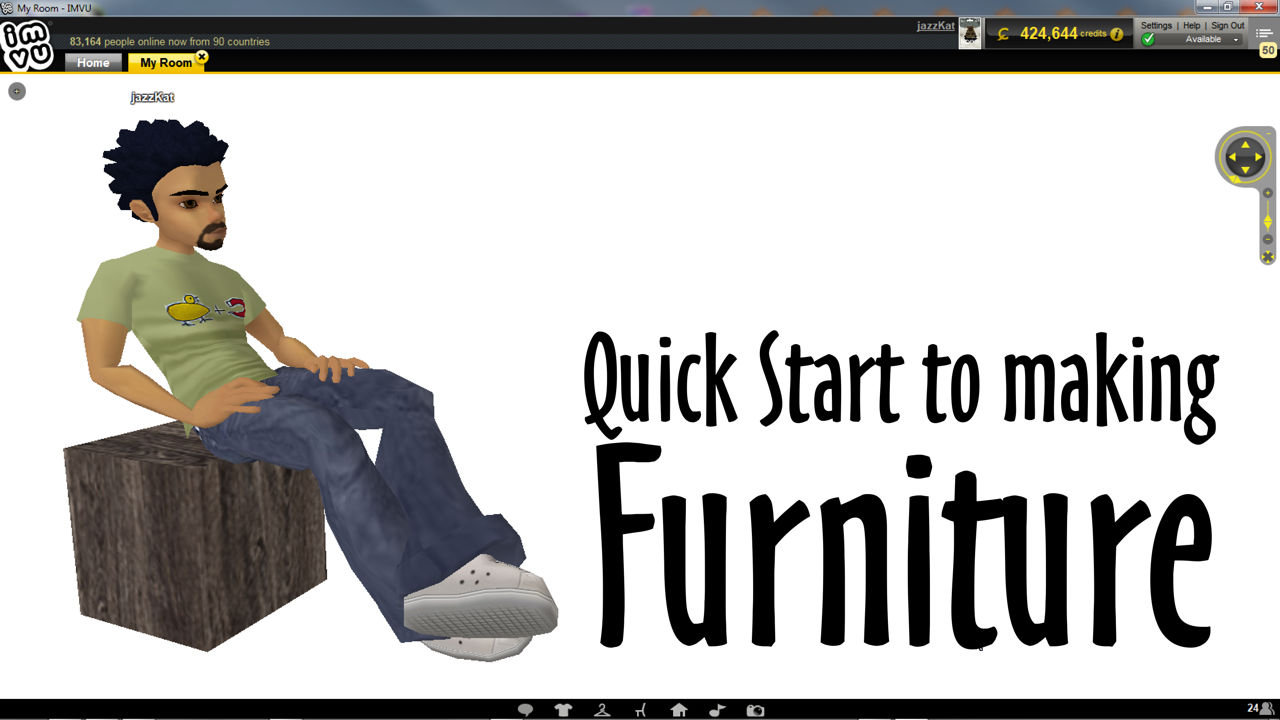
When starting Blender for the first time this is what appears. Left-click any where other than the Splash Screen overlay to close it and access Blender fully. The big area in the middle is where most work goes on.
Open the Starter File
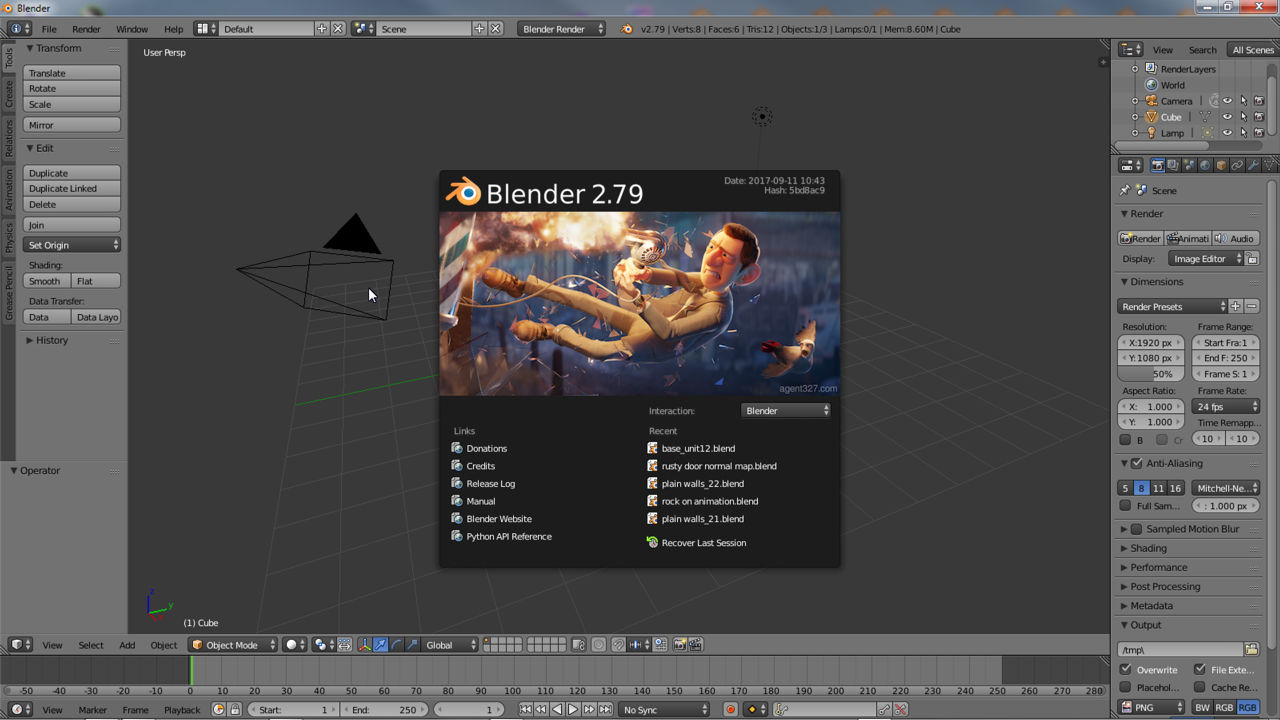
With the furniture start file downloaded it can be opened into Blender by clicking File » Open top-left. This opens the File Browser a built-in asset browser that displays the contents of a folder or directory much like Windows Explorer or Mac’s Finder – it works the same way. Browse to and select the *.blend file – furniture (nodes).blend – it highlights orange indicating selection. Click the Open Blender File button top-right completing the process. Blender will return to the previous view.
The Starter File
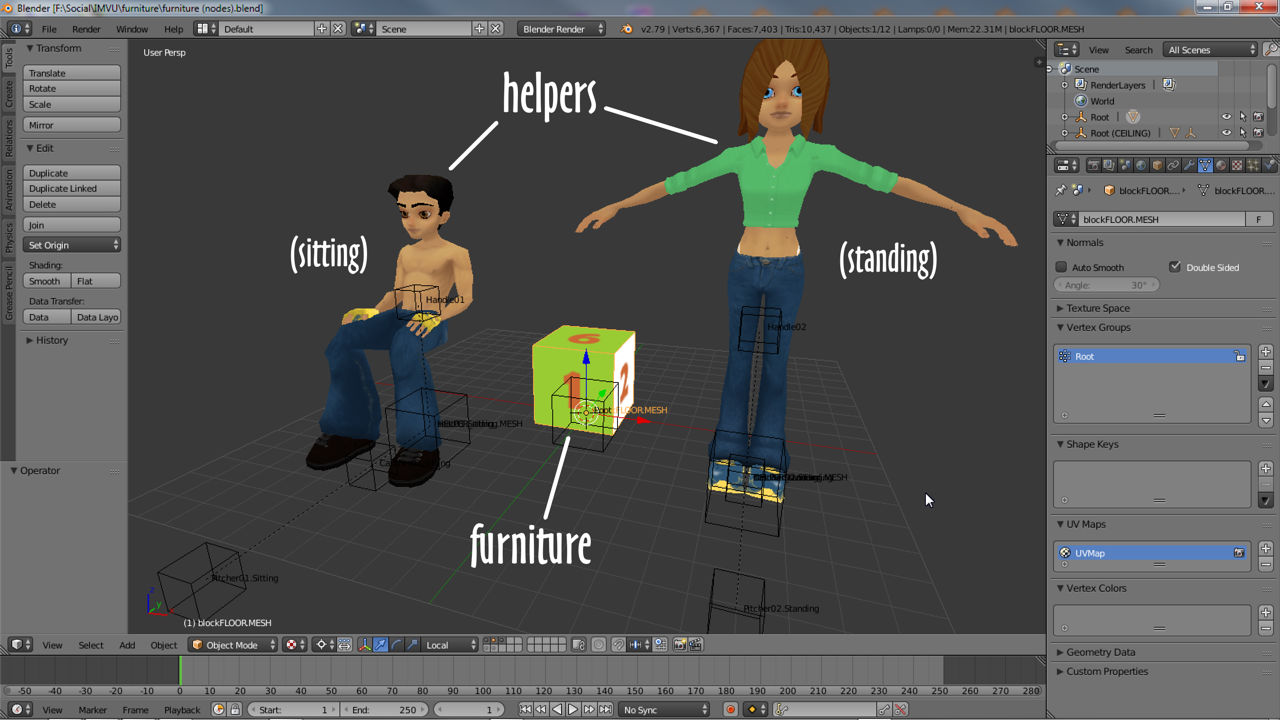
Looking at the starter file three meshes are visible; a block roughly centre-screen, the basic furniture item; two avatar helpers representing the default poses or avatar spots available for use when making furniture, sitting (*.Sitting) and standing (*.Standing). Each mesh is accompanied by one or more nodes representing different aspects of the skeleton furniture items need to work properly in IMVU. The block and its node will form the basis of a simple furniture item.
Including a seat
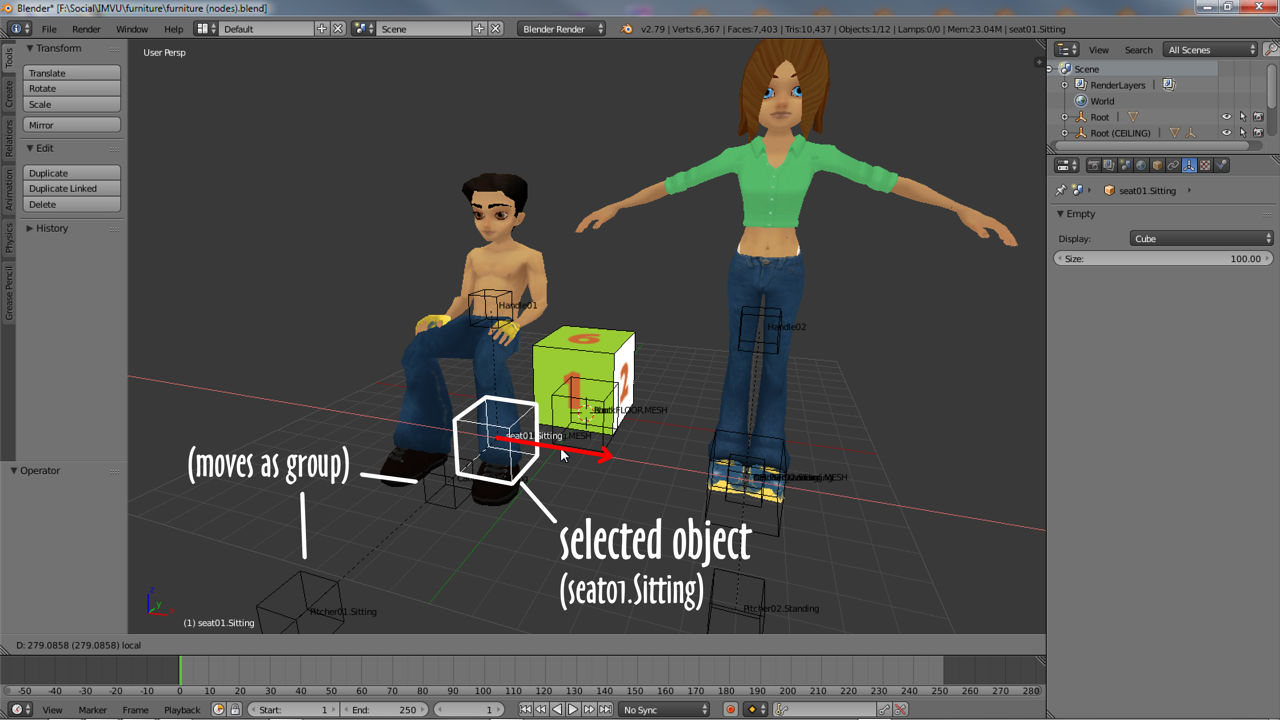
To make the furniture a little more interesting, and useful, the sitting seat can be included. First it should be moved into position. Right-click the large node directly beneath the avatar mesh called seat01.Sitting. The manipulator widget moves to it confirming selection – press ‘.’ (period/full-stop) if this doesn’t happen. Left-click drag the coloured arrows and reposition the selected node so the avatar sits atop the box – the seated helper and nodes will move as a group. Release left-click to complete the action.
Parenting Objects
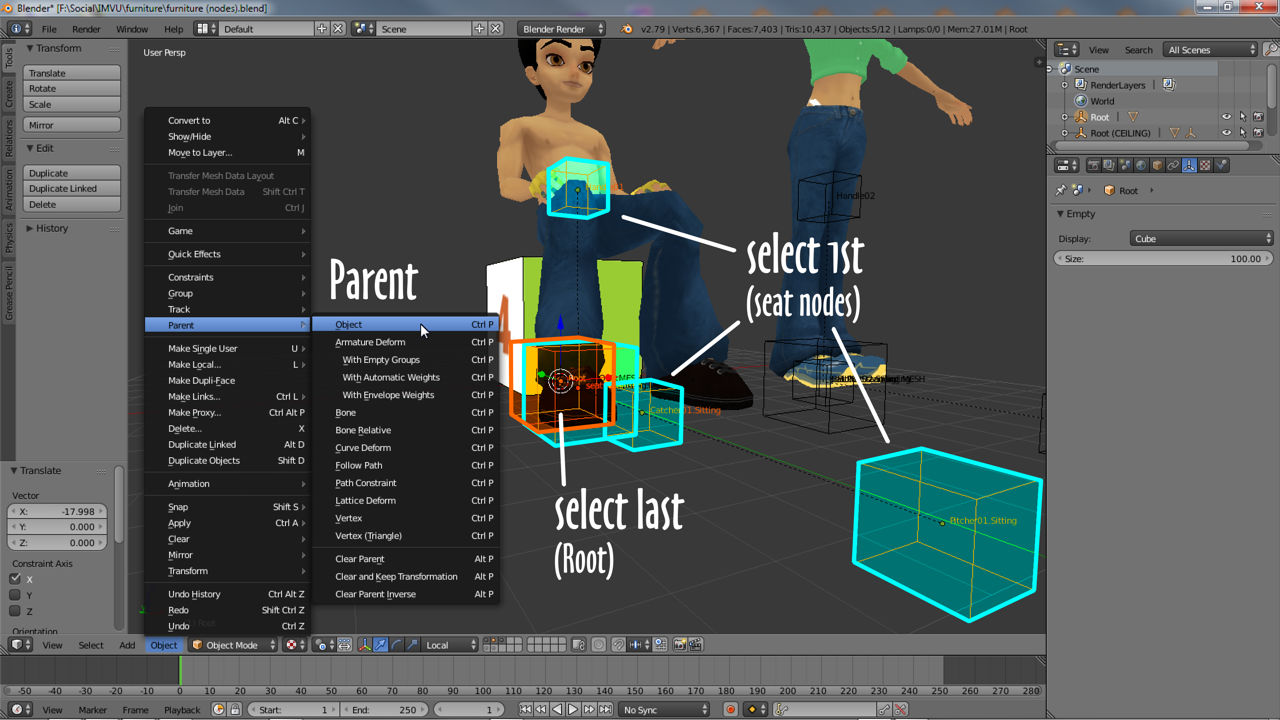
To ensure the seat is properly associated with the furniture block all the nodes belonging to the seat group need to be linked to the furniture’s master node, Root. This creates the necessary skeletal structure IMVU needs for products to work properly. Right-click one of the seat nodes then hold down Shift and right-click the remainder – this should mean Handle01, seat01.Sitting, Catcher01.Sitting and Pitcher01.Sitting are selected. Last but not least, still hold Shift, right-click Root. From the Object menu select Parent » Object, then Object (Keep Transform) in the pop-up that appears. Repeat the process this time selecting the mesh block, Root node, and Parent again. This ensures everything is linked properly.
Selection Export
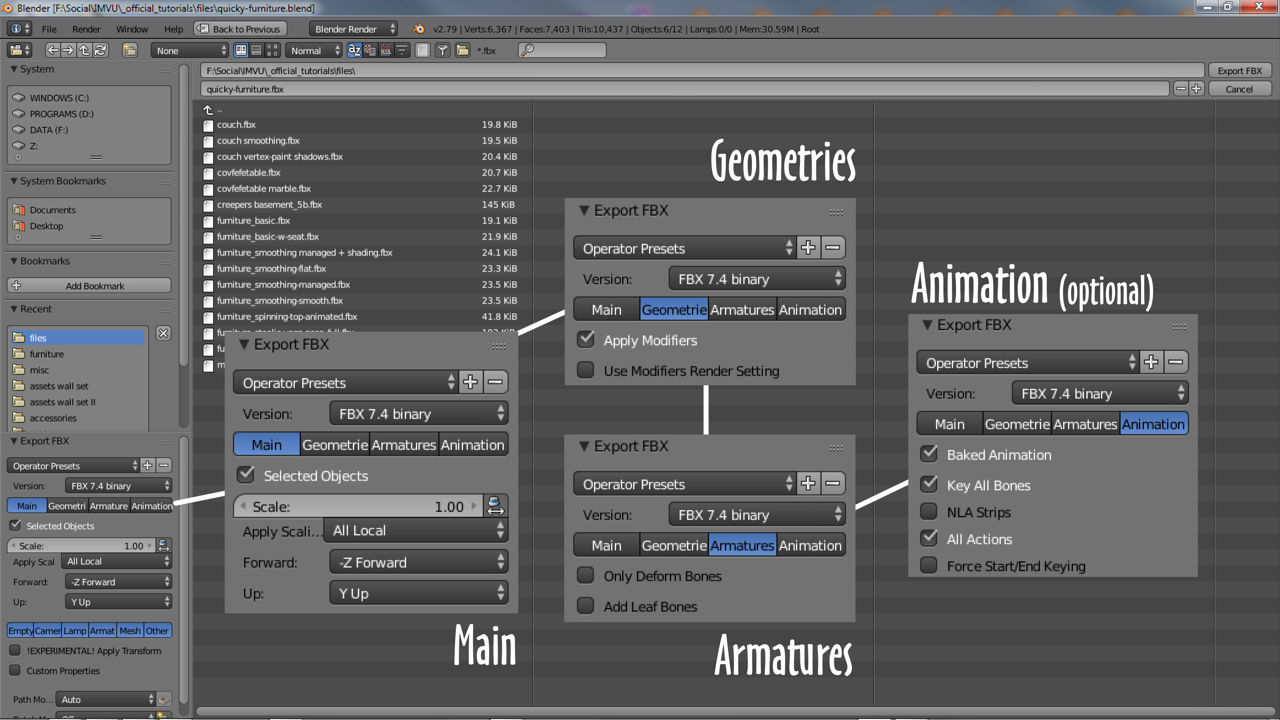
To export the completed seat all the elements need to be selected so Blender knows what needs to be processed. Using Shift+right-click select all the seat nodes, the root node and the block mesh, six objects in total (avatar mesh not needed). From the File menu select (File ») Export » FBX (.fbx). In the File Browser type a file name if necessary (Blender defaults to the *.blend files name) and set the save location (defaults to same folder *.blend is saved to). In Export FBX setting bottom-left make sure Selected Objects is enabled in Main, Apply Modifiers is enabled in Geometries, and Add Leaf Bones is disabled in Armatures. Click the Export FBX button top-right to complete the process.
IMVU Import
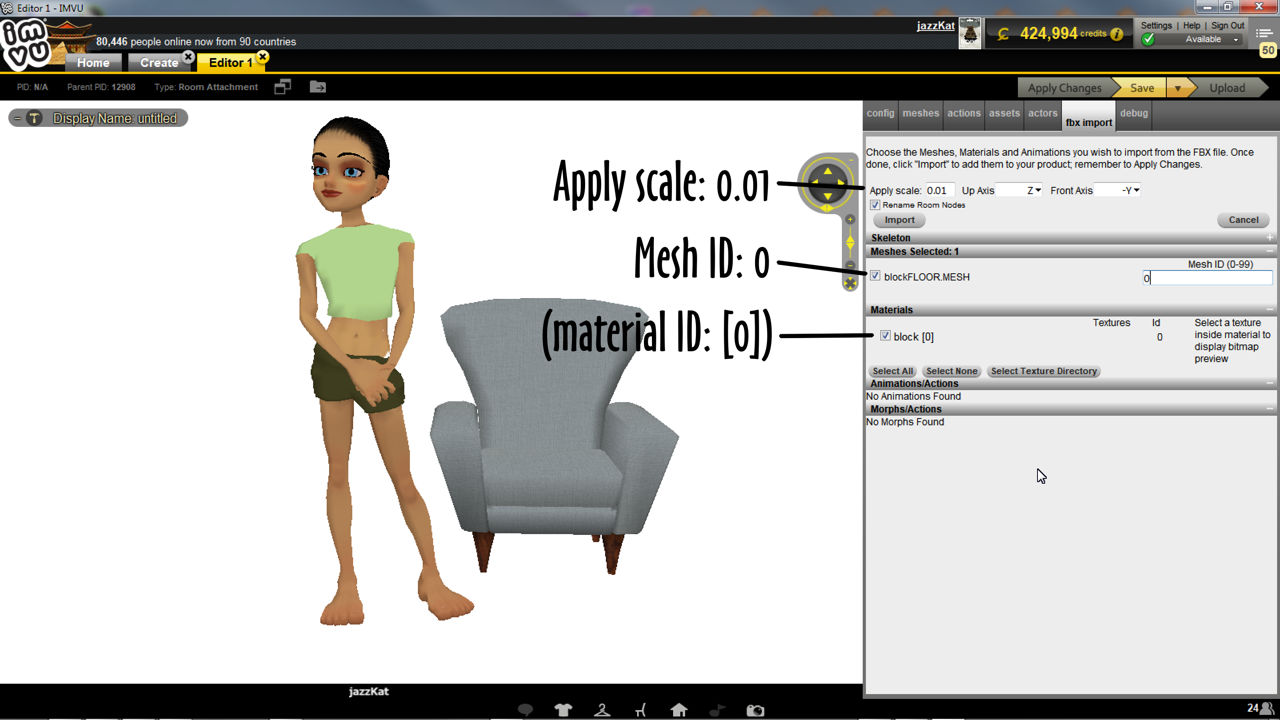
Importing furniture into IMVU is relatively straightforward because all the necessary components are included in the FBX exported from Blender, in this instance mesh, materials and skeleton. In Create mode start a new project and select Furniture as the product type. When the Editor appears click the fbx import tab then browse, select and load the FBX file clicking the Load FBX button. Change Mesh ID to 0 (zero) and Apply scale to 0.01. Check a material is selected then click the Import button. The panel will clear indicating import and conversion has completed.
Assembly
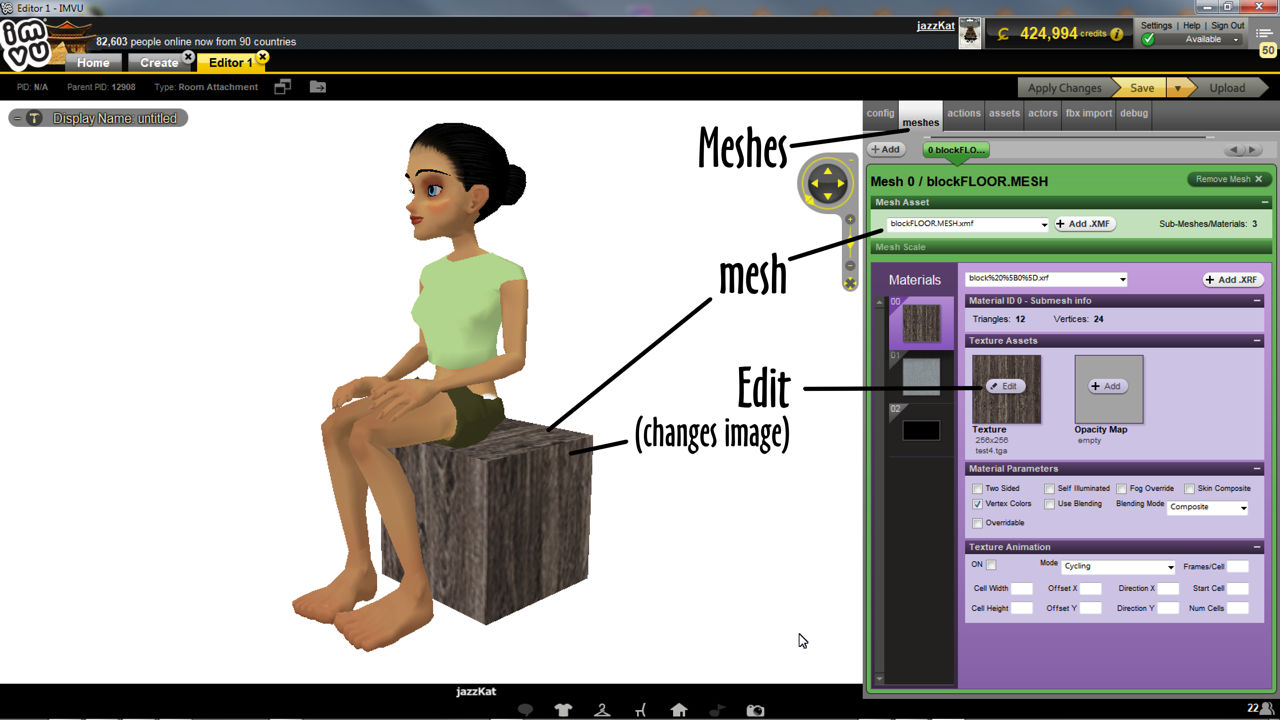
Once IMVU has finished the import process, to see the result click Apply Changes, the assets contained in the FBX file will be automatically assembled and displayed in the main 3D window. This is the basic furniture item. To make it look like a block of wood, click meshes to reveal the materials and images assigned to the project. Select material ID 0 (zero), the blocks default, then click the Edit button in Texture Assets to browse to, select and open a replacement image. Click Apply Changes once more to update the project showing a wood texture instead of the original green and white checker.
Upload to Catalogue
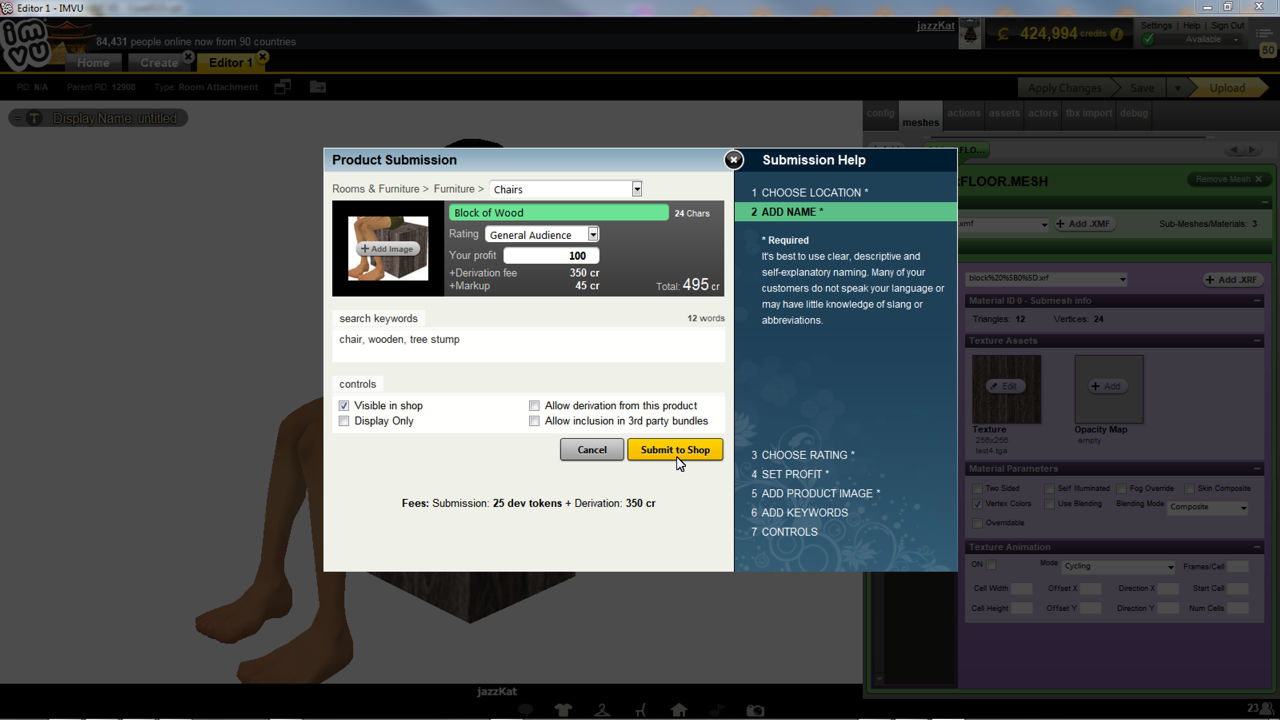
Once the product is assembled and textures replaced it can be saved and uploaded to the catalogue. Click the Save button then Upload. In the Product Submission screen give the new item a name, e.g. Block or Wood, set the Rating (General Audience) and an amount for Your Profit, e.g. 100 (note the total cost to the customer lower-right). Click the + Add Image button, select and open a 100 x 80 pixel jpg, png or gif image to use as the products thumbnail that’s displayed in the store. Finally click the Submit to Shop button. In the web browser that opens click the text at the top of the page – Click here to publish it – to fully publish the product completing the project and making it available for purchase.
