Derive & Create Mode
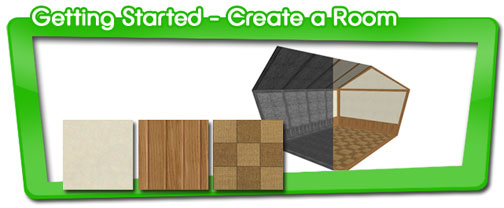
The best way to learn how something works is to roll up your sleeves and dive right in. In this spirit we have created a quick tutorial to help you become familiar with the process of getting a new product into the IMVU Catalog. Create a New Room Product In this tutorial you are going to learn to Derive from an existing product, open up the Create Mode Editor, swap a texture, and resubmit it as your own product. 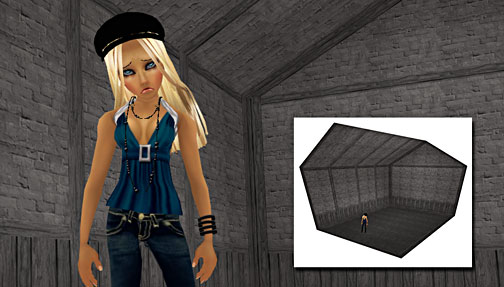 This room looks stark and flat, but with just a few changes we can transform it into a more appealing space. See below for instructions.
Open up Create Mode
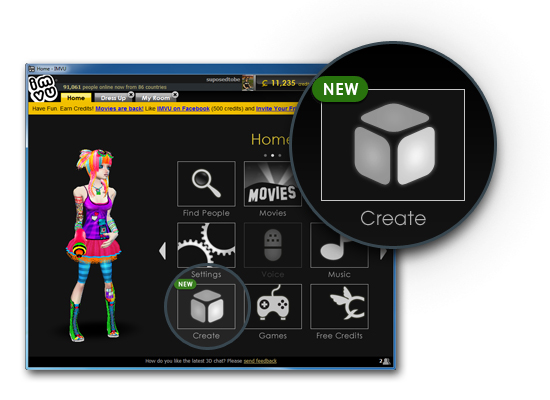
To get to Create Mode, click on the Create button located on your IMVU main page. You may have to click on one of the navigation arrows on the right or left to find it.
Derive
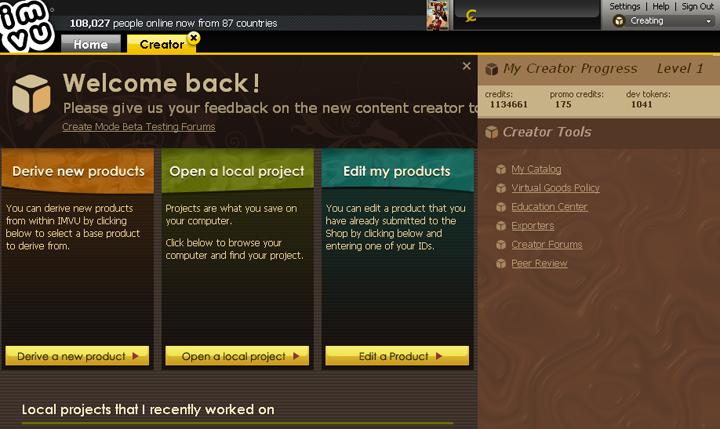
Find the Derive a new product button Every time you create a new product you need to Derive it from an existing IMVU product first. To get started you will need to click on the Derive a new product button on the left side of the Create Mode screen
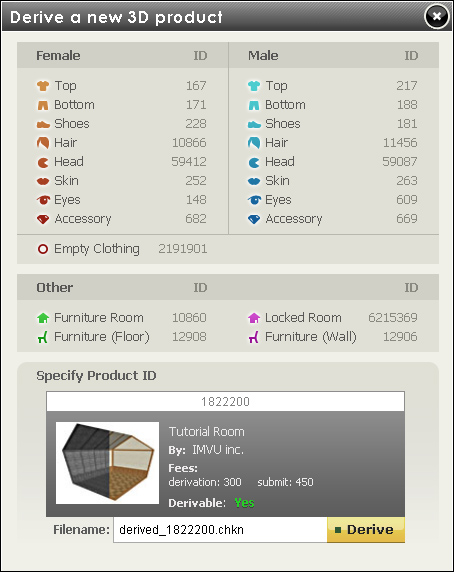
Enter a Product ID Number
The Derive a new 3D Product window will appear. This is where you will specify the product you will base your new product on. This window gives you a list of base products for you to derive from, but for our exercise, we are going to manually enter the number 1822200, to start with the Room Vanessa currently owns. Type in the number and click the Derive button.
Understanding the Create Mode Editor
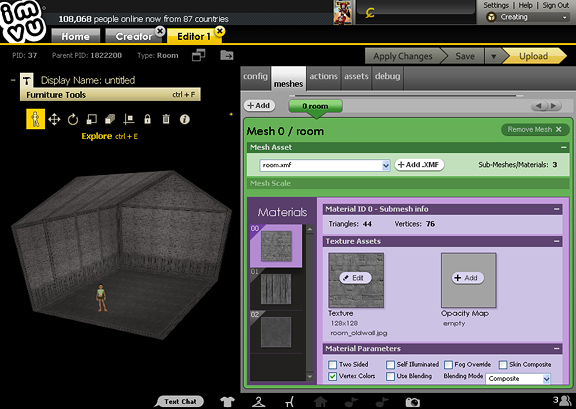
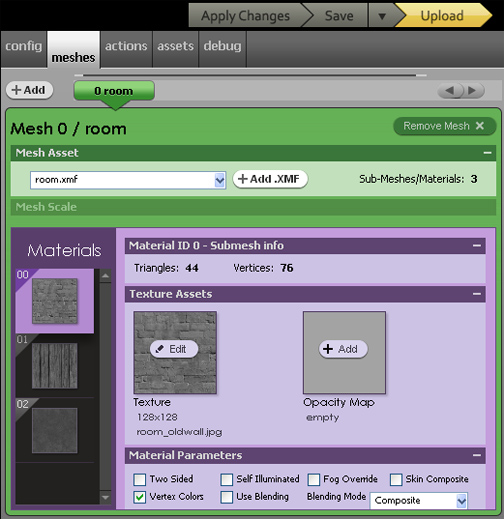
Next, the above window will appear. This is the Create Mode Editor, and this is were all IMVU products are assembled. On the left is the 3D preview window with its Furniture Tools that allow you to navigate and edit your 3D products, and on the right are the various tab functions of the Editor. For this tutorial we are only going to change the Textures in Vanessa’s room, so we will remain in the Mesh TAB to do our remodeling.
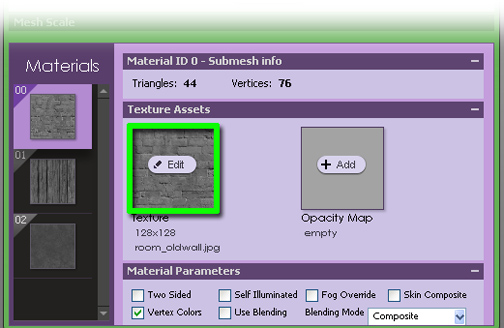
Introduction to the Mesh Tab
When the Create Mode Editor first opens your Room product it will open the Mesh Tab by default. The Mesh Tab is where you can load your product’s Mesh and Textures (Materials). For this tutorial we will only be “swapping” the three materials in the Materials column with new textures. To swap a texture you will need to click on the Material preview image on the left to access the Material properties on the right. The material properties window will allow you to swap, animate, and adjust settings that will effect how your texture will appear on your product.
Adding New Textures
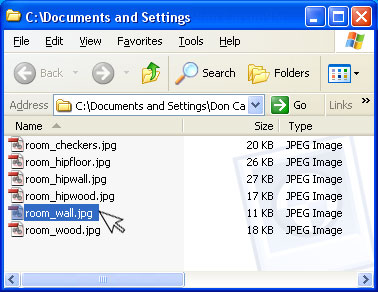
Okay, here is where we get to redecorate! Swapping textures in Rooms can really transform a space dramatically. To illustrate our point we have created a few textures for you to tryout, but we encourage you to create textures of your own. Now that you have opened the Mesh TAB you are ready to swap the Derived textures with some of your own. We have supplied you with several texture options, which you can download here:
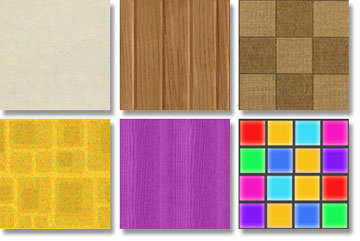
Or you can create your own. If you choose to make your own textures, they will need to be 128 pixels by 128 pixels square. The Tutorial Room is also texture mapped to allow tiled texture patterns. NOTE: These are tile-able textures. This means that when they are applied to a 3D model, they “tile” like the pattern on wallpaper or a bed sheet. Make sure your texture tiles properly for the best effect. .
Now its time to change the textures in your Room. If you want to use any of the textures we provide, download them to your desktop. Then, click on the texture picture in the Create Mode Editor and browse to the example textures you have just downloaded, or to your own original designs.
Update Your 3D Window
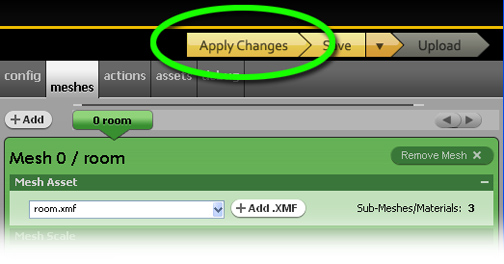
Once you’ve loaded your new texture, please click the ‘Apply Changes’ button at the top right corner of the Create Mode Editor. This will update the textures applied to the Room Mesh.
Save As
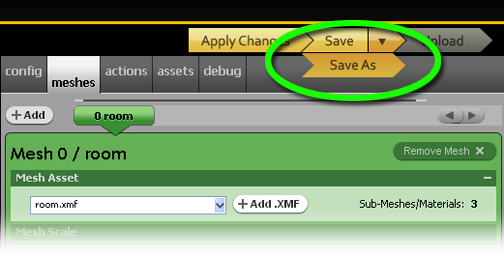
Once you have entered and applied all the textures you wish to the Room Mesh, now is the time to Save your work. To do this, choose Save As from the Save menu (arrow button next to Save will allow you to access the Save As button). Here you can give your Room project file a unique name that will make it easier for you to find later if you need to make further edits.
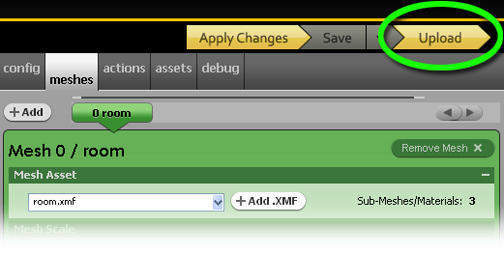
Upload Your Product
Once you have Saved your new product, go to the top of the Create Mode Editor window and then click the button labled “Upload”
Edit Product Information
When you hit the Upload’ button, a web page will appear wherein you can edit multiple fields: · Choose where in the catalog your product will live · The Product’s name · A catalog image for your new product * · The Product Description (you can add HTML tags to this) · Product rating (See IMVU’s Terms of Service for guidelines – anything containing nudity and/or otherwise adult content must be given a mature rating) · Product price · CFL file – for this section, copy and paste the URL provided just above the edit box. TIP: If you haven’t saved your CFL, this URL will not appear. · Derivability – Allows others to make derivations of your work. If they sell, you get more money. . Tags (helps search engine point people to your product in the Catalog) Fill everything out and press the Submit button. *

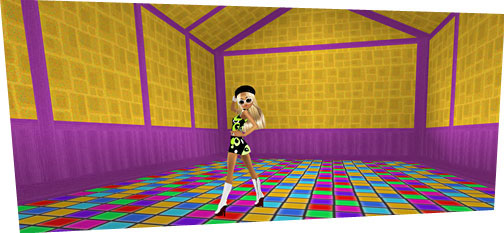
I have a feeling that Vanessa is much happier now… don’t you? Each Room is outfitted with nodes in the floor, walls, and ceiling to allow objects to be placed in and around it…. so now she is ready to start filling her new apartment with Furniture fitting its new theme.
Final Step… PUBLISH!
Congratulations! You have just submitted a product to IMVU! If you have chosen to become an IMVU Creator then you can Submit your product to the IMVU Catalog. If you have not, or choose not to, become a Creator you can still build, texture, and use your personall products within the IMVU Creator Editor, but not be able to sell or share these items.Submitting a product to IMVU means that you can now load your product into your own 3D window and try it on with the other products in your Inventory. This will allow you to adjust your product until you are happy with it. When you are ready, you will be able to Publish your product and it will go through a Peer Review before being added officially to the IMVU Catalog for others to see and purchase.