What is a Morph Target, anyway? The Free Dictionary tells us that “Morph Target Animation (or per-vertex animation) is a method of 3D computer animation that is sometimes used as an alternative to skeletal animation. Morph target animation is stored as a series of vertex positions. In each keyframe of the animation, the vertices are moved to a different position.
There are advantages to using morph target animation over skeletal animation. The artist has more control over the movements because he or she can define the individual positions of the vertices within a keyframe, rather than being constrained by skeletons. This can be useful for animating cloth, skin, and facial expressions because it can be difficult to conform those things to the bones that are required for skeletal animation.”
This is definitely the case in IMVU. It is nearly impossible to get a believable squash and stretch in a mesh using skeletal animation. I say “nearly” because, sure, it *can* be done but you’d have to be insanse to want to do it that way. Morphs make your squash and stretch achievable fairly easily.
Make Parent Mesh
At the end of this process, you will end up with a MAX file that contains a fully mapped and weighted Parent Mesh, a Morph Target that is linked to that Parent Mesh and a Base Copy that is neither linked or weighted to anything. This MAX file will be what you export your mesh .XMF asset from. A copy of this file will also be used to create your morph animation for testing in the Create Mode Editor.
The first step is to build your Parent Mesh. This is the Mesh from which all of your morph targets will be copied.
A Parent Mesh could also be called a ‘finished mesh’ in that the geometry is *final* and the Material IDs and texture mapping are *final*. This is because your Morph Target must be an exact copy of the Parent mesh in order to work.
Don’t Change Parent Mesh
Please remember to not make changes to the geometry of your Parent Mesh once you have made Morph Targets. Any geometric change to the Parent Mesh will result in a broken set of morph targets.
Most 3D programs assign an ID (or number) to each vertex in a model. That way, it knows where vertex 137 lives in relation to the origin of the scene. When you add even one more vertex to a mesh, the IDs are reassigned from scratch. This means that what used to be vertex 137 is now vertex 845. So, applying an old morph to new geometry will simply collapse the mesh in all kinds of scary ways.
So, I’ll say it again, don’t start making morph targets until you’re sure you are not going to make *any* changes to your Paren Mesh.

Make a Base Copy
I always make a working copy from which I will make my Morph Targets. This allows me to weight my Parent Mesh and not worry about making more copies later.
To Make a Copy, select the Parent Mesh and then Shift-drag to the, say, right. When you do, the Clone Options dialog box will appear. Make sure the ‘Copy’ button is selected and the number of copies is ‘1’. For the purposes of this tutorial, please name your copy ‘BaseCopy’.
Weight Parent Mesh
Once you have your Base Copy, it is a good time to weight your mesh. Most items like accessories, furniture and rooms use the Skin weighting modifier as they can all be parented to one bone.
Copy the Base Copy
Make a copy of the BaseCopy mesh. Your final mesh product can contain as many morph targets as you like. However, to keep things simple in this tutorial, we will only create one Morph Target.
When you name your new Morph Target mesh, please use the naming convention below.
Name Morph
Morph targets in IMVU use a naming convention that dictates what kind of morph they are. This naming convention must be used or your morphs will not play back in IMVU. An example of a properly named morph target is leftBlink.Clamped where the .Clamped suffix is the morph type. The prefix of the name can be anything you like. Here is a breakdown of what the four morph types are and what they mean:
For the purposes of this tutorial, we will name our Morph Target ‘Morph.Exclusive‘.

Adjust Morph
Click on your Morph and then enter edit geometry mode. While in edit geometry mode, you can change the shape of your mesh however you like. However, you may not add/remove geometry or turn faces. The first change, add/remove geometry will render your Morph Target useless. The second, turning faces, will not show up in the final product as the Parent Mesh is the source of truth for the geometry. Remember: the Morpth Target simply tells the XMF the new location of the vertices.
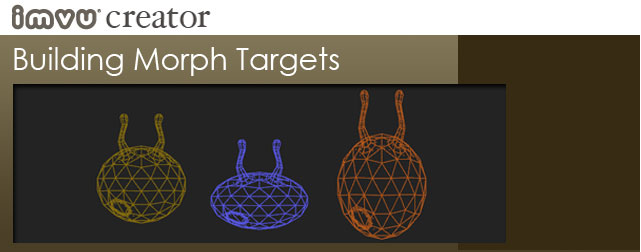
For this tutorial, I am creating a morph that squashes the shape of the hoppity hop. To do this, I enter edit vertex mode, select the ball verts and then scale them towards each other. Then I exit vertex mode to make sure I don’t mistakenly move the geometry on my Morph.
Link Morph to Parent
Once you are done editing your Morph, you want to link it to the Parent Mesh. To do this, click on the ‘Select and Link’ tool in the upper right. Then, click on the Morph and drag toward the Parent Mesh. When the icon changes, that means you are able to link. So, click on the Parent. It should blink to let you know that the linking occurred.
However, I always verify that the link occured by checking the hierarchy. To do this, click on the ‘Select by Name’ button. This will bring up the Select Objects dialog box. Make sure ‘Display Subtree’ is selected to see how objects in the scene are linked. If an object appears indented underneath another object, then it is linked to that object. In this case, we are making sure that Morph.Exclusive is parented to ParentMesh.
Test Morphing
*AFTER* you have linked your morph target to your Parent Mesh, you can safely add a Morpher modifier to the Parent Mesh. Add the Morpher underneath your weighting Modifier and above your Editable Mesh/Poly modifier. You can load Morphs into the Channel List in two ways:

Now, drag the slider up to 100% to see what your active morph will do to the Parent Mesh when it is eventually animated. Cool.
Export
Now that you have a Parent Mesh that is weighted and a Morph Target that is linked to that Parent Mesh, you can export your mesh .xmf file.
Remember, as is the case with any mesh, you need to have exported your skeleton .xsf file first. The mesh needs to know where each vertex lives in 3D space. It gets its grounding, or initial position, from whatever skeleton is used in the export process. So, if you don’t have a skeleton that contains a bone with the name that the mesh has used for its weighting information, then the mesh won’t show up in IMVU.
Select Export in the File menu and then choose the ‘Cal3D Mesh File (*.CMF, *.XMF)’ option. You may name your mesh whatever you like. Remember to manually type in the .xmf suffix at the end of your name. Otherwise, you will export a .CMF file that can not be used in IMVU.
Animate & test
The whole purpose of your building a morph target was to animate it in IMVU. Now its time to make a morph animation in order to test whether the whole thing works. Alas, there is no way to find out if the whole thing works until after you have done most of the work.
First, Save a copy of your existing MAX file. This will be the file you use to build your morph animation. Your original file should be kept free of excess data as its intent is to be your ‘mesh and morph target file’.
Wacky Brokenness
Aside from the usual steps you should take if a morph animation shows up as broken, there is an additional step you should take if you encounter what could be called “The Bane of Matt’s Existence”.
Sometimes, the ‘transform’ on a mesh and on a morph gets messed up. This means that the origin of the mesh gets corrupted – even though the visible origin in MAX looks totally OK. Even worse, your animation will look TOTALLY FINE in MAX but, in IMVU, the morph will move all over the place.
The fix for this is rather simple but just means a little bit more work. First, you must delete the link information on the Morph. Then, you must delete the Weighting modifier on the Parent.
With those two out of the way, you can go to the tools tab on the right hand pane in MAX. Towards the bottom of this section, you will see a button called ‘Reset Xform’. With the Parent selected, click that button and then click the ‘Reset Selected’ button. The Parent mesh has now had its transform reset.

Go to the Modify tab, right-click over the stack and choose to ‘collapse all’. Now, follow the exact same process for the Morph.
With the transforms reset, you can go through the process of weighting, linking, exporting the xmf, and then making a new MAX file, creating an animation, exporting the xaf and testing in the Create Mode Editor. Yes, it makes sense to do this reset transform step before going through the initial process.